Precise Measurement Layout Techniques for Workshops (Guide)
When I first started working with metal, I thought a thick felt-tip marker and a standard tape measure were all I needed. I quickly learned that in the world of metal fabrication, “close enough” often leads to parts that don’t fit and hours of wasted material. Precision in the workshop starts long before any metal is joined; it begins with the physical discipline of laying out your marks. Mastering these manual techniques requires a shift in mindset from general measuring to high-accuracy marking.
Over the last 12 years, I have tracked my own progression from sloppy 1/8-inch errors to consistently hitting marks within five-thousandths of an inch. This journey wasn’t about buying expensive machines; it was about refining how my hands move a scribe across a steel plate and how my eyes interpret the edge of a rule. For a beginner, the anxiety of making that first permanent mark on a clean piece of cold-rolled steel is real. However, by breaking down the mechanics of layout into structured practice, you can build the muscle memory needed for professional-grade results.
Establishing a Reliable Reference Datum
A reference datum is a specific point, line, or edge on a workpiece from which all other measurements are taken to ensure consistency. By using a single starting point, you prevent “stacking errors,” where small mistakes in individual measurements add up to a large overall discrepancy.
Selecting the Primary Reference Edge
The primary reference edge is the cleanest, straightest side of your metal stock chosen to serve as the baseline for all subsequent layout marks. Selecting this edge carefully is the first step in ensuring that your square lines are actually square and your parallel lines are true.
In my early projects, I would measure from whichever side was closest to me. This was a mistake. If the stock from the mill is slightly bowed or has a rough “factory edge,” every measurement pulled from it will be skewed. I now teach students to identify the truest edge first. If no edge is perfectly straight, one must be established using a file or a precision straightedge before any layout begins. Once you pick an edge, mark it with a small “V” or an “X” so you always return to the same starting point.
Identifying the Secondary Datum
The secondary datum is a line or edge perpendicular to the primary datum that establishes the second dimension of your layout. Using two fixed reference points allows you to locate any point on a flat surface with absolute certainty using X and Y coordinates.
When I am laying out a complex bracket, I treat the corner where my primary and secondary edges meet as “zero.” Every hole center and every bend line is measured from these two edges. This method mimics how a machinist thinks. It removes the guesswork and ensures that even if I get interrupted, I can return to the piece and know exactly where my measurements stand.
The Mechanics of High-Accuracy Scribing
Scribing is the process of using a hardened steel or tungsten carbide tip to scratch a fine, permanent line into the surface of the metal. Unlike ink or graphite, a scribe line has physical depth and a very narrow width, which allows for much higher precision during the fabrication process.
Mastering the Scribe and Rule Relationship
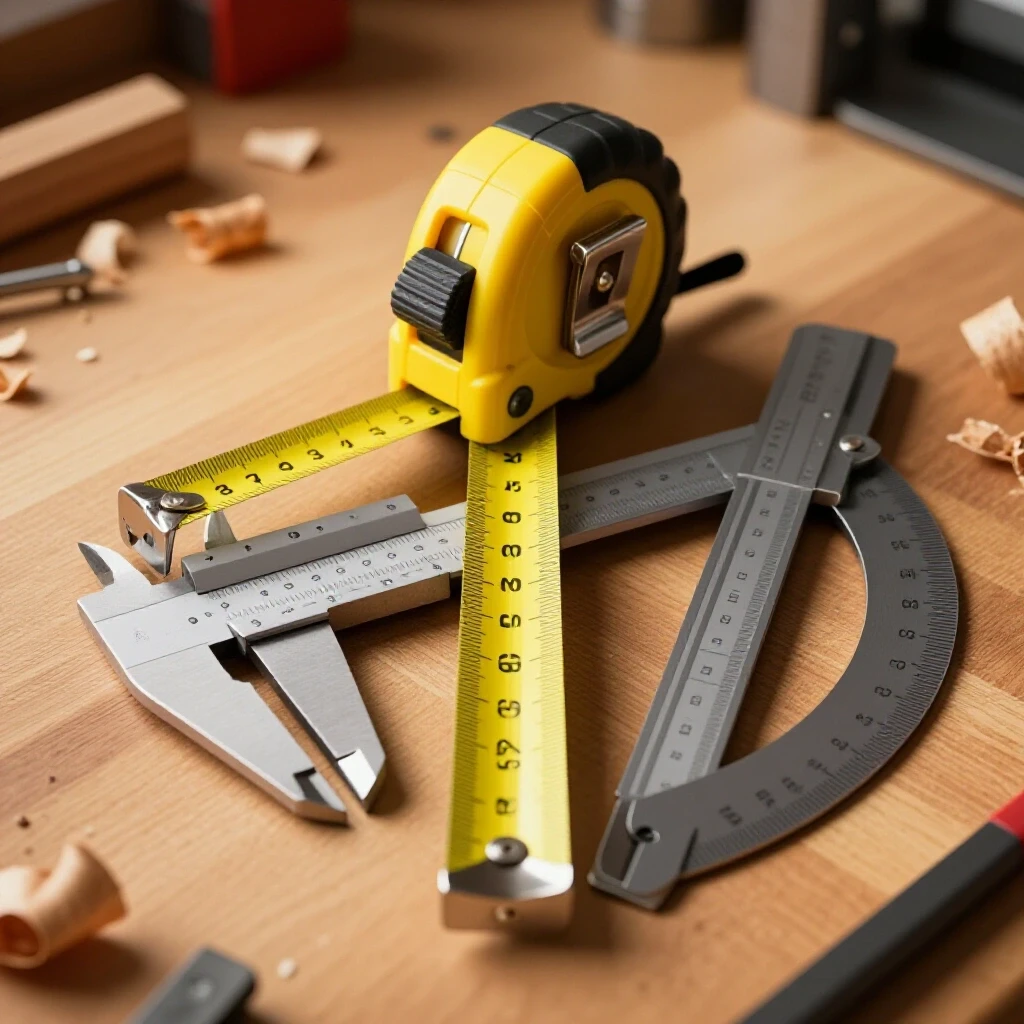
The relationship between your measuring rule and your scribe is the foundation of layout accuracy. This involves placing the rule on the work and using the scribe to “feel” the graduation marks etched into the metal rule.
A common rookie mistake is holding the scribe like a pencil, tilted away from the rule. This creates a gap between the rule’s edge and the actual mark. To achieve a professional-grade line, you must angle the scribe so the tip runs exactly against the bottom edge of the rule. I practiced this by making hundreds of marks on scrap plate, then checking them with a magnifying glass. You want a line that is roughly 0.005 inches wide.
| Tool Type | Typical Accuracy | Best Use Case |
|---|---|---|
| Steel Rule (Etched) | +/- 0.010″ | General linear measurements and short scribe runs. |
| Combination Square | +/- 0.005″ | Layout of 90-degree and 45-degree angles from an edge. |
| Spring Dividers | +/- 0.005″ | Transferring dimensions and scribing circles or arcs. |
| Surface Gauge | +/- 0.002″ | Marking parallel lines on a flat surface or cylindrical stock. |
Controlling Scribe Pressure and Path
Scribe pressure refers to the amount of downward force applied to the marking tool to create a visible line without jumping or skidding. Consistent pressure ensures the line is deep enough to see under workshop lights but thin enough to maintain tight tolerances.
When I track my students’ progress, I look for “ghost lines”—marks where the scribe skipped or the hand wobbled. To fix this, I recommend a two-pass technique. The first pass is very light, just enough to track the rule. The second pass follows the first with slightly more pressure to “set” the line. This builds the hand-eye coordination needed to keep the scribe locked against the reference tool.
Geometric Construction Using Manual Tools
Geometric construction is the method of creating complex shapes, such as equilateral triangles, hexagons, or perpendicular lines, using only a straightedge and dividers. This technique relies on the mathematical properties of circles and arcs rather than relying on a protractor for every angle.
Using Dividers for Circles and Arcs
Dividers are a two-legged tool used to step off equal distances or scribe circles by pivoting one leg around a fixed center point. They are essential for laying out bolt patterns and radius corners where a standard rule cannot easily reach.
One of my favorite drills involves “walking” the dividers. Set them to a specific width and see if you can step off five equal spaces along a line and end up exactly on a pre-marked finish point. If you are off by even a hair, your divider setting is wrong. This teaches you the “feel” of the tool. When scribing an arc, I always use a center punch to create a small dimple for the divider leg to sit in. This prevents the tool from wandering across the metal.
Bisecting Lines and Angles Manually
Bisecting is the process of dividing a line or an angle into two exactly equal parts using geometric arcs. This manual skill is vital when you need to find the exact center of a piece of stock or create a perfect 45-degree angle without a square.
I remember struggling with this until I realized it is just a matter of symmetry. By swinging two arcs of the same radius from opposite ends of a line, the points where they intersect will always form a perfect perpendicular bisector. I have found that practicing these “old school” drafting techniques on metal plate significantly improves a fabricator’s understanding of how shapes fit together.
| Layout Task | Recommended Tool | Physical Cue |
|---|---|---|
| Finding Center of a Circle | Hermaphrodite Calipers | Feeling the leg “hook” the outside diameter. |
| Marking a 90-degree Line | Combination Square | Ensuring the head is flush against the datum. |
| Transferring a Dimension | Spring Dividers | The “click” of the point into a scribe line. |
| Long Straight Lines | Precision Straightedge | Using finger weights to prevent the rule from sliding. |
Measuring Progress and Accuracy Metrics
To improve, you must be able to measure how far you have come. In my workshop, I use a systematic approach to track layout errors, treating every project as a data point for skill refinement.
Tolerance Tracking for Metalwork
Tolerance tracking involves comparing your finished layout marks against a master dimension to see how much “drift” occurred during the process. For manual layout, we aim for “fractional” or “decimal” consistency depending on the project requirements.
I encourage learners to keep a layout log. After you finish marking a piece, go back with a high-quality rule and re-measure every distance. Note if you are consistently long or short. Often, I find that beginners are consistently off by the same amount—usually the width of their scribe tip. Recognizing this pattern allows you to “aim” your scribe to compensate, a technique known as “holding the line.”
Identifying and Correcting Parallax Error
Parallax error occurs when your eye is not directly over the measurement scale, causing the graduation marks to appear shifted relative to the workpiece. This is one of the most common reasons for inconsistent layout results in a workshop environment.
To overcome this, I developed a habit of “sighting” my marks. I move my head so my line of sight is perfectly perpendicular to the rule. If you look from an angle, you might think you are on the 1-inch mark when you are actually 1/64th off. In my practice sessions, I use a small square held upright next to my mark to check if my eye was deceiving me. It is a simple physical check that builds better spatial awareness.
Structured Practice Drills for Layout Mastery
Consistency in metalwork comes from repetition. You cannot expect to hit professional tolerances on a complex project if you haven’t mastered the basic motions on scrap material.
The “Ten-Line” Drill
This drill focuses on the consistency of scribe lines and parallel measurements. Take a piece of scrap plate and establish a reference edge. Your goal is to scribe ten parallel lines, exactly 0.500 inches apart, using only a rule and a scribe.
- Clean the metal surface thoroughly to remove mill scale or oil.
- Scribe your first line 0.500″ from the reference edge.
- Measure the next line from the first scribe line, not the edge.
- Repeat until you have ten lines.
- Measure the total distance from the edge to the tenth line. It should be exactly 5.000 inches.
- If the total is 5.050″, you are gaining 0.005″ per line.
This drill is humbling. It forces you to realize how small errors accumulate. When I first did this, I was off by nearly an eighth of an inch by the end. Now, I can usually hit it within the width of a single scribe mark.
The Bolt Circle Challenge
Laying out a circular bolt pattern requires a combination of center finding, divider work, and geometric stepping. This is an intermediate-level drill that tests your ability to maintain accuracy across multiple points.
- Find the center of a square plate using intersecting diagonal lines.
- Use a center punch to mark the intersection.
- Set your dividers to a 3-inch radius and scribe a circle.
- Without changing the divider setting, pick a point on the circle and scribe an arc that crosses the circle.
- Move the divider point to that intersection and repeat.
- You should end up with six perfectly spaced points. If the last arc doesn’t land exactly on your first point, your divider setting or your center point was slightly off.
Advanced Visual Verification Techniques
Once the lines are on the metal, you need to be able to “read” them. Professional layout involves a level of visual scrutiny that most beginners haven’t developed yet.
Using Layout Fluid for High Contrast
While I don’t recommend specific brands, using a layout dye or fluid is a standard industry practice. This thin coating (usually blue or red) sits on the surface of the metal. When you scribe a line, it removes the dye and reveals the bright metal underneath.
The contrast makes the line much easier to see, but it also reveals your mistakes. A “wobble” in your hand that might be invisible on raw steel becomes glaringly obvious on a dyed surface. I use this as a teaching tool. If a student’s lines look “hairy” or jagged under the dye, it means they aren’t applying consistent pressure or their scribe is dull.
The “Felt Test” for Scribe Depth
A good scribe line should be felt as well as seen. If you run your fingernail across the metal, it should “click” into the scribe line. This physical feedback is crucial when you are trying to align a tool (like a center punch or a cold chisel) later in the fabrication process.
If the line is too shallow, your tools will slide out of it. If it is too deep, you might be creating a stress riser in the metal. I aim for a depth that is just enough to “catch” the point of a divider. Practicing the “feel” of a proper line depth is a subtle but vital part of building muscle memory.
Layout Practice Log Template
To track your progression, use a simple log like the one below. Spend 20 minutes at the start of each shop session on a layout drill and record your results.
| Date | Drill Type | Target Dimension | Actual Dimension | Error | Notes on Body Mechanics |
|---|---|---|---|---|---|
| 10/12 | Parallel Lines | 5.000″ (Total) | 5.015″ | +0.015″ | Hand tilted on pass 4-6. |
| 10/14 | Bolt Circle | 6 Points | 5.95 Points | -0.05″ | Center punch was off-center. |
| 10/16 | 45-degree Bisect | 45.0° | 44.5° | -0.5° | Divider leg slipped on arc. |
| 10/18 | Parallel Lines | 5.000″ (Total) | 5.002″ | +0.002″ | Focused on vertical scribe angle. |
Key Takeaways for Workshop Precision
Mastering layout is about slowing down and respecting the geometry of the workpiece. By selecting a consistent datum, maintaining your tools, and practicing the physical mechanics of scribing, you remove the “luck” factor from your fabrication.
- Always start with a datum. Never measure from multiple unverified edges.
- Keep your scribe sharp. A dull tip creates a wide, inaccurate line.
- Watch for parallax. Keep your eyes directly over the scale.
- Trust the geometry. Use dividers and arcs for angles rather than eye-balling them.
- Track your errors. Use a log to identify if you are consistently measuring “long” or “short.”
Frequently Asked Questions
Why shouldn’t I just use a fine-point marker for layout?
A fine-point marker, even a “surgical” tip, usually creates a line that is 0.020 to 0.030 inches wide. In precision metalwork, that is a huge margin of error. A scribe line is typically 0.005 inches wide, which is four to six times more accurate. Additionally, ink can smudge or burn off, while a scribe line is a permanent physical mark in the metal.
How do I know if my combination square is actually square?
You can verify a square using the “flip test.” Place the square against a known straight edge and scribe a line. Flip the square over so the head is on the same edge but facing the opposite direction, and align it with your line. If the square’s edge perfectly matches the line in both directions, it is true. If the lines diverge, the square is out of alignment.
What is the best way to mark a center point for drilling?
Always start with two intersecting scribe lines. Use a sharp center punch. Place the point of the punch in one scribe line and slide it until you feel it “click” into the intersection of the second line. Hold the punch perfectly vertical and give it a firm, single strike with a hammer. This ensures the drill bit has a definite starting point and won’t wander.
How do I prevent my scribe from slipping when following a rule?
The key is downward pressure on the rule, not just the scribe. Use your non-dominant hand to pin the rule to the metal using multiple fingers spread across its length. This prevents the rule from pivoting. For the scribe, use a light “tracking” pass first to create a path, then a heavier pass to deepen the line.
Can I use these techniques on round tubing or pipe?
Yes, but you often need a “V-block” or a center finder to establish a datum on a curved surface. Once a longitudinal line is established on the pipe, you can use a wrap-around template or a surface gauge to scribe lines around the circumference. The principle of the reference datum still applies.
Why do my divider marks never seem to meet up perfectly?
This is usually caused by “spring” in the divider legs or a center point that is too large. If you press too hard on the dividers, the legs can flex outward, changing the radius. Use light pressure and ensure your center punch mark is small and deep enough to capture the divider point without allowing it to wiggle.
How often should I sharpen my layout scribe?
You should touch up your scribe as soon as you notice the line getting wider or if the tip starts to “skate” on the surface of the metal. I use a fine-grit diamond stone to keep a needle-sharp point. A sharp scribe requires less pressure, which gives you better control and more accurate results.
Is it better to measure in inches or millimeters for layout?
In most professional shops, the choice depends on the project’s specifications. However, many fabricators find that metric (millimeters) is easier for layout because you are dealing with whole numbers rather than adding complex fractions. Whichever you choose, stay consistent throughout the entire project to avoid conversion errors.
(This article was written by one of our staff writers, Thomas Langley. Visit our Meet the Team page to learn more about the author and their expertise.)