Effective Metal Deburring Hand Tools for Clean Edges (Review)
I’ve spent the better part of two decades in shops where the difference between a successful assembly and a pile of scrap came down to a few thousandths of an inch. I remember a specific contract back in 2012 involving high-pressure hydraulic manifolds. We were hitting our machining tolerances perfectly, but the units kept failing pressure tests. After three days of head-scratching and checking every motor controller and spindle for backlash, I found the culprit: microscopic burrs inside the cross-drilled ports. They were breaking off under pressure and shredding the O-rings. It wasn’t a machine error; it was a failure in our manual edge-finishing process.
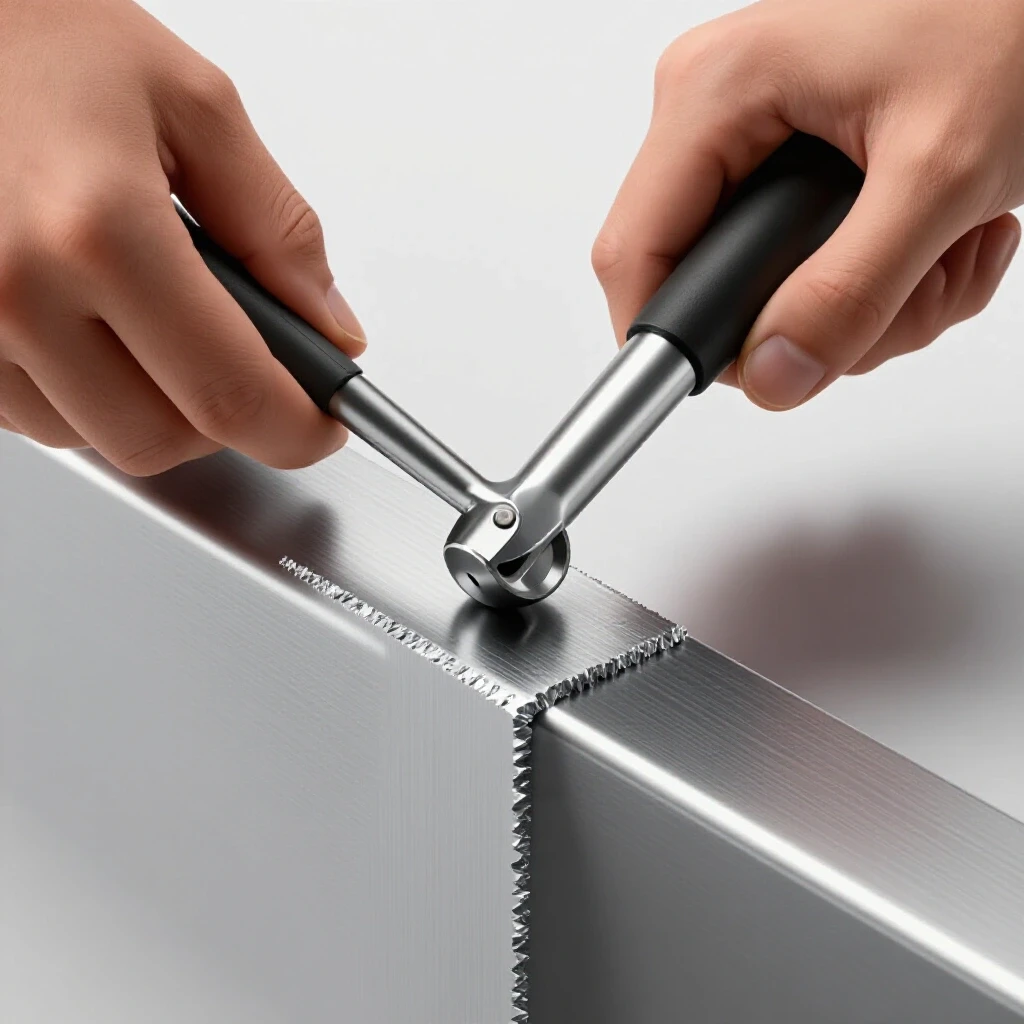
That experience taught me that the final touch is just as critical as the initial cut. When a part doesn’t fit or a weld fails due to contamination, we often look for complex electrical gremlins or mechanical misalignments. Often, however, the root cause is a poorly managed edge. Mastering the use of manual finishing implements allows you to diagnose and fix these issues before they become catastrophic failures.
Establishing a Diagnostic Framework for Manual Edge Finishing
This framework involves a systematic approach to identifying the type of burr present and selecting the specific manual tool required to remove it without compromising the part’s dimensional integrity.
Before you pick up a tool, you have to understand what you’re looking at. A burr isn’t just “extra metal.” It is plastic deformation. When a cutting tool exits a workpiece, the material at the very edge doesn’t get sheared; it gets pushed. In my shop, I categorize these into three types: rollover burrs, tear burrs, and Poisson burrs. Identifying which one you have determines whether you need a heavy-duty swivel blade or a fine-grit abrasive stone.
A systematic approach prevents the most common mistake in the shop: over-deburring. If you’re working to a tolerance of 0.002 inches, a heavy hand with a coarse file can put your part in the scrap bin faster than a faulty stepper motor. You need to observe the edge under a magnifying glass, isolate the areas of interference, and control your pressure to maintain the mechanical baseline of the workpiece.
Identifying Root Causes of Excessive Burring in Primary Operations
This process involves analyzing the variables of the initial cut—such as tool sharpness, feed rates, and material hardness—to minimize the amount of manual finishing required later.
If you find yourself spending more time with a hand scraper than you do at the mill, your primary process is failing. I always start by checking the “exit path” of my cutters. If a drill bit is dull, it creates a massive rollover burr as it punches through the back of a plate. This isn’t just an aesthetic issue; it’s a diagnostic signal. For example, excessive burring on aluminum often points to a “built-up edge” on your end mill, which occurs when the material welds itself to the tool due to heat.
I use a simple checklist to diagnose why my edges are coming out “hairy.” First, I check the tool’s sharpness. Second, I look at the feed-per-tooth calculation. If your feed is too low, you’re rubbing the metal rather than cutting it, which generates heat and plastic flow.
- Tool Sharpness: Dull edges increase cutting force and burr size.
- Feed Rate: Higher feeds often produce larger exit burrs.
- Material Ductility: Softer metals like copper or 6061 aluminum burr more easily than hardened steel.
- Climb vs. Conventional Milling: Climb milling generally produces a smaller burr on the finished edge.
Selection and Maintenance of Swivel-Blade Deburring Tools
These tools utilize a rotating, hardened steel or cobalt blade housed in a handle to quickly follow the contours of holes and straight edges for rapid material removal.
The swivel-blade tool is the workhorse of the diagnostic fabricator. It’s designed to be self-centering. If you’re dealing with a hole that has a rough internal exit, a standard “S-blade” (heavy duty) or “N-blade” (light duty) is your first line of defense. However, I’ve seen many guys struggle with tool chatter when using these. Chatter in a hand tool is usually caused by an incorrect blade angle or applying too much downward pressure, which causes the blade to “hop” rather than slice.
Maintenance is where most people fail. A dull swivel blade won’t cut; it will just burnish the burr, pushing it back into the hole. I replace my blades the moment I feel any resistance or see the metal starting to “smear.” If you’re working with stainless steel, you need cobalt-coated blades to handle the work-hardening nature of the material.
| Blade Type | Best Material | Application | Diagnostic Note |
|---|---|---|---|
| S-10 (Steel) | Steel / Aluminum | Straight edges / Holes | Most versatile; prone to wear on hard alloys. |
| S-20 (Brass) | Brass / Cast Iron | Heavy burr removal | Beveled on both sides for bi-directional use. |
| S-100 (Cobalt) | Stainless Steel | High-precision edges | Resists heat; prevents work-hardening. |
| N-1 (Small) | All materials | Small diameters (<3mm) | Requires very light pressure to avoid snapping. |
Precision Scraping and Filing for High-Tolerance Metalwork
This method uses fixed-geometry tools like triangular scrapers and machinist files to remove minute amounts of material while ensuring the edge remains perfectly flat or chamfered.
When I’m troubleshooting a fitment issue between two machined plates, I reach for a file or a scraper. A swivel blade is great for speed, but it can’t guarantee a flat surface. A triangular scraper is an essential tool for cleaning up internal corners where a radius has been left by an end mill. By using the “three-point” scraping technique, you can ensure that the corner is truly 90 degrees, allowing your mating part to sit flush.
Filing is an art that requires understanding “pinning.” Pinning occurs when small bits of metal (clogs) get stuck in the file’s teeth. If you continue filing with a pinned tool, those clogs will scratch your workpiece, creating deep gouges that look like tool chatter. I use a file card (a stiff wire brush) every few strokes to keep the teeth clean. For the cleanest edges, I use “draw-filing”—holding the file at both ends and pulling it toward me perpendicular to the edge. This produces a surface finish that often rivals a ground edge.
Troubleshooting Surface Finish Issues with Abrasive Stones and Rotary Burrs
This stage involves using fine-grit stones or hand-driven rotary bits to achieve a polished edge or to reach deep into complex geometries where rigid tools cannot fit.
Sometimes, a mechanical tool is too aggressive. If you’re working on a precision spindle seat, a steel blade might remove too much material. This is where abrasive stones come in. I use India or Arkansas stones to “soften” an edge. If you’re diagnosing a vibration issue in a high-speed assembly, look for “stress risers”—sharp nicks or scratches on the edges. A smooth, stoned radius can prevent a part from cracking under harmonic stress.
Handheld rotary burrs (carbide bits in a manual driver) are useful for heavy-duty troubleshooting, like cleaning up a rough casting. However, you must be careful with RPM. If you spin a carbide burr too slowly, it will “grab” the material and kick back, which can damage the part or your hands. If you spin it too fast without a steady hand, you’ll create resonant vibration that leaves a “scalloped” finish.
- India Stones: Great for fast cutting on hardened steel.
- Arkansas Stones: Best for final polishing and ultra-fine edges.
- Carbide Burrs: Use double-cut patterns for better control and smaller chips.
- Ceramic Stones: Excellent for deburring hard-to-reach slots without leaving abrasive grit behind.
Why Manual Edge Defects Lead to Structural and Mechanical Failures
In this section, I analyze how poor edge finishing contributes to larger system problems like weld porosity, mechanical interference, and fatigue cracking.
I’ve spent years tracking down “electrical gremlins” that turned out to be mechanical. For instance, a burr on a mounting bracket can prevent a sensor from sitting perfectly level. If that sensor is an accelerometer or a laser level, your entire diagnostic reading will be skewed. Similarly, in welding, a burr acts as a trap for oils, moisture, and cleaning fluids. When the arc hits that edge, those contaminants vaporize, leading to porosity.
Welding Porosity Diagnosis Pathway
- Observe: Identify the location of the pores. Are they at the start of the weld or along the edge?
- Isolate: Check the gas flow and nozzle. If they are fine, look at the edge preparation.
- Test: Take a scrap piece, deburr it thoroughly with a clean file (not a used grinding disk), and weld again.
- Resolve: If the porosity disappears, your deburring method was the culprit. Grinding disks often embed aluminum oxide or resin into the metal; a manual file does not.
Machining Chatter Factors and Fixes
| Factor | Observation | Manual Fix |
|---|---|---|
| Tool Overhang | High-pitched squeal. | Shorten the tool or use a sturdier hand scraper. |
| Workpiece Rigidity | Vibration felt through the bench. | Clamp the part closer to the edge being worked. |
| Blade Angle | Tool “jumps” or skips. | Decrease the angle of attack; use a shallower “lead-in.” |
| Material Hardness | Tool won’t bite; slides over. | Switch to a cobalt blade or a diamond-coated file. |
Practical Steps for Calibrating Your Manual Finishing Process
This is a numbered guide to ensuring your hand tools are ready for precision diagnostic work and that your technique is consistent.
- Check for Tool Squareness: Use a machinist’s square to ensure your files are flat. A warped file will create a crowned edge.
- Verify Blade Sharpness: A simple “fingernail test” can work. If the blade doesn’t catch on your nail with zero pressure, it’s too dull for precision work.
- Establish a “Clean Zone”: Dedicated files should be kept for aluminum, brass, and steel. Never cross-contaminate, or you’ll embed steel shards into your aluminum parts, leading to galvanic corrosion.
- Use a Lubricant: For aluminum and tough alloys, a drop of light oil or a specialized “stick” lubricant prevents the metal from welding to your deburring blade.
- Measure Twice: After deburring, use a micrometer or a set of go/no-go gauges to ensure you haven’t removed too much material. I aim for a break of 0.005 to 0.010 inches for most general fabrication edges.
Actionable Tracking: The Edge Quality Log
I recommend keeping a small logbook near your finishing station. When you encounter a part that is particularly difficult to deburr, note the material, the tool used, and the result. Over time, this data becomes an invaluable diagnostic tool.
- Date/Part: 10/14 – 4140 Steel Shaft.
- Issue: Heavy burr on keyway.
- Tool Tried: Swivel blade (Failed – chattered).
- Solution: Small pillar file followed by an Arkansas stone.
- Metric: Final chamfer measured at 0.008 inches.
Conclusion
Systematic troubleshooting isn’t just about fixing the big machines; it’s about mastering every variable in the fabrication chain. A clean, well-prepped edge is the foundation of mechanical accuracy. By choosing the right manual tools—whether it’s a swivel blade for speed, a file for flatness, or a stone for precision—you eliminate a massive category of potential failures.
When you stop guessing and start measuring the impact of your edge finishing, your shop’s productivity will climb. You’ll find that “unexplained” fitment issues and “random” weld defects start to disappear. It takes patience and a keen eye, but the result is a level of craftsmanship that sets your work apart from the rest. Keep your tools sharp, your bench clean, and your diagnostic mind sharp.
FAQ: Resolving Common Manual Edge-Finishing Challenges
Why does my swivel-blade tool leave a wavy, “scalloped” edge? This is almost always a result of resonant vibration or “chatter.” It happens when the blade catches and releases rapidly. To fix this, try changing the angle at which you hold the handle. Reducing your speed and applying constant, steady pressure—rather than jerky movements—will help the blade stay in the cut.
How can I tell if a burr is “rolled over” or if I’m actually cutting into the part? Use a bright light at a low angle. A rollover burr will cast a shadow away from the edge. If you see a shadow, the burr is still there. If the edge looks shiny and uniform, you’ve likely reached the parent metal. Always check with a caliper if the edge is a critical mating surface.
What is the best way to deburr a hole that’s too small for a swivel blade? For holes under 1/8 inch (3mm), a small “N-style” blade is the go-to. If that’s still too big, a high-quality countersink bit turned by hand (using a manual driver handle) is the most controlled way to break the edge without enlarging the hole excessively.
Why do my files keep “clogging” when working with aluminum? Aluminum is “gummy” and tends to weld itself into the teeth of a file. This is called pinning. Use a “Lathe Cut” or “Single Cut” file, which has teeth running in one direction, making it easier for chips to clear. Applying a bit of chalkboard chalk or a dedicated file lubricant to the teeth can also prevent the aluminum from sticking.
Can I use a manual deburring tool on hardened steel (above 50 HRC)? Standard HSS (High-Speed Steel) blades will dull instantly on hardened steel. You must use cobalt-coated blades or, better yet, diamond-coated needle files or ceramic stones. These materials are hard enough to abrade the surface without the tool itself being destroyed.
How do I avoid “over-chamfering” an edge when I only want to remove the burr? Control your “angle of attack.” Hold the tool at a 45-degree angle to the edge and use very light pressure. The goal is to “break” the edge, not to create a decorative bevel. If the part is critical, use a fine-grit abrasive stone instead of a blade; stones remove material much more slowly and predictably.
What should I do if a burr breaks off and falls into a blind hole? This is a major diagnostic red flag. You must remove that debris, or it will cause mechanical failure later. Use compressed air, a vacuum with a small nozzle, or a magnetized probe (if the material is ferrous). For non-ferrous materials, a small “sticky” probe or flushing the hole with solvent is necessary.
Is there a specific tool for deburring the “back side” of a hole I can’t reach? Yes, there are specialized “back-deburring” swivel tools. These have a blade that can be folded or inserted through the hole and then opened on the other side. You pull the tool toward you to clean the hidden edge. It’s an essential tool for manifold and gearbox troubleshooting.
How do I maintain my abrasive stones to keep them flat? Over time, stones will “dish” in the center. You can flatten them by rubbing them against another stone or on a piece of sandpaper laid on a flat surface (like a granite surface plate or a piece of thick glass). Use water or oil as a lubricant during this process to keep the stone from loading up.
Why is my hand-held scraper leaving deep scratches on the face of the part? You are likely “digging in” with the corner of the scraper. Ensure the tool is held at a shallow angle relative to the surface. If you’re using a triangular scraper, keep the face of the tool as flat as possible against the work. If scratches persist, your tool may have a nick in the edge that needs to be honed out on a fine stone.
(This article was written by one of our staff writers, Paul Whitaker. Visit our Meet the Team page to learn more about the author and their expertise.)