How to Align a Vintage Metal Lathe Tailstock (DIY Guide)
The first time I hauled a 1940s-era lathe into my shop, it was more of a monument to neglect than a precision tool. The cast iron was hidden under layers of dried “machinery gray” paint and a thick pelt of rust. I spent weeks soaking the assembly in penetrating oil just to move the quill. When I finally got it spinning, my first test cut looked like a tent peg—the taper was nearly an eighth of an inch over a six-inch span. That was my introduction to the reality that a machine is only as good as its centers.
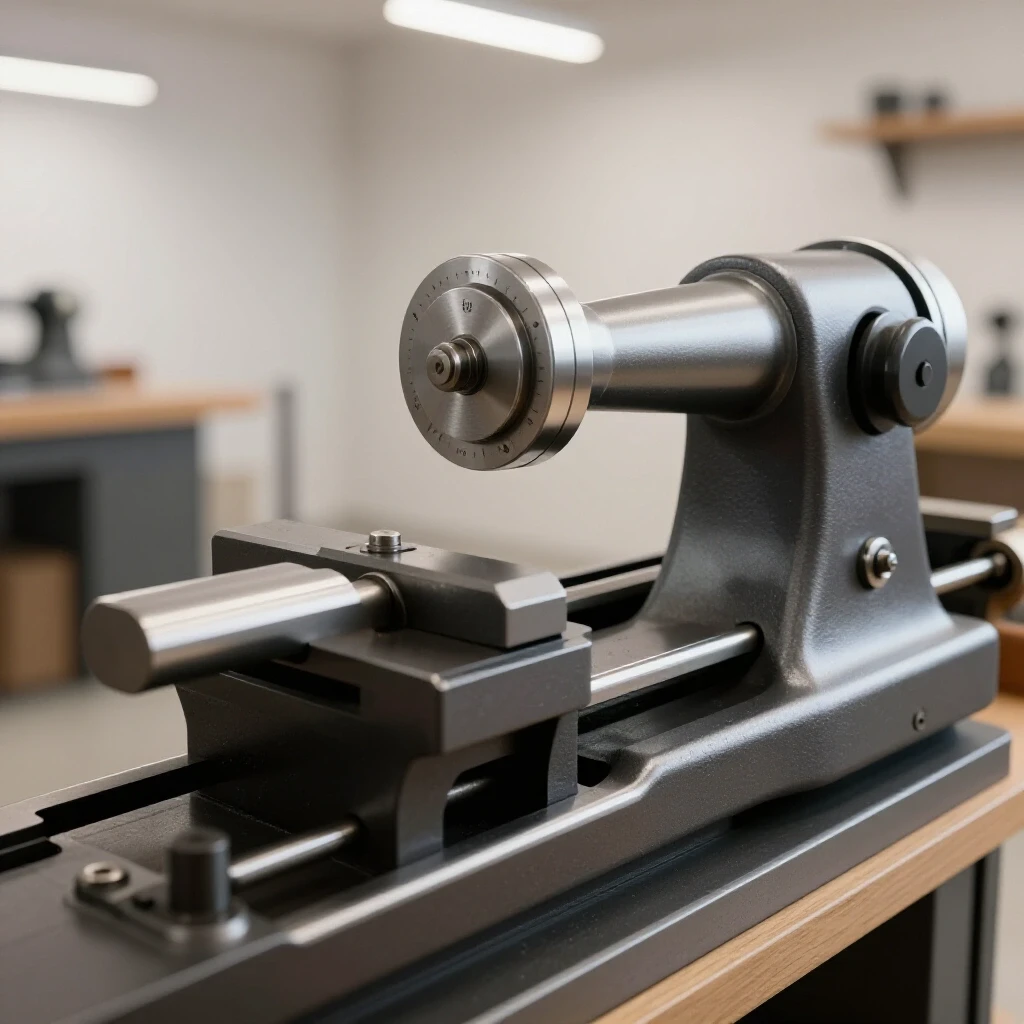
Restoring classic metalworking equipment requires a shift in mindset. We aren’t just cleaning parts; we are reviving a mechanical legacy. These old machines were built with a level of mass and rigidity that modern, budget-friendly imports simply cannot match. However, that mass comes with its own set of challenges. Cast iron is stable, but it is also brittle. Years of sliding a tailstock back and forth across a bed creates wear that pulls the center point out of its original factory position. Correcting this is a slow, methodical process that demands patience and a keen eye for detail.
In my eighteen years of machinery rescue, I have learned that precision is earned, not bought. You cannot simply bolt a vintage tool together and expect it to hold a thousandth of an inch. You have to understand the geometry of the machine and how each component interacts with the bed ways. Whether you are working on a heavy Hendey or a nimble South Bend, the principles of ensuring the tailstock quill tracks true to the spindle axis remain the same.
Evaluating the Structural Integrity of a Vintage Tailstock
Evaluating the physical state of the tailstock is the first step to determine if it is fit for precision work or requires significant resurfacing before any calibration can begin.
When I pull a machine from a scrap yard or a damp garage, I look for “witness marks.” These are the scores and scratches on the bottom of the tailstock base that tell the story of its life. If the base is heavily galling—meaning the metal has physically torn and smeared—the tailstock will never sit flat. I start by checking the fit of the quill within the casting. If you can wiggle the quill by hand when it is unlocked, the bore is likely worn into an oval shape. In such cases, the tool may need to be bored out and sleeved, a task that goes beyond simple adjustment.
I also examine the internal taper of the quill, usually a Morse Taper #2 or #3. I’ve seen quills where a previous owner let a drill bit spin inside the taper, creating deep ridges. These ridges prevent a dead center from seating properly, which introduces “runout”—a wobble that makes precision work impossible. Before I even think about moving the adjusting screws, I ensure the mating surfaces between the tailstock top and its base are clean and free of burrs.
Strategies for Freeing Seized Components Without Damage
The process of using heat, chemistry, and patience to loosen frozen fasteners without fracturing brittle vintage cast iron or damaging obsolete thread patterns is a critical skill for any restorer.
Seized parts are the primary source of frustration in machinery restoration. I once spent three days trying to remove a frozen set screw on a 1920s lathe. My rule is simple: never use a “cheater bar” on a vintage casting. Cast iron does not bend; it shatters. If a screw won’t budge, I reach for a 50/50 mix of automatic transmission fluid (ATF) and acetone. This homemade concoction often outperforms commercial penetrating oils because of its low viscosity and high lubricity.
If chemistry fails, I use localized heat. I use an oxy-acetylene torch with a small tip to heat the casting surrounding the stuck bolt, not the bolt itself. The goal is to make the hole expand slightly. Interestingly, the thermal expansion of cast iron can be unpredictable if the casting has internal stresses. I always keep a paraffin wax candle nearby. When the metal is hot, I touch the wax to the threads. The wax wicks into the microscopic gaps, acting as a high-temperature lubricant.
Removing Oxidation While Preserving Precision Surfaces
Stripping oxidation from the tailstock base and quill using non-abrasive methods is essential to preserve the original factory dimensions and surface finish.
When dealing with the precision-ground surfaces of a tailstock, I avoid sandpaper or wire wheels. These are too aggressive and can easily dub over the sharp edges of the ways. Instead, I prefer chemical chelators or electrolysis. A water-based chelator like Evapo-Rust is safe for the base metal but will eat through every speck of rust. For larger castings, I set up an electrolysis bath.
An electrolysis bath uses a 12V DC power source (like a manual battery charger) and a solution of washing soda and water. I connect the negative lead to the rusty part and the positive lead to a sacrificial piece of scrap steel. The process gently lifts the rust without removing any of the underlying iron. This is vital because even removing 0.001 inches of metal from the bottom of the tailstock can throw off your vertical center height.
| Method | Pros | Cons | Best Use |
|---|---|---|---|
| Electrolysis | Zero metal loss, reaches deep pits. | Requires setup, produces hydrogen gas. | Large castings, heavily rusted bases. |
| Chemical Chelators | Non-toxic, very easy to use. | Can be expensive for large volumes. | Precision quills, internal tapers. |
| Manual Scraping | Restores flatness, creates oil pockets. | High skill floor, very time-consuming. | Mating surfaces between base and top. |
| Scouring Pads | Cheap, readily available. | Can cause uneven wear if overused. | Final cleaning of non-critical surfaces. |
Measuring the Horizontal Offset of the Center Point
Using mechanical measurement tools ensures the tailstock quill travels in a line perfectly parallel to the lathe’s bed ways and the headstock spindle.
Once the parts are clean and moving freely, I begin the measurement phase. I start by placing a known-straight test bar between centers. If you don’t have a ground test bar, you can turn a piece of scrap steel between centers and measure the diameter at both ends. This is often called the “two-collar test.” I turn two small sections of the bar to the same diameter, one near the headstock and one near the tailstock, without moving the cross-slide.
I then use a dial indicator mounted on the carriage. I move the carriage from one collar to the other. If the indicator shows a difference, the tailstock is horizontally offset. For example, if the tailstock end is 0.003 inches closer to the operator, the tailstock needs to be adjusted toward the back of the machine. I aim for a tolerance of 0.0005 to 0.001 inches over a twelve-inch span. Achieving this requires tiny, incremental adjustments to the offset screws located on the tailstock base.
Correcting Vertical Drop with Precision Shimming
Adjusting the tailstock’s vertical position is necessary when years of friction have worn the base down, causing the center to sit lower than the headstock spindle.
Vertical misalignment is more difficult to fix than horizontal offset. Gravity and friction ensure that tailstocks almost always wear “down.” If the tailstock center is lower than the headstock, you will never be able to drill a hole that doesn’t wander or turn a shaft that is perfectly round. To check this, I bring the tailstock close to the headstock and use a dial indicator to compare the height of the two centers.
If the tailstock is low, I use brass or steel shim stock between the tailstock casting and its base. I avoid plastic shims as they can compress over time. I start with a thin shim, perhaps 0.001 or 0.002 inches, and re-test. It is a tedious process of disassembly, shimming, and reassembly. Building on this, if the wear is uneven, I may have to employ hand scraping. This involves using a hardened steel scraper to remove high spots, aiming for a density of 10 to 20 points per inch (PPI) to ensure the base sits flat and retains oil.
The Role of Hand Scraping in Restoring Bearing Surfaces
Hand scraping is a traditional technique used to create a perfectly flat surface on cast iron, allowing for high-precision movement and oil retention.
In my experience, many restorers are intimidated by hand scraping. However, it is the only way to truly “mate” two surfaces. When I scrape a tailstock base, I apply a thin layer of “Prussian Blue” dye to the lathe bed. I then slide the tailstock over the dyed area. The high spots on the tailstock base will pick up the blue dye. I then use a hand scraper to shave off only those blue spots.
This process is repeated dozens of times. As the number of contact points increases, the tailstock becomes more stable. Interestingly, a scraped surface is superior to a ground surface for machinery because the tiny valleys created by the scraper act as reservoirs for lubrication. This prevents the “stick-slip” motion that can ruin a fine finish on a turned part. I look for a uniform pattern across at least 70% of the surface area.
Sourcing and Fabricating Obsolete Components
Locating or making replacement parts for vintage machinery often requires searching through historical databases or using modern techniques like custom machining.
One of the biggest hurdles in restoring tools from the early 20th century is the “orphan” machine—a tool whose manufacturer has been out of business for decades. You might find that your tailstock is missing its original handwheel or has a stripped lead screw with an obsolete thread pitch, like 1/2″-10 Acme. In these cases, I often have to fabricate my own parts.
I keep a library of old service manuals and thread pitch databases. If I need to replace a screw, I use my other working lathe to cut the specific thread required. For those without a second machine, there are vibrant online communities of “old iron” enthusiasts who share 3D scans of castings or offer custom casting services. When I can’t find an original part, I prioritize function over aesthetics, though I always try to match the “feel” of the original design to maintain the tool’s historical integrity.
Checklist for Precision Alignment Verification
- Clean the Bed Ways: Ensure there is no grit, oil, or metal chips between the tailstock and the bed.
- Inspect the Centers: Ensure both the headstock and tailstock centers are clean and free of burrs.
- Mount the Indicator: Secure a dial indicator to the lathe carriage, positioned to touch the side of the test bar.
- Check Horizontal Runout: Move the carriage along the bar and adjust the tailstock offset screws until the needle movement is minimal.
- Verify Vertical Height: Use a master level or indicator to ensure the tailstock hasn’t “dropped” due to wear.
- Perform the Two-Collar Cut: Take a light finishing pass on a test piece and measure both ends with a micrometer.
- Lock and Re-check: Always perform your final measurement with the tailstock clamped down, as clamping pressure can slightly shift the alignment.
Maintaining Accuracy Through Proper Lubrication
Selecting the correct lubricants for vintage cast iron ensures that your hard-won alignment lasts for years of shop use.
Once the alignment is dialed in, the work isn’t over. Vintage machines do not have the sophisticated oiling systems of modern CNC equipment. They rely on the operator to provide manual lubrication. I never use modern automotive grease on the ways or the tailstock quill. Automotive grease is designed for high-speed bearings and often contains additives that can actually gum up in the tight tolerances of a lathe.
Instead, I use a dedicated “Way Oil” (usually ISO 68 or ISO 100). Way oil contains “tackifiers” that help the oil stick to vertical surfaces and prevent it from being squeezed out by the weight of the tailstock. For the internal lead screw of the tailstock, a light machine oil is usually sufficient. I make it a habit to oil the ways every single time I use the machine. This simple act preserves the hand-scraped finish and prevents the need for another major alignment project five years down the road.
Lessons from the Workshop: Common Pitfalls to Avoid
Reflecting on nearly two decades of restoration, I have identified several recurring mistakes that can derail a project and damage vintage equipment.
The most common mistake I see is rushing the “settling” period. After you shim or scrape a tailstock, the metal needs time to settle under its own weight. I usually wait 24 hours after a major adjustment before performing the final test cuts. Another pitfall is over-tightening the tailstock clamp. If you have to crank down on the handle to keep the tailstock from moving, your base is likely not making full contact with the ways.
I also caution against using “miracle” rust removers that contain strong acids like phosphoric or hydrochloric acid on precision surfaces. While they remove rust quickly, they can cause hydrogen embrittlement or leave a phosphate coating that changes the dimensions of the part. Stick to pH-neutral chelators or electrolysis. Finally, always document your work. I keep a logbook for every machine, noting the thickness of shims used and the specific measurements of my test cuts. This data is invaluable when the machine inevitably needs a tune-up years later.
Frequently Asked Questions
Why is my lathe cutting a taper even after I aligned the tailstock? A taper can be caused by several factors beyond the tailstock. If the lathe bed is twisted, the carriage will not move in a straight line. Ensure the machine is properly leveled using a precision machinist’s level (sensitive to 0.0005 inches per foot). Also, check if your cutting tool is exactly on the center line; a tool that is too high or too low will change the effective geometry of the cut.
How do I know if I should shim or scrape the tailstock? Shimming is best for correcting a uniform vertical drop. If the tailstock is 0.005 inches low across its entire length, a 0.005-inch shim is the logical fix. Scraping is required if the tailstock is “nodding” (lower at the front than the back) or if it is rocking on the ways. Scraping restores the geometry, while shimming only restores the height.
Can I use a digital caliper to check my alignment? While a digital caliper is useful for rough measurements, it lacks the resolution and repeatability needed for final alignment. A dial indicator with 0.001-inch or 0.0005-inch graduations is the standard tool for this job. For the “two-collar” test, a micrometer is essential to accurately measure the diameter of the turned sections.
What should I do if the tailstock quill is stuck? Avoid using a hammer. Apply a penetrating oil like a 50/50 ATF/acetone mix and let it sit for several days. If it remains stuck, you can try applying gentle heat to the casting. In extreme cases, you may need to use a hydraulic press, but this carries a high risk of cracking the vintage cast iron. Patience is your best tool.
Is it worth restoring a tailstock that has been repaired with brazing? It depends on the quality of the repair. Brazing is a common historical repair for cracked cast iron. If the repair is in a non-critical area and the casting hasn’t warped, it can be perfectly functional. However, if the braze is on the precision ways or the quill bore, it may be difficult to achieve factory-level accuracy.
How often should I check the alignment of my vintage lathe? I recommend checking the alignment whenever you move the machine or after a particularly heavy “crash.” For general hobby use, a quick check once a year is usually sufficient. Over time, the foundation of your shop may shift, or the cast iron may continue to “season” and move slightly, so periodic verification is a good habit.
What is the best way to clean the internal Morse taper? Use a specialized Morse Taper reamer, but only use it by hand with light pressure to “clean” rather than “cut.” Alternatively, you can wrap a piece of fine-grit Scotch-Brite around a wooden dowel turned to the correct taper. The goal is to remove rust and burrs without changing the angle of the taper.
Can I use aluminum foil as a shim? Aluminum foil is approximately 0.0005 to 0.0007 inches thick and can be used in a pinch. However, aluminum is soft and can deform under the heavy clamping pressure of a tailstock. Brass or steel shim stock is much more durable and provides a more stable adjustment over the long term.
Why does my dial indicator give different readings every time I move the tailstock? This usually indicates that there is “slap” or play in the system. Check if the tailstock quill is locked during measurement. Also, ensure the dial indicator base is securely mounted. Any grit or oil on the ways can also cause inconsistent readings.
What voltage should I use for electrolysis rust removal? A standard 12V DC manual battery charger is ideal. Avoid using “smart” chargers, as they often require a battery’s counter-voltage to turn on. A simple, old-fashioned transformer-based charger or a dedicated DC power supply works best. Keep the current low—usually around 2 to 5 amps—to prevent the solution from overheating.
How do I identify the thread pitch on an old tailstock lead screw? Use a thread pitch gauge. If the gauge doesn’t match perfectly, it may be an obsolete standard or a “bastard” thread used by a specific manufacturer to force customers to buy replacement parts from them. In these cases, you may need to measure the distance over ten threads with a caliper and divide by ten to find the “threads per inch” (TPI).
Is hand scraping a skill I can learn at home? Absolutely. It requires a few basic tools—a scraper, a surface plate, and some marking blue—and a great deal of patience. There are many historical texts and modern video guides available. Start by practicing on scrap pieces of cast iron before attempting to scrape the base of a prized vintage lathe.
(This article was written by one of our staff writers, Richard Beaumont. Visit our Meet the Team page to learn more about the author and their expertise.)