Why Clean Metal Before Welding Stops Porosity (DIY Guide)
I remember standing over my workbench twelve years ago, staring at a weld that looked more like a sponge than a bead of steel. I had followed every setting on the door chart of my welder, yet the metal was filled with tiny holes. It was frustrating because I felt I was doing everything right with my hands, but the results were failing.
That was the day I learned that my torch control didn’t matter if the metal surface was working against me. In those early years, I spent hundreds of hours tracking my progress in a notebook. I realized that the secret to a smooth, consistent arc was often decided before I ever pulled the trigger. If you want to stop the frustration of “Swiss cheese” welds, you have to understand how surface preparation dictates the health of your weld pool.
Understanding How Surface Contaminants Create Gas Pockets
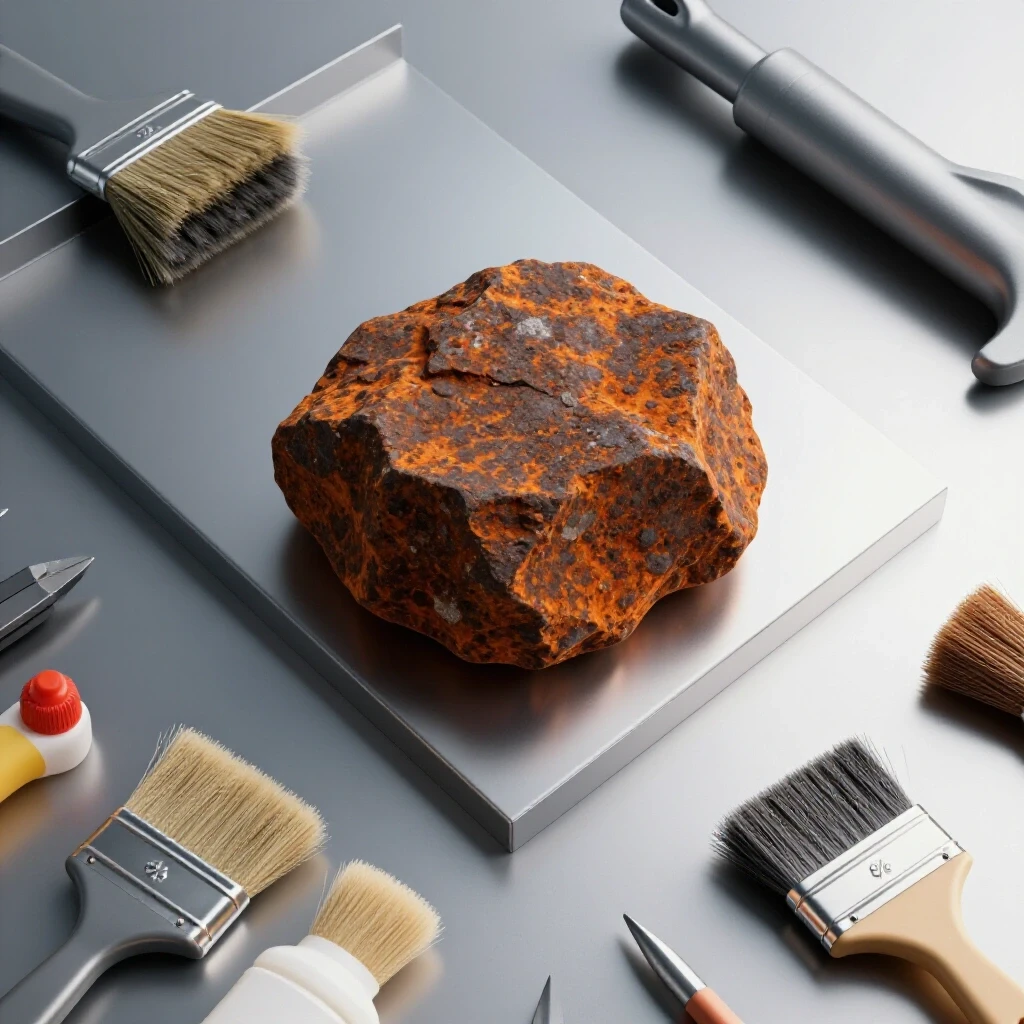
Gas pockets, often called porosity, occur when impurities on the metal surface turn into gas under the extreme heat of the arc. These gases become trapped as the molten metal cools rapidly, leaving behind a weakened, holy structure. Proper cleaning ensures that only the base metal and filler material interact in the puddle.
When you strike an arc, the temperature can exceed 6,000 degrees Fahrenheit. At this heat, anything on the surface of your steel—rust, oil, or the dark coating from the mill—vaporizes instantly. If these gases cannot escape before the metal freezes, they stay inside the joint. This is why you see those tiny bubbles on the surface or, worse, hidden inside the bead.
In my own practice, I found that identifying the specific “enemy” on the metal was the first step to fixing my consistency issues. Different contaminants release different gases. For example, moisture releases hydrogen, while oil releases carbon-based gases. Both lead to the same result: a weld that lacks structural integrity and looks terrible.
| Contaminant Type | Gas Released | Visual Effect on Puddle |
|---|---|---|
| Mill Scale (Dark Coating) | Oxygen/Carbon | Erratic arc, brown “scum” on top |
| Rust (Oxidation) | Oxygen | Bubbling, popping, and holes |
| Oil and Grease | Hydrogen/Carbon | Black soot and internal voids |
| Moisture/Condensation | Hydrogen | Rapid “fizzy” bubbles in the pool |
The Role of Mill Scale in Erratic Arc Behavior
Mill scale is the flaky, dark blue or black layer of oxide found on all hot-rolled steel. It acts as an electrical insulator, making it difficult to maintain a steady arc and causing the puddle to wander. Removing it is essential for achieving the smooth, predictable metal flow required for high-quality fabrication.
When I was a beginner, I thought mill scale was just the “color” of the steel. I would try to weld right over it. I noticed my arc would jump around, and I couldn’t get the puddle to “wet out” or flow into the edges of the joint. This led to a jagged bead shape and trapped gas at the toes of the weld.
To master torch control, you need a predictable environment. Mill scale has a higher melting point than the steel beneath it. This means you end up using more heat than necessary to punch through the scale, which can lead to burn-through once you hit the actual steel. Grinding back to “bright metal” creates a uniform surface that responds consistently to your hand movements.
- What it is: A byproduct of the hot-rolling process at the steel mill.
- Why it’s a problem: It is brittle, poorly conductive, and traps oxygen.
- The fix: Mechanical removal until the steel shines like a mirror.
Mechanical Cleaning Tools for the Home Workshop
Mechanical cleaning involves using physical force to strip away surface layers until you reach pure, uncontaminated steel. Tools like angle grinders, wire wheels, and flap discs are the primary weapons in a fabricator’s arsenal. Choosing the right tool for the job saves time and prevents the accidental embedding of more debris.
I spent a lot of time testing which tools gave me the best surface for my practice runs. I found that while a standard hard grinding stone is fast, it can be too aggressive for thin materials. Flap discs, which are made of overlapping sandpaper strips, offer much better control. They allow you to remove the scale without gouging deep valleys into your workpiece.
A common mistake I see in trade school practice is using a dirty wire brush. If you use a steel brush on aluminum, or a brush that has oil on it, you are actually pushing contaminants into the pores of the metal. I keep my brushes labeled and never use a “steel” brush on anything but steel. This habit alone saved me from dozens of failed test plates.
- Flap Discs (40-60 grit): Best for removing thick mill scale and shaping edges.
- Wire Wheels: Excellent for removing loose rust and cleaning between weld passes.
- Fiber Discs: Great for a high-polish finish that ensures zero surface interference.
- Hand Wire Brushes: Essential for final “dusting” before the arc is struck.
Solvent Degreasing for Chemical Purity
Solvent cleaning removes invisible films like oils, cutting fluids, and grease that mechanical tools might just smear around. Using a high-quality degreaser like acetone ensures that the “clean zone” is truly free of hydrocarbons. This step is the final defense against hydrogen-induced gas pockets in your weld beads.
Even after grinding, there can be finger oils or residue from the metal’s storage. I always perform a “wipe test.” I take a clean white paper towel with a bit of acetone and wipe the joint. If the towel comes back gray or brown, the metal isn’t ready. This is a simple metric I use to teach my students that “looks clean” isn’t always “is clean.”
You must be careful with chemicals in a shop environment. Never use chlorinated brake cleaners, as the heat of the welding arc can turn those chemicals into dangerous gases. Stick to pure acetone or dedicated welding prep solvents. Always wait for the solvent to evaporate completely before you start your metal welding practice guide drills.
- Grind the area to remove heavy scale and rust.
- Wipe the area with a clean, lint-free cloth.
- Apply acetone to the cloth, not the metal directly.
- Wipe in one direction to pull contaminants away rather than spreading them.
- Inspect the cloth; repeat until the cloth stays white.
Establishing a One-Inch Clean Zone
A “clean zone” is the area surrounding the joint that must be stripped of all coatings and debris before welding begins. For most DIY projects, cleaning at least one inch back from the weld path prevents the heat from pulling in contaminants from the surrounding area. This practice is a hallmark of professional-grade fabrication.
When the arc travels along a joint, the heat spreads out in a “heat-affected zone.” If you only clean the tiny sliver where the bead goes, the heat will reach the paint or oil just half an inch away. That material will smoke and bubble, and the suction of the arc can pull those gases directly into your molten puddle.
In my practice logs, I started marking a “prep boundary” with a soapstone marker. By ensuring I had a full inch of bright metal on every side of the joint, my bead consistency improved overnight. My travel speed became more fluid because I wasn’t fighting the “scum” that would otherwise float into my path.
- Width: 1 inch (25mm) minimum on all sides of the joint.
- Depth: Only remove the surface layer; do not thin the base metal.
- Consistency: The clean zone should be uniform in brightness.
Why Moisture is the Invisible Enemy of Sound Welds
Moisture can hide in the layer of rust on steel or even as invisible condensation on cold metal. When heated, this water breaks down into hydrogen and oxygen, causing immediate gas pockets and potential cracking. Preheating the metal or storing it in a dry area is a key part of the preparation process.
I once spent an entire morning struggling with a “fizzing” puddle on a humid summer day. I realized the steel, which I had brought in from a cool garage, was sweating as the shop warmed up. This thin film of moisture was enough to ruin my beads. Now, I always run a torch over the joint briefly to “sweat” out any moisture before I begin my high-heat practice.
This is especially important if you are working with thicker plates. Thick steel acts as a heat sink and can hold a lot of cold, leading to condensation. A quick preheat to about 100-150 degrees Fahrenheit ensures the surface is bone-dry. This small step can be the difference between a professional result and a frustrating afternoon of grinding out bad welds.
| Material Thickness | Prep Requirement | Pre-Heat Need |
|---|---|---|
| 1/8″ (3mm) | Grind + Wipe | Low (Room Temp) |
| 1/4″ (6mm) | Grind + Wipe | Medium (Warm to touch) |
| 1/2″ (12mm) | Heavy Grind + Wipe | High (150°F+) |
Mastering Torch Control Through Consistent Preparation
Consistent metal preparation allows you to focus entirely on your physical mechanics, such as travel speed and torch angle. When the metal is clean, the puddle behaves predictably, which is essential for building the muscle memory needed for advanced fabrication. If the puddle is “popping” due to dirt, you cannot learn to read the fluid’s movement.
In my twelve years of fabrication, I’ve seen that students who skip the prep stage never develop a “steady hand.” Why? Because they are constantly reacting to the chaos in the puddle. If the arc is jumping because of mill scale, you can’t maintain a steady 1/8″ arc gap. You end up twitching and overcorrecting.
By removing the variables of dirt and scale, you create a “laboratory condition” on your workbench. This allows you to focus on your travel speed metrics, aiming for that 8–12 inches per minute (IPM) sweet spot. You can finally see the difference that a 10-degree drag angle makes versus a 15-degree angle because the puddle is clear enough to observe.
- Visual Cues: A clean puddle looks like liquid mercury; a dirty one looks like muddy water.
- Physical Feedback: Clean metal allows the arc to “hum” rather than “crackle.”
- Focus: Spend 70% of your time on prep and 30% on welding to speed up your learning curve.
Tracking Your Progression with a Practice Log
A structured practice log helps you identify if your technical plateaus are caused by your hand technique or your preparation habits. By recording your cleaning steps alongside your weld parameters, you can objectively measure what leads to the best results. This data-driven approach is how I moved from a hobbyist to a professional fabricator.
When I was struggling with consistency, I started a simple notebook. I would write down the material, how I cleaned it, the machine settings, and then a 1-10 score on the bead quality. I noticed a direct correlation: every time I gave a “10” for cleaning, my bead quality score was an “8” or higher. When I rushed the cleaning, my bead score never went above a “5.”
This type of self-assessment is vital for any skill-focused learner. It turns a “bad day in the shop” into a data point you can learn from. If you see “porosity” in your log three days in a row, and your prep note says “just wire brushed,” you know exactly what to change: it’s time to break out the flap disc and the acetone.
- Date and Material: Record the steel type and thickness.
- Prep Method: Note if you used a grinder, flap disc, or solvent.
- Parameters: Record your voltage, wire speed, or amperage.
- Visual Results: Note the presence of any holes or surface “scum.”
- Action Plan: What will you change in the prep for the next run?
Developing a Systematic Practice Drill
To build muscle memory, you should practice “bead-on-plate” runs on perfectly prepared material. This allows you to isolate your hand-eye coordination from the stresses of joint fit-up or metal contamination. Repeating this drill on clean metal is the fastest way to achieve professional-grade results.
My favorite drill for beginners is the “10-Plate Challenge.” I have my students take ten scrap pieces of steel and prep them to a mirror finish. We then run five straight beads on each plate. Because the metal is perfectly clean, the student can focus entirely on their travel speed and arc gap.
If a student tries this on rusty metal, they spend all their mental energy fighting the arc. On clean metal, they can actually “see” the puddle freeze behind the torch. They can see the ripples forming. This visual feedback is the only way to learn how to adjust your speed in real-time.
- Step 1: Grind a 4×4 inch plate to bright metal.
- Step 2: Use a scribe to mark five straight lines 1/2 inch apart.
- Step 3: Run a bead on each line, focusing on a 1/8″ arc gap.
- Step 4: Inspect each bead for gas pockets; if found, re-evaluate your solvent wipe.
Common Mistakes in Metal Preparation
Even with good intentions, many fabricators make mistakes that re-introduce contaminants into the joint. Recognizing these “rookie errors” is essential for maintaining a clean workspace and ensuring joint integrity. Avoiding these pitfalls will save you hours of rework and grinding.
One of the most common mistakes I see is using a “loaded” grinding disc. If you use a disc to grind on aluminum or plastic and then use it on your steel, you are smearing those materials into the grain of the metal. Another is touching the cleaned joint with oily gloves. I always keep a pair of “clean” MIG pliers and handling tools that never touch grease.
Another subtle mistake is “over-grinding.” You want to remove the scale, not the steel. If you grind too deep, you create a thin spot in the material that will overheat and warp. The goal is a surface that is bright and shiny, not a surface that has been gouged out.
- Cross-Contamination: Using the same tool for different types of metal.
- Dirty Abrasives: Using discs that have picked up oil or floor dirt.
- Improper Solvents: Using “oily” cleaners like mineral spirits instead of acetone.
- Handling: Touching the clean zone with bare hands or greasy gloves.
Summary of Best Practices for Clean Joints
Achieving a professional weld is a process that begins long before the arc is struck. By following a systematic approach to cleaning, you remove the primary cause of internal voids and surface defects. This consistency allows you to focus on the physical art of welding, leading to faster skill progression.
I’ve learned over the last decade that the best fabricators aren’t necessarily the ones with the steadiest hands; they are the ones with the best habits. They don’t view cleaning as a chore; they view it as the foundation of the weld. When you respect the metal, the metal will “behave” for you under the torch.
As you move forward in your fabrication journey, remember that your practice logs are your best teacher. If you find yourself hitting a plateau, go back to the basics of surface preparation. Often, the solution to a technical struggle isn’t a more expensive welder—it’s a fresh flap disc and a clean rag.
- Always grind to bright metal (remove all mill scale).
- Always use a dedicated solvent wipe (acetone).
- Always maintain a one-inch clean zone around the joint.
- Always check for moisture or condensation on cold days.
- Always log your prep steps to track what works.
Frequently Asked Questions
Why does my weld look like a sponge even after I used a wire brush?
A wire brush often just polishes the surface of mill scale rather than removing it. Mill scale is a hard oxide that requires an abrasive, like a grinding wheel or flap disc, to be fully stripped away. If you only use a wire brush, the heat of the arc will still release the gases trapped beneath that dark scale layer, leading to gas pockets.
Can I use rubbing alcohol instead of acetone for cleaning?
While rubbing alcohol is better than nothing, it often contains a percentage of water (usually 30% in 70% IPA). This moisture can actually introduce hydrogen into the weld, causing the very porosity you are trying to avoid. Pure acetone (100%) is the industry standard because it evaporates completely and leaves no residue or moisture behind.
Is it okay to weld over a little bit of light surface rust?
No. Rust is iron oxide, which contains oxygen. When the arc hits rust, that oxygen is released into the molten puddle. This will almost always cause “fizzy” behavior in the puddle and result in tiny holes throughout your bead. For a sound joint, every speck of orange rust must be ground away until you see shiny, silver steel.
How do I know if I have ground deep enough to remove mill scale?
Mill scale usually has a dull, dark blue, or grey-black appearance. You have ground deep enough when the surface looks like a bright, reflective mirror. If you see any dark “speckles” or “shadows” in the metal, that is scale trapped in the pits of the steel. Keep grinding until the color is uniform and silver across the entire clean zone.
Does the type of grinding disc matter for preventing gas pockets?
Yes. Using a flap disc (60 grit) is generally better for beginners because it provides a smoother finish. A hard grinding rock can leave deep scratches where dirt and oils can hide. Furthermore, ensure your disc is “clean.” If you previously used the disc on greasy or painted metal, it can transfer those contaminants to your new workpiece.
Why do I get bubbles in my weld only at the very beginning of the bead?
This is often due to moisture or “starting porosity.” If the metal is cold, condensation can form the moment the heat of the arc hits it. Another cause is “long-arcing” at the start, which allows atmospheric nitrogen to enter the puddle. Try preheating the start of the joint with a torch for a few seconds to ensure it is bone-dry before you strike your arc.
Can I use a wire wheel on a bench grinder to clean my parts?
A bench grinder wire wheel is great for removing loose rust, but it rarely removes mill scale effectively. It tends to “burnish” or smear the scale rather than stripping it. For the best results, use an angle grinder with a flap disc to get down to the bare metal, then use the wire wheel only for light cleanup between passes.
Should I clean the filler rod as well as the base metal?
Absolutely. Filler rods (TIG) or MIG wire can collect dust, oils from your hands, or even “shop film” if left out in the open. I always wipe my TIG filler rods with an acetone-soaked rag before I start. For MIG welding, make sure your wire spool is clean and not covered in a layer of fine rust, which is a common cause of feed issues and gas pockets.
What is the “one-inch rule” in metal preparation?
The “one-inch rule” suggests that you should clean the base metal at least one inch away from the actual joint in all directions. This prevents the heat of the weld from vaporizing paint, oil, or scale nearby, which could then be sucked into the molten puddle by the arc’s vacuum effect. It also gives you a clear, unobstructed view of the puddle.
How does cleaning the metal help me improve my travel speed?
When the metal is clean, the puddle is much more fluid and predictable. You can clearly see the “toes” of the weld as they melt into the base metal. This clarity allows you to maintain a consistent travel speed because you aren’t waiting for the arc to “burn through” dirt or scale. A clean surface leads to a steady, rhythmic movement of the torch.
Why is brake cleaner dangerous to use for welding prep?
Many brake cleaners contain chlorinated compounds. When these chemicals are exposed to the UV light and high heat of a welding arc, they can turn into phosgene gas. Phosgene is highly toxic even in tiny amounts. Only use non-chlorinated cleaners, or better yet, stick to pure acetone, which is much safer for welding applications.
Does the “cleanliness” requirement change for different welding processes?
While all processes (MIG, TIG, Stick) benefit from clean metal, TIG is the most sensitive. TIG welding will show immediate gas pockets if there is even a fingerprint on the metal. Stick welding is more “forgiving” because the flux can help float out some impurities, but even then, your weld quality and arc stability will be significantly better on ground-clean steel.
(This article was written by one of our staff writers, Thomas Langley. Visit our Meet the Team page to learn more about the author and their expertise.)