How to Replace a Worn V-Belt on a Benchtop Lathe (DIY Guide)
When I first started taking on paid fabrication work in my garage, I viewed my benchtop lathe as a simple tool. It was just a machine that turned metal. However, after a few months of tracking my bills, I realized it was actually a capital asset that required a specific maintenance budget to remain profitable. One afternoon, right in the middle of a rush order for a local automotive shop, my spindle began to slip. That high-pitched squeal wasn’t just rubber rubbing on a pulley; it was the sound of my hourly shop rate evaporating.
Managing a side-hustle metalworking business requires a shift in mindset from a hobbyist to an owner. In a hobby, a broken drive belt is a minor annoyance that delays a project until next weekend. In a small business, that same broken belt represents a halt in production, a missed deadline, and a direct hit to your bottom line. To maintain a consistent profit margin, you must understand the mechanical and financial realities of keeping your primary spindle drive in top condition.
The Economics of Spindle Drive Maintenance in Small Shops
Spindle drive maintenance involves the regular inspection and eventual replacement of the power transmission components that link your motor to the lathe headstock. For benchtop machines, this is usually a rubber V-belt that transfers torque to allow for turning, facing, and threading operations.
Every minute your machine is non-functional, your overhead costs continue to accumulate while your revenue stops. If you have calculated a shop hourly rate of $85, a two-hour repair window costs you $170 in lost labor plus the price of the replacement part. I have seen many talented fabricators fail because they didn’t account for these “hidden” maintenance hours in their fabrication job costing. By mastering the process of swapping out a worn drive component, you minimize this downtime and protect your projected ROI.
Calculating the True Cost of Machine Downtime and Parts
Downtime cost is the total financial loss incurred when a machine is unavailable for production, including lost labor revenue and the physical cost of repair components. It is calculated by adding the price of the replacement part to the product of the repair time and your shop’s billable rate.
When a belt begins to fray or slip, you face a choice: replace it now or wait for it to snap. Waiting for failure is almost always the more expensive option. An emergency repair usually happens during a billable project, forcing you to rush shipping on parts or lose a client’s trust. I recommend keeping a “consumable burden factor” in your pricing—a small percentage added to every quote to cover the wear and tear on your machine’s drive system.
| Expense Category | Cost Estimate (Low) | Cost Estimate (High) | Impact on Job Margin |
|---|---|---|---|
| Replacement V-Belt | $15.00 | $45.00 | Direct Material Cost |
| Shipping (Standard vs. Overnight) | $8.00 | $35.00 | Overhead Increase |
| Labor Time for Replacement (1 hr) | $65.00 | $120.00 | Opportunity Cost |
| Total Financial Impact | $88.00 | $200.00 | Reduced Net Profit |
Amortization and Maintenance Schedules for Benchtop Equipment
Machine amortization is the process of spreading the cost of a piece of equipment over its expected useful life. A maintenance schedule is a planned list of inspections designed to ensure the machine reaches or exceeds that lifespan without unexpected breakdowns.
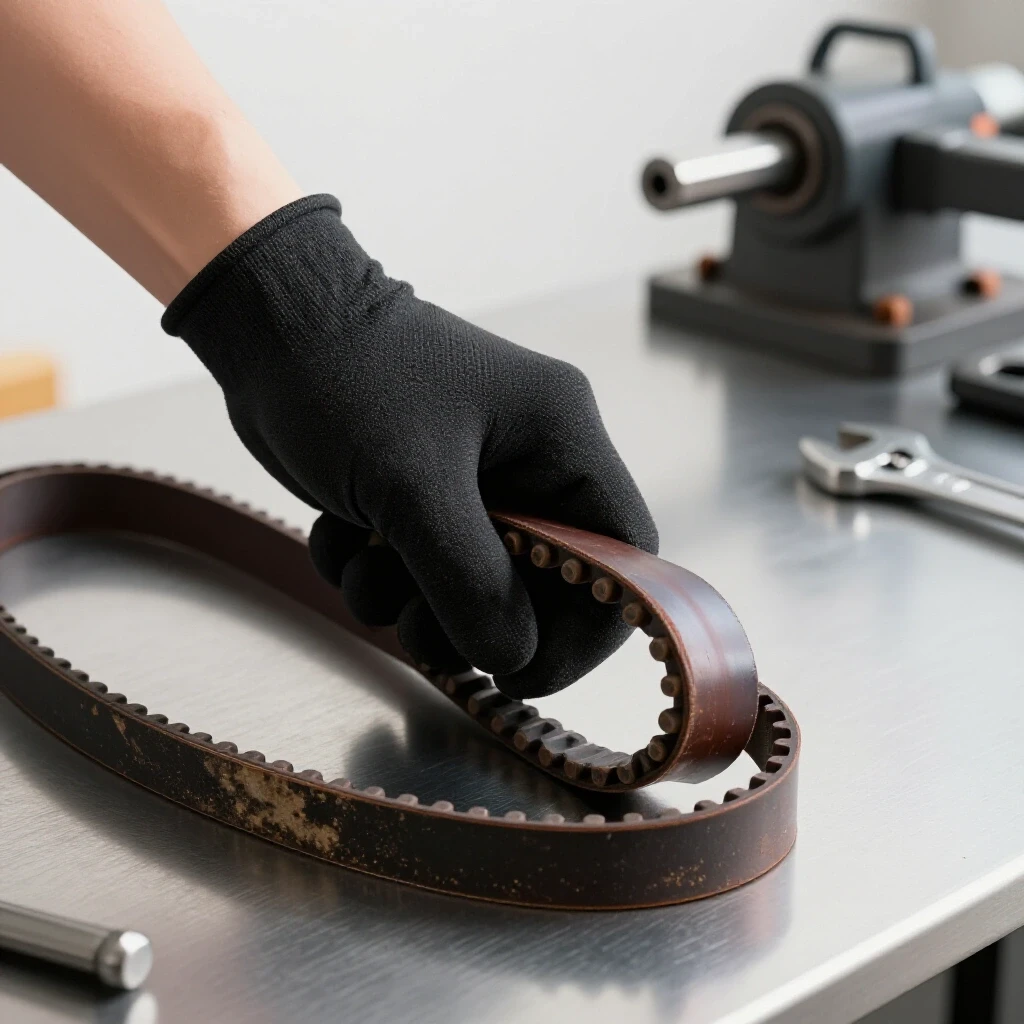
I track my benchtop lathe as a five-year asset. If the machine cost $2,500, I need it to generate enough profit to cover its own replacement eventually. Part of that “health” check involves inspecting the drive belt every 50 operating hours. If you see “glazing”—a shiny, hard surface on the sides of the belt—or small cracks in the rubber, the belt is reaching the end of its life. Replacing it during a scheduled “shop day” rather than a “client day” is the key to maintaining your small metal shop pricing integrity.
Identifying Wear Patterns and Tensioning for Maximum Life
Identifying wear patterns involves looking for physical signs of degradation, such as cracking, fraying, or thinning of the belt walls. Proper tensioning refers to the specific amount of pressure applied to the belt to prevent slipping without putting excessive load on the motor bearings.
A common mistake I see in side-hustle metalworking is over-tensioning. People think a tighter belt means more power. In reality, an over-tightened belt acts like a brake, wearing out your headstock bearings and the belt itself much faster. This leads to a lower metal business ROI because you end up replacing expensive bearings instead of a cheap belt. You want just enough tension so that the belt doesn’t slip under a heavy cut, but still has about a half-inch of “give” when pressed with your thumb.
Step-by-Step Restoration of the Spindle Drive System
Restoring the spindle drive system is the physical act of removing a degraded power transmission belt and installing a new one. This process ensures that the lathe can once again handle the torque required for precise metal fabrication without slipping or vibrating.
Before you begin, ensure the machine is completely disconnected from power. Safety isn’t just about health; an injury is the fastest way to bankrupt a small shop. Most benchtop lathes require you to open a side or rear access panel to reach the pulleys.
- Loosen the Motor Mounts: Most small lathes have the motor mounted on a plate held by two or four bolts. Loosen these bolts to allow the motor to slide toward the headstock, which creates slack in the belt.
- Remove the Old Belt: Once the slack is created, walk the belt off the pulleys. If the belt has already snapped, simply remove the debris and check the pulley grooves for any leftover rubber residue.
- Inspect the Pulley Alignment: Use a straightedge to ensure the motor pulley and the spindle pulley are perfectly in line. Misalignment causes the belt to wear unevenly on one side, cutting its lifespan in half.
- Install the New Belt: Loop the new belt over the spindle pulley first, then the motor pulley. Ensure it is seated deeply in the “V” of the grooves.
- Set the Tension: Slide the motor back to apply tension. Tighten the mounting bolts while maintaining pressure. As mentioned before, aim for a small amount of deflection under thumb pressure.
- Test Run: Rotate the spindle by hand first to ensure everything is seated. Then, plug the machine in and run it at a low RPM to check for smooth operation and lack of vibration.
Why Hidden Consumables Bleed Small Shop Profits
Hidden consumables are the small, often overlooked items like belts, lubricants, and cutting fluids that are used up during the fabrication process. Failing to account for these items in your material markup can lead to a situation where you are busy but not actually making money.
When I consult for small shops, I often find that owners are only charging for the raw steel and their time. They forget that the lathe belt is slowly wearing out with every rotation. To fix this, I suggest a “Consumable Tracking Log.” Every time you buy a belt or a bottle of way oil, record it. At the end of the year, divide that total by the number of billable hours you worked. This gives you a “consumable hourly rate” that you must add to your base shop rate.
Sourcing Consumables and Building a Spare Parts Inventory
Sourcing involves finding reliable suppliers for your maintenance parts, while inventory management is the practice of keeping essential spares on hand to prevent work stoppages. For a side-hustle, this means having at least one spare belt in a drawer at all times.
You can often find V-belts at local industrial supply houses for much less than what the lathe manufacturer charges. Look for the part number printed on the back of the belt (e.g., 3L240 or K-26). Buying these in “bulk”—even just two or three at a time—can reduce your unit cost and eliminate the risk of waiting for a shipment.
- Industrial Supply Houses: Often the cheapest source for standard sized V-belts.
- Specialty Lathe Parts Distributors: Best for unique or proprietary belt sizes.
- Online Marketplaces: Useful for price comparisons, but beware of low-quality “no-name” rubber that stretches quickly.
- Local Automotive Stores: Sometimes carry 3L or 4L belts that can work in an emergency.
Optimizing Shop Rates Through Preventive Maintenance
Preventive maintenance is a proactive approach to equipment care that involves performing small tasks (like belt adjustment) to prevent large failures. This strategy directly optimizes your shop rate by ensuring your billable hours are spent on production, not unpaid repairs.
If your shop rate is $75/hour, and you spend five hours a month on “unplanned” repairs, you are losing $375 in potential revenue. By spending just 30 minutes every Sunday morning checking belt tension and oiling the ways, you can often eliminate those five hours of crisis. This is how you move from a “struggling hobbyist” to a “profitable professional.”
Managing the Transition from Hobbyist to Side-Hustle Owner
Transitioning to a professional footing means treating your shop as a business entity where every action is measured against its financial return. This includes the way you maintain your equipment and how you value your own time during those maintenance periods.
I once worked with a fabricator who refused to buy a $20 spare belt. When his belt snapped on a Thursday night, he couldn’t finish a $500 job due on Friday morning. He spent Friday driving around to three different stores to find a replacement. He lost a day of work at his “day job,” missed his deadline, and looked unprofessional to his client. His “savings” of $20 cost him nearly $800 in total. Don’t be that guy. Value your uptime.
Key Takeaways for Shop Owners
- Track Every Minute: Maintenance is a cost of doing business. If you don’t track it, you can’t price your work accurately.
- Keep Spares on Hand: A $20 belt in the drawer is worth $200 when your machine is down.
- Avoid Over-Tensioning: Protect your bearings to ensure a high machine ROI.
- Include Maintenance in Your Rate: Your shop rate must cover the eventual replacement of every part of your lathe.
Frequently Asked Questions
How can I tell if my lathe belt needs replacement before it actually breaks? You should look for three main signs: glazing, cracking, and “thumping.” Glazing appears as a shiny, mirror-like finish on the sides of the belt, indicating it has been slipping and overheating. Cracking is visible on the underside (the narrow part of the V). Thumping is a rhythmic vibration or noise that occurs because the belt has developed a “set” or has a chunk of rubber missing. If you notice any of these, schedule a replacement immediately.
Does a more expensive “link-belt” offer a better ROI than a standard V-belt? Link-belts (the red or green belts made of interlocking segments) can be a great investment for benchtop lathes. They often reduce vibration significantly, which can improve surface finish on your parts. A better surface finish means less time spent sanding or polishing, which increases your efficiency. While they cost more upfront, their ability to be resized and their vibration-dampening qualities often justify the price for a professional side-hustle.
How do I factor the cost of a new belt into my fabrication job costing? You shouldn’t charge a single client for the whole belt unless the job is so massive it literally wears the belt out. Instead, use a “consumable burden.” If a belt costs $30 and lasts 300 hours, it costs you $0.10 per hour. Add that, along with the costs for electricity, oil, and tooling, to your base labor rate to ensure your overhead is always covered.
What is the average shop rate for a part-time metalworker using a benchtop lathe? Typically, side-hustle rates range from $65 to $120 per hour, depending on your location and the complexity of the work. If you are doing basic turning, you might be on the lower end. If you are doing precision threading or working with exotic materials like titanium, you should be on the higher end. Always ensure this rate covers your “hidden” costs like insurance and machine depreciation.
Is it worth it to buy “original equipment” belts, or are generic ones okay? For most benchtop lathes, a high-quality industrial belt from a brand like Gates or Browning is actually superior to the “original” belt that came with a budget machine. These industrial belts are manufactured to tighter tolerances and use better rubber compounds. This leads to less stretching and a longer lifespan, providing a better return on your investment.
Can I use belt dressing to extend the life of a slipping belt? I generally advise against it in a professional shop setting. Belt dressing is a temporary fix that often creates a sticky mess on your pulleys. While it might stop a slip for an hour, it doesn’t fix the underlying issue of a worn or stretched belt. It’s better to spend the time tensioning the belt correctly or replacing it rather than dealing with the cleanup and eventual failure that dressing usually leads to.
How often should I check the tension on my lathe’s drive system? I recommend a quick “thumb test” before you start your first job of the day. It takes five seconds. For a more formal inspection, check the tension and the condition of the rubber every 50 hours of spindle time. If you do a lot of heavy interrupted cuts or high-speed polishing, check it more frequently as these tasks put more stress on the drive system.
What tools do I need to keep in my “maintenance kit” for these repairs? You don’t need much, which makes this a high-ROI activity. A set of high-quality wrenches or hex keys that fit your motor mounts, a straightedge for pulley alignment, and a small brush to clean debris out of the pulley grooves are usually sufficient. Keeping these in a dedicated “lathe kit” prevents you from hunting through the shop for tools when you should be working.
Why is my new belt squealing even though I just installed it? This is usually due to one of two things: oil on the pulleys or incorrect tension. If you got way oil or finger oils on the pulley surfaces during installation, the belt will slip. Clean the pulleys with a bit of brake cleaner or alcohol. If it still squeals, the belt may have “seated” into the grooves and loosened slightly, requiring a quick re-tensioning after the first few minutes of run-time.
How does machine depreciation affect my taxes as a side-hustle owner? In many jurisdictions, you can deduct the cost of the machine and its maintenance parts from your business income. This reduces your taxable profit, effectively making the repairs cheaper. Consult with a tax professional, but generally, keeping receipts for every belt and tool you buy is essential for maximizing the financial efficiency of your workshop.
(This article was written by one of our staff writers, Michael Hargrove. Visit our Meet the Team page to learn more about the author and their expertise.)