How to Weld a Heavy Steel Fire Pit Cooking Grate (DIY Plan)
I remember the first time I pulled a 1942 South Bend lathe out of a damp barn in rural Ohio. The rust was so thick it looked like the machine had been submerged in the ocean for decades. My hands were stained orange for a week, but as I slowly peeled back the layers of oxidation, I found the soul of the machine was still intact. Restoring over 40 pieces of vintage machinery has taught me that steel is remarkably resilient, provided you treat it with the right technical respect. Whether I am scraping the ways of a Bridgeport mill or fabricating a heavy-duty steel cooking surface for a workshop fire pit, the principles of metallurgy, heat management, and precision remain identical.
Fabricating heavy-duty workshop accessories requires the same methodical approach as restoring a classic drill press. You cannot simply throw heat at metal and expect it to remain true. You must understand how the steel will move, how the welds will pull, and how to prepare the surface so it remains safe for its intended use. In this guide, I will walk you through the process of building a robust, load-bearing cooking grate using the same precision-focused mindset I apply to every machine rescue.
Evaluating Structural Materials for High-Heat Fabrication
Assessing the metallurgical properties of steel bars and expanded metal is the first step to ensure they can withstand repeated thermal cycling without warping or losing structural integrity. Choosing the right material is a balance between weight, heat retention, and the ability to weld the components into a single, rigid unit that won’t sag over time.
Why Mild Steel is the Restorer’s Choice for Custom Grates
Mild steel, specifically A36 grade, is the preferred material for these projects because of its excellent weldability and predictable behavior under heat. Unlike cast iron, which can be brittle and prone to cracking during the cooling phase of a weld, mild steel allows for deep penetration and a strong, ductile bond that handles the stress of a fire.
When I select material for a heavy-duty project, I look for 1/2-inch or 5/8-inch round or square bar stock. This thickness provides the thermal mass needed to hold heat and the structural rigidity to prevent sagging. If you use thinner material, you will find that the heat from the fire causes the metal to “relax,” leading to a permanently bowed surface. This is similar to how a machine table can warp if it is not properly normalized after a heavy casting process.
Understanding Thermal Expansion and Metal Memory
Metal memory is the tendency of a piece of steel to return to its original shape or deform based on internal stresses. When you heat a specific area during welding, that section expands, and as it cools, it contracts, often pulling the surrounding metal with it.
In machinery restoration, we see this when a shaft is bent due to uneven cooling. When building a cooking surface, if you weld all the bars in a row from left to right, the entire grate will curl like a potato chip. To avoid this, we use a “staggered” welding sequence, much like the pattern used when tightening the bolts on a vintage engine head. This distributes the heat evenly and keeps the final assembly flat within a reasonable tolerance.
Mapping the Disassembly and Layout Sequence
The process of planning a weldment involves creating a precise grid layout to ensure all components are square and level before the first arc is struck. Just as I would map out the disassembly of a complex gear train, I must plan the placement of every bar to ensure the final product is balanced and functional.
Creating a Precision Grid for Heavy Steel Bars
Before you even pick up the welder, you need a flat surface. I often use the bed of a heavy-duty welding table or even a thick piece of plate steel that has been checked with a machinist’s level. A deviation of even 1/16th of an inch across the span of the grate can cause it to rock or sit unevenly, which is unacceptable for someone used to working within 0.001-inch tolerances.
- Measure the inner diameter of your fire pit or support structure.
- Subtract 1/2 inch from the total diameter to allow for thermal expansion of the grate itself.
- Space your bars no more than 3/4 inch apart to ensure smaller items do not fall through.
- Use a framing square to ensure the outer rim or frame is perfectly 90 degrees at every corner.
Managing Thermal Expansion in Heavy Steel Assemblies
Strategies to prevent warping during the welding process involve using tack welds and alternating patterns to maintain the alignment of the steel. A tack weld is a small, temporary weld used to hold parts in position. In my experience, restorers often rush this step, but it is the most critical part of maintaining precision.
I recommend placing small tacks at the ends of every bar first. Once the entire grid is tacked, check it for flatness using a straightedge. If a bar has pulled out of alignment, it is much easier to grind away a tiny tack weld than it is to fix a full-length bead. After the tacks are secure, move in a “criss-cross” pattern to complete the final welds. This ensures that the pulling force of one weld is offset by the pulling force of another on the opposite side of the frame.
Removing Surface Corrosion and Mill Scale
Preparing raw steel for welding by stripping away oxides and mill scale is essential to ensure deep penetration and a clean, food-safe final finish. Mill scale is the flaky, bluish-black layer of hot-rolled steel that forms during the manufacturing process. It is a poor conductor and will contaminate your welds if not removed.
Chemical vs. Mechanical Stripping for Large Surface Areas
When restoring classic cast iron, I often use electrolysis or evaporative rust removers. For a new steel project, mechanical stripping is usually faster. I use a 4-1/2 inch angle grinder equipped with a flap disc or a wire cup brush to take the steel down to a “bright” finish.
| Method | Best For | Pros | Cons |
|---|---|---|---|
| Flap Disc (60-80 Grit) | Removing Mill Scale | Very fast, leaves a smooth surface | Can remove base metal if not careful |
| Wire Cup Brush | Light Rust/Scale | Follows contours well | Can “smear” grease into the pores of the metal |
| Phosphoric Acid | Deep Pitting | Penetrates into tight spots | Requires thorough rinsing and drying |
| Electrolysis (12V DC) | Complex Shapes | Zero metal loss, very thorough | Slow, requires a large tank and setup |
Achieving a Food-Safe Surface Preparation
Because this grate will be used for cooking, you must be careful about the chemicals you use. If you use a chemical rust remover or a degreaser, you must neutralize the surface afterward. I prefer a simple wash of white vinegar followed by a high-pressure water rinse. Once the steel is clean and dry, it should be welded immediately to prevent “flash rust” from forming. In my shop, I keep a dehumidifier running to protect bare steel surfaces while I work through a long assembly process.
Precision Welding Techniques for Load-Bearing Grates
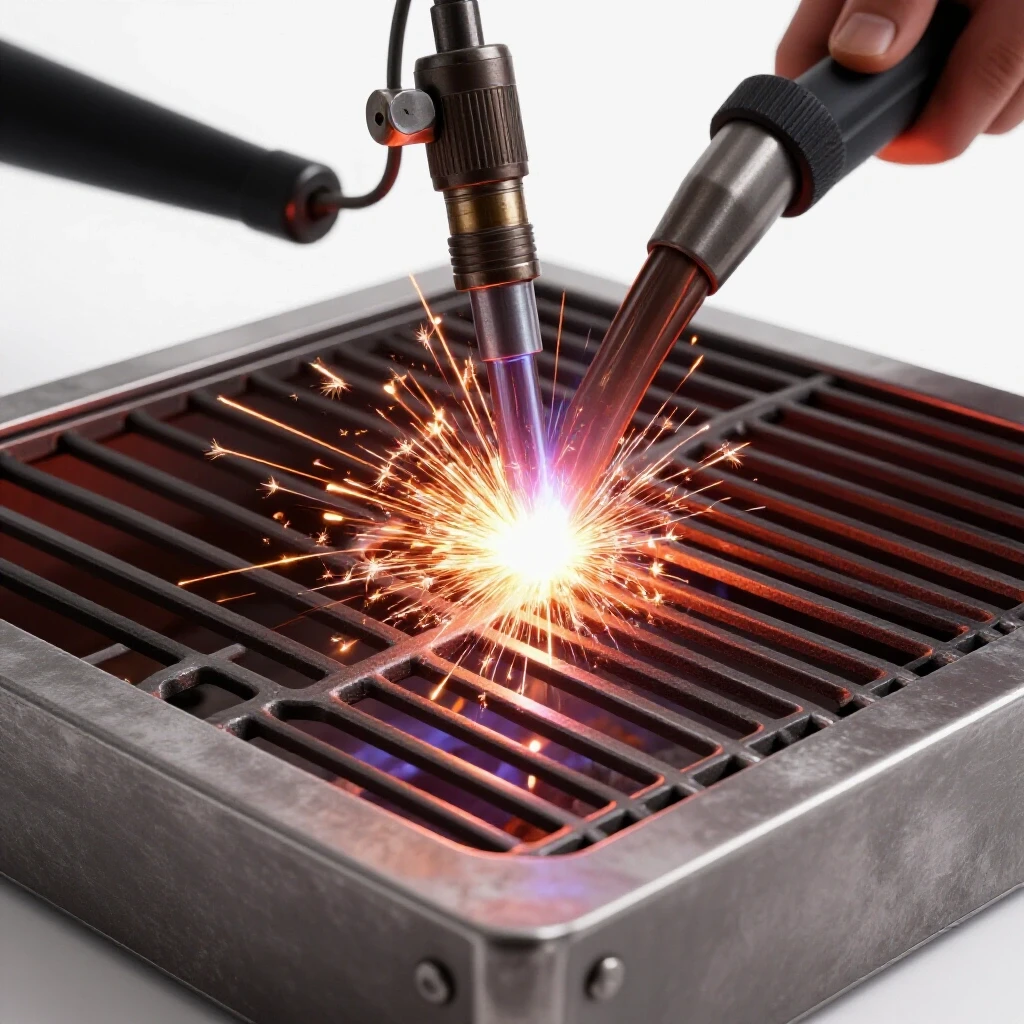
Utilizing MIG or Stick welding allows you to create robust joints between heavy steel bars that can support significant weight under heat. For a project of this scale, I prefer a Stick welder (SMAW) for its deep penetration on thick sections, though a high-output MIG (GMAW) welder is certainly capable if set up correctly.
Selecting the Right Electrode and Voltage for Thick Sections
Matching welding parameters to the thickness of the steel is the only way to ensure full-depth fusion. If you are using 1/2-inch steel bar, you need enough “juice” to melt into the core of the material. For Stick welding, a 1/8-inch 7018 electrode is a fantastic choice. It produces a strong, ductile weld that is resistant to cracking.
- Amperage Settings: Set your welder between 120 and 140 amps for 1/8-inch 7018 rods.
- Arc Length: Keep a tight arc, roughly the diameter of the electrode core.
- Travel Speed: Move slowly enough to allow the puddle to “wet out” into the sides of the joint.
- Angle: Hold the electrode at a 15-degree angle in the direction of travel.
If you are using MIG, ensure you are using a 0.035-inch solid wire with a 75/25 Argon/CO2 shielding gas mix. You will likely need to be in the “Spray Transfer” or high “Globular Transfer” range to get the penetration required for 1/2-inch steel.
Why Seized Cast Iron Screws Crack Under Force—And How to Formulate a Real Thermal Release Plan
While this project uses mild steel, the lessons I’ve learned from seized cast iron are highly relevant. When you weld a grate, the metal expands. If the grate is trapped inside a rigid frame without room to move, the internal stress can actually snap the welds or bow the bars.
Always leave a small gap (about 1/8 inch) between the edge of your grate bars and the outer frame if you are building a “floating” style grate. This allows the metal to expand and contract freely as the fire heats up and cools down. In machinery restoration, we call this “allowance for thermal growth,” and it is the same reason why bridgeport spindles have specific end-play tolerances.
Post-Weld Alignment and Surface Conditioning
The final steps of checking for flatness across the cooking surface and removing weld spatter ensure a smooth, professional finish. Once the welding is complete, the grate will likely have some minor distortions. This is the stage where we apply the “fine-tuning” skills of a tool restorer.
Precision Leveling and Straightening Techniques
I use a 4-foot precision straightedge to check the grate for high spots. If a section has bowed upward due to heat, I use a process called “flame straightening.” By applying heat to the opposite side of the bow and then cooling it quickly with a damp rag, you can “shrink” the metal and pull the grate back into a flat plane.
- Identify the high spot with your straightedge.
- Heat a small “V” shaped area on the high side using an oxy-acetylene torch.
- Once the area is dull red, quench it with a spray of water.
- The contraction will pull the metal back toward the heat source.
Hand-Scraping vs. Power Grinding for Surface Finish
In machinery restoration, hand-scraping is used to create a perfectly flat surface with “pockets” to hold oil. For a cooking grate, we want a similar level of flatness but for a different reason: ease of cleaning. Use a flap disc to grind your welds flush with the surface of the bars. This prevents food from getting trapped in the “valleys” of the weld bead.
I aim for a surface finish that feels smooth to the touch but still has enough “tooth” to hold a layer of seasoning. A 120-grit finish on the top of the bars is usually perfect. This is much coarser than the 10-20 Points Per Inch (PPI) I look for when scraping a lathe bed, but it serves the purpose of this specific tool perfectly.
Food-Safe Finishing and Rust Prevention
Treating the completed steel grate with natural oils creates a seasoned, rust-resistant barrier suitable for cooking. This is the same principle as “bluing” or “black oxide” finishes used on vintage machine handles to prevent corrosion from sweaty hands.
The Seasoning Process for Heavy Steel
Once the grate is clean and smooth, it needs to be “seasoned” immediately to prevent rust. 1. Heat the grate until it is too hot to touch (about 200°F). 2. Apply a thin layer of flaxseed oil or grape seed oil using a lint-free rag. 3. Wipe away the excess so the metal looks damp, not dripping. 4. Increase the heat to 450°F and hold it there for an hour. 5. Allow it to cool slowly. The oil will polymerize, forming a hard, black, non-stick coating.
Long-Term Maintenance and Corrosion Control
Just like a well-oiled lathe, a steel grate requires maintenance. After every use, I recommend scraping away any debris with a wire brush and applying a light coat of vegetable oil while the metal is still warm. If the grate is left out in the rain and develops surface rust, don’t panic. Simply take a wire brush to the affected area and re-season it. The thickness of the 1/2-inch bars ensures that surface rust will not compromise the structural integrity for many decades.
Actionable Tracking Framework for Your Project
To ensure your fabrication goes as smoothly as a machine rebuild, use this checklist to track your progress and maintain high standards.
- Material Inspection: Verify bar stock is straight and free of deep structural cracks.
- Layout Verification: Check grid spacing with a caliper or precision rule.
- Weld Prep: Ensure all joint areas are ground to bright metal (no mill scale).
- Tack Sequence: Apply tacks in a star pattern, checking for flatness after every 4 tacks.
- Final Weld Log: Note the amperage and rod type used for future repairs or modifications.
- Alignment Check: Use a straightedge to ensure no more than 1/16-inch deviation across the span.
- Seasoning Cycle: Complete at least three cycles of oiling and heating for a deep finish.
Conclusion
Restoring old machinery and fabricating new tools are two sides of the same coin. Both require patience, a respect for the properties of metal, and a commitment to precision. By applying the same methodical disassembly, cleaning, and alignment techniques used in vintage machine rescue, you can build a cooking grate that is not just a functional tool, but a piece of workshop history that will last for generations.
The next time you find yourself staring at a seized bolt on a 1950s drill press, remember that the skills you are honing there are the same ones that allow you to build robust, high-quality gear from scratch. Take your time, measure twice, and always respect the heat.
FAQ: Frequently Asked Questions for Heavy Steel Fabrication
Can I use galvanized steel for a cooking grate? Absolutely not. Galvanized steel is coated in zinc, which releases toxic fumes when heated to welding or cooking temperatures. Always use “black” or “mild” raw steel and strip the mill scale yourself.
How do I know if my welds are deep enough? On 1/2-inch steel, you should see a slight “heat tint” or discoloration on the opposite side of the bar from where you welded. This indicates the heat has penetrated through the thickness of the material.
Why did my grate warp even though I tacked it? You likely applied too much heat too quickly during the final pass. Even with tacks, the cumulative shrink force of long weld beads can pull steel. Try “back-stepping” your welds—welding in short 1-inch segments in the opposite direction of your overall travel.
Is expanded metal better than solid bars? Expanded metal is easier to weld but much harder to clean. It also has less thermal mass, meaning it won’t hold a sear as well as 1/2-inch solid bars. For a restorer, solid bars offer a more “machined” and professional look.
What is the best way to remove heavy rust from an old grate I found? If the grate is already built, an electrolysis bath is the most thorough method. Use a manual battery charger (12V), a plastic tub of water, and washing soda (sodium carbonate). This will lift the rust out of the tightest corners without damaging the steel.
Do I need to worry about the “grade” of the mild steel? For this application, standard A36 or “Hot Rolled” mild steel is perfectly fine. You do not need high-carbon or alloy steels, which are harder to weld and more prone to cracking under the rapid temperature changes of a fire pit.
How often should I re-season the grate? Treat it like a cast iron skillet. If the surface starts to look “dry” or orange-ish, it’s time for a new coat of oil and a heat cycle. If you use it regularly, the fats from the food will actually help maintain the seasoning.
Can I weld this with a small 110V hobby welder? It is difficult. 1/2-inch steel acts as a “heat sink,” sucking the heat away from the weld zone. A 110V welder usually lacks the amperage to get a deep, structural bond on such thick material. You would need to pre-heat the steel with a torch to about 300°F before welding.
What should I do if a bar snaps off later? This usually happens due to “cold lap” (lack of fusion). Grind the old weld completely off both the bar and the frame until you see bright metal, then re-weld with higher amperage or a slower travel speed.
How do I ensure the legs are the same length? Clamp all four legs together in a vise and grind the ends until they are perfectly flush. Use a machinist’s square to ensure the legs are welded perfectly perpendicular to the frame.
(This article was written by one of our staff writers, Richard Beaumont. Visit our Meet the Team page to learn more about the author and their expertise.)