Digital vs Analog Dial Calipers for Shop Accuracy (Review)
After seventeen years in industrial maintenance, I have learned that the most expensive tool is not always the best one for the job. In my shop, I have seen high-end machinery fail because of a single poor measurement. When you are standing at a workbench trying to decide between an electronic display and a mechanical needle, the marketing hype does not help. You need to know how that tool will perform when it is covered in cutting fluid and metal shavings.
I have spent my career tearing down machines and evaluating their internal components. Whether it is the bedway of a metal lathe or the sliding surface of a precision gauge, the physics of wear remain the same. Many fabricators struggle to choose between modern sensors and traditional gears. They worry that a digital screen might fail or that a dial might lose its zero. This guide is designed to cut through the noise and look at the mechanical reality of these essential measuring instruments.
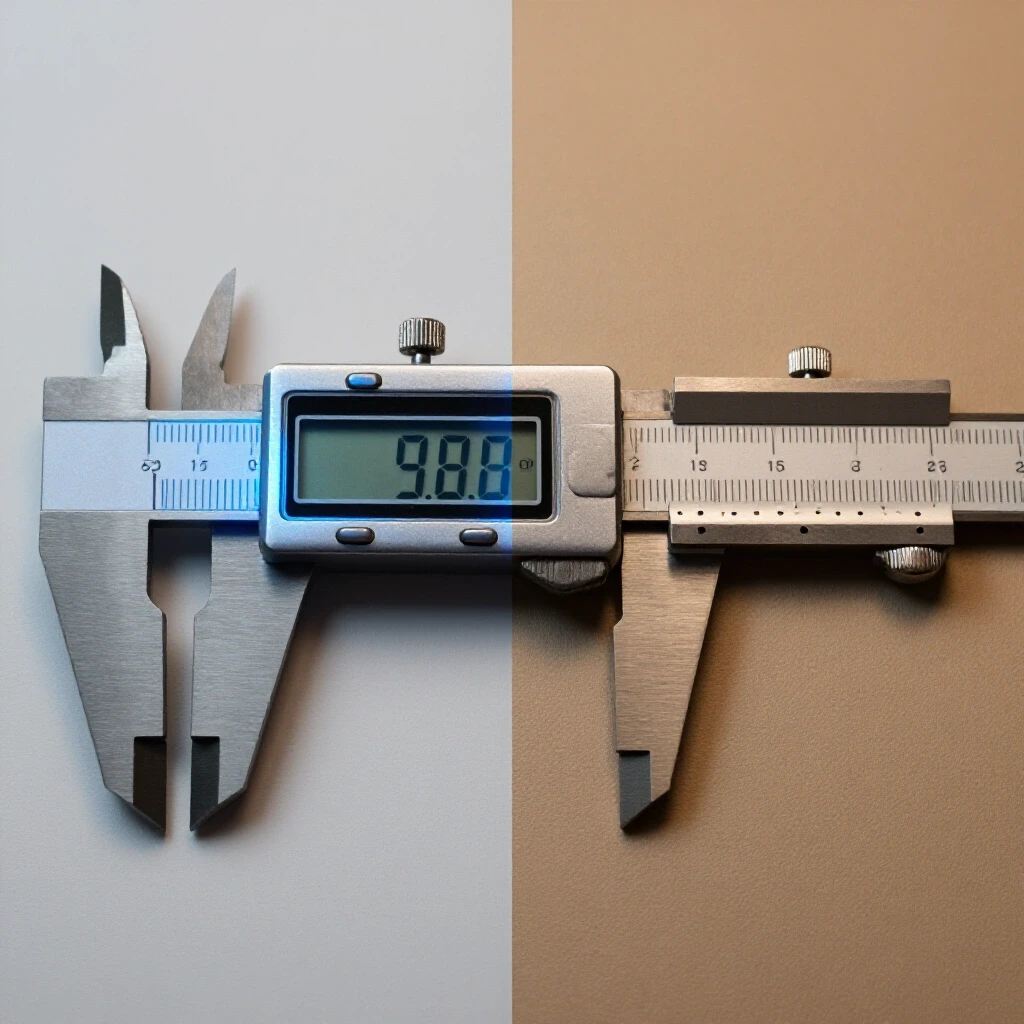
We will look at how these tools are built, how they handle shop debris, and which one provides the most repeatable results for your specific projects. My goal is to help you understand the internal mechanics so you can make a confident investment for your workshop.
The Foundation of Precision Sliding Instruments
Precision sliding gauges rely on a solid frame and a smooth movement to provide accurate data. The backbone of any high-quality measuring tool is the beam, which must be made from hardened materials to resist bending and wear over time. If the frame flexes even slightly, your measurements will be useless for high-tolerance work.
When I evaluate a tool, I start with the material. Most professional-grade instruments use hardened stainless steel. This is critical because it resists corrosion from coolant and sweat. In my experience, cheaper tools often use softer alloys that can nick or burr easily. A single burr on the track can cause the sliding jaw to jump, leading to errors in your readings. You want a tool that feels substantial in your hand and moves without any gritty sensation.
Hardened Stainless Steel vs. Plated Frames
The choice of material determines how well the tool will maintain its accuracy after years of sliding back and forth. Hardened stainless steel is the industry standard because it provides a stable surface for the measuring scales, whether they are etched for a sensor or cut for a gear rack.
Plated frames are often found on budget options. These tools might look shiny, but the plating can flake off over time. Once the plating fails, the underlying metal is exposed to moisture and friction. This leads to uneven wear and “sticky” spots in the travel. When you are measuring a part for a press-fit assembly, any hesitation in the tool’s movement can lead to a false reading. I always recommend looking for a ground finish on the beam to ensure the best possible sliding action.
The Role of Torsional Stiffness in Measurement
Torsional stiffness refers to the tool’s ability to resist twisting when pressure is applied to the measuring jaws. If the beam is too thin, the jaws can splay outward, which creates an error known as Abbe error. This is a common problem when measuring large diameters or deep bores.
In a heavy-duty shop environment, you need a beam with a thick cross-section. This thickness provides the rigidity necessary to keep the jaws parallel. I often perform a “flex test” by applying light pressure to the tips of the jaws while the tool is locked. A high-quality instrument will show almost no movement. This stiffness is what allows you to trust the tool when you are working on critical engine components or structural fabrications.
Resolution and Repeatability in the Metal Shop
Resolution is the smallest increment that a tool can display, while repeatability is the ability of the tool to give the same result every time you measure the same part. These two metrics are often confused, but they are both vital for ensuring your parts fit together correctly.
In my testing, I look for how well a tool returns to zero after multiple measurements. If you open the jaws and close them five times and get five different numbers, the tool is unreliable. Digital sensors often boast a higher resolution, sometimes down to half a thousandth of an inch. Mechanical dials usually show increments of one thousandth. However, a high resolution is only useful if the tool’s mechanical construction can support that level of precision without drifting.
Electronic Sensors and Half-Thousandth Increments
Electronic measuring tools use a capacitive sensor to track the position of the sliding jaw. This technology allows the tool to toggle between units and provide a very fine resolution, often 0.0005 inches. This is helpful when you are trying to hit a very tight tolerance on a lathe.
The benefit of a digital readout is that it removes the guesswork of reading a needle. You get a clear number on the screen. However, this electronic precision depends on the scale remaining clean. If oil or dust gets between the sensor and the scale, the numbers may “jump” or flicker. In a clean assembly room, this is rarely an issue, but in a grinding bay, it requires constant attention to keep the tool functioning correctly.
Mechanical Dial Graduations and One-Thousandth Precision
Mechanical dial instruments use a rack-and-pinion system to turn a physical needle. Most of these tools are graduated in 0.001-inch increments. While this might seem less precise than a digital screen, it is often more than enough for most fabrication tasks. The human eye is very good at seeing where a needle sits between two marks.
The beauty of a dial is its analog nature. You can see the needle move in real-time as you apply pressure. This gives you a “feel” for the measurement that a digital screen cannot replicate. If a part is slightly out of round, the needle will sweep back and forth, giving you a visual representation of the error. This is similar to how a machinist uses a dial indicator to check for spindle runout on a mill or lathe.
| Feature | Electronic Sensor Tool | Mechanical Dial Tool |
|---|---|---|
| Resolution | 0.0005 in / 0.01 mm | 0.001 in / 0.02 mm |
| Repeatability | High (if clean) | High (if gears are clear) |
| User Feedback | Static Number | Real-time Needle Sweep |
| Power Source | Battery Required | None (Fully Mechanical) |
| Zeroing | Instant Button Press | Rotating Dial Bezel |
Readability and Visual Accuracy Under Shop Lighting
Reading a tool quickly and accurately is essential when you are in the middle of a complex job. Shop lighting is often poor, and shadows can make it difficult to see fine lines or small needles. You need a tool that minimizes the chance of a reading error.
I have spent many hours under flickering fluorescent lights trying to read a measurement. If you have to squint or move to a different light source, you are wasting time and increasing the risk of a mistake. Digital screens offer high contrast, but they can be prone to glare. Dial faces are easy to read from a distance, but they are susceptible to parallax error, which occurs when you look at the needle from an angle.
High-Contrast LCDs and Glare Reduction
Modern electronic tools feature large LCD screens with high-contrast digits. This makes them very easy to read in low-light conditions. Some even include a “hold” function that freezes the measurement on the screen so you can pull the tool out of a tight spot to read it.
The main drawback of these screens is the protective plastic cover. In a shop environment, this plastic can get scratched or clouded by chemicals. Once the screen is damaged, it becomes much harder to read. I always check the quality of the screen housing to ensure it is recessed slightly. This helps protect the display from accidental impacts against metal workpieces.
Parallax Error and Dial Face Clarity
Parallax error happens when the needle is set slightly above the dial face. If you look at the dial from the left or right, the needle appears to point to a different number. To get an accurate reading, you must look directly down at the face of the tool.
Despite this, many experienced machinists prefer dials because they do not require batteries. There is nothing more frustrating than reaching for a tool and finding a dead screen. A dial is always ready to work. Most high-quality dials use a white or black face with crisp, high-contrast markings. Some even use a color-coded system to help you track how many full revolutions the needle has made, which prevents “one-revolution” errors.
Environmental Resilience and Mechanical Failure Points
The shop is a hostile environment for precision instruments. Metal chips, oily mist, and fine dust are always present. How a tool handles these contaminants determines its long-term value. I have seen both digital and dial tools fail for very different reasons.
In my maintenance work, I often have to clean and repair measuring tools that have “seized up.” Usually, this is due to a lack of protection for the internal components. A tool that works perfectly on a clean desk might fail within a week on a welding bench. Understanding these failure points will help you choose the right tool for your specific environment.
The Vulnerability of the Gear Rack
Mechanical dial tools rely on a tiny gear rack that runs along the length of the beam. This rack is the tool’s greatest strength and its biggest weakness. The gears provide a direct physical connection to the measurement, but they are open to the environment.
If a tiny shard of metal or a grain of grinding dust gets into those gear teeth, the tool will “skip.” You will feel a crunching sensation, and the needle will no longer return to zero. While some tools have a “covered rack” design to minimize this, they are never completely sealed. If you work in an environment with a lot of fine metal dust, a dial tool requires constant cleaning to prevent permanent damage to the brass gears.
Electronic Sensor Sensitivity to Fluids
Electronic tools do not have gears to get clogged, which makes them feel smoother over time. However, their capacitive sensors are very sensitive to liquids. If cutting fluid or oil gets onto the scale, it can create a bridge between the sensor elements. This causes the display to show random numbers or “frozen” readings.
Some higher-end electronic tools are rated for water and oil resistance (IP ratings). These tools use inductive sensors that can read through a film of oil without losing accuracy. If you are working on a CNC machine where parts are constantly soaked in coolant, an oil-resistant digital tool is almost a necessity. Without that protection, you will spend more time wiping the scale than actually measuring parts.
- Dial Failure Mode: Gear teeth clogging, needle jumping, rack damage.
- Digital Failure Mode: Battery failure, screen flickering, oil interference on the scale.
- Common Fix: Wiping the beam with a lint-free cloth and a drop of light oil.
- Prevention: Always store tools in a padded case when not in use.
Measuring Dynamics: Inside, Outside, and Depth
A versatile tool must be able to measure more than just the thickness of a plate. You need to measure the diameter of a hole, the width of a slot, and the depth of a pocket. Each of these functions places different stresses on the tool’s mechanics.
I pay close attention to the grinding quality of the internal and external jaws. On lower-quality tools, the jaws may not be perfectly flat or parallel. This leads to “point loading” where the measurement changes depending on where the part is placed between the jaws. When checking the depth of a blind hole, the smoothness of the depth rod is also critical.
Depth Rod Consistency and Fluidity
The depth rod is a thin strip of metal that extends from the end of the beam. It is used to measure how deep a hole or a step is. In my shop, I use this frequently to check the depth of counterbores. The rod must be perfectly straight and move without any friction.
On some tools, the depth rod is a flat bar, while on others, it is a round pin. Flat bars are generally more stable and less likely to bend. When you extend the rod, there should be no “play” or wobbling. If the rod is loose, it can tilt inside the hole, giving you a measurement that is longer than the actual depth. This is a common mechanical failure in tools that have been dropped or mistreated.
Internal Jaw Alignment for Bore Measurements
Measuring the inside of a tube or a machined hole requires the top jaws of the tool. These jaws are ground to a sharp edge so they can fit into small openings. If these edges are dull or misaligned, you will get an undersized reading.
I test this by closing the tool and holding it up to a light source. You should see no light passing through the internal jaws. If you see a gap, the tool is not zeroed correctly for internal measurements. This alignment is a result of the factory grinding process. It is one of the key differences between a tool built for high-level machining and one built for general DIY use.
Maintenance and Longevity for the Long-Term Shop
A precision tool should last for decades if it is cared for properly. However, even the best tools will wear out if they are not maintained. I look at how easy a tool is to adjust and clean when I am making a recommendation.
Wear usually occurs on the sliding surfaces and the gibs. Gibs are small adjustment strips that control the tension between the sliding jaw and the beam. If the tool feels too loose, you can tighten the gib screws to take up the play. If it feels too tight, you can loosen them. A tool that lacks these adjustment points is essentially a “disposable” instrument.
Wear on the Sliding Surfaces and Gib Adjustments
Every time you slide the jaw, a tiny amount of metal is worn away. Over years of use, this can lead to “slop” in the mechanism. High-quality tools feature adjustable gibs, usually held in place by small set screws on the top of the sliding carriage.
I recommend checking these screws every few months. You want enough tension so that the jaw doesn’t move on its own, but not so much that it binds. If you find that you have to constantly adjust the tension, it may be a sign that the beam or the carriage is no longer flat. In my experience, keeping the sliding surfaces clean and lightly oiled is the best way to prevent this wear from happening in the first place.
The Impact of Shop Vibrations on Tool Accuracy
If you store your tools on a workbench that is constantly vibrating from a nearby mill or lathe, it can affect the mechanical components. For dial tools, constant vibration can cause the needle to drift or the gears to wear prematurely. For digital tools, it can cause the battery contacts to loosen over time.
I always advise keeping precision instruments in a dedicated drawer or a padded box. This protects them from both physical impacts and the “micro-vibrations” of a busy shop. When I am diagnosing a machine with high runout, I need to know that my measuring tools are not adding their own errors to the equation. A well-protected tool is a reliable tool.
Actionable Inspection Checklist for Measuring Tools
Before you commit to a new instrument, you should perform a few basic checks. These tests will help you identify if the tool meets the standards required for your workshop.
- The Light Test: Close the jaws and hold them up to a bright light. Look for any gaps between the measuring surfaces.
- The Repeatability Test: Measure a known object (like a gauge block or a high-quality drill bit) five times. The reading should be identical every time.
- The Feel Test: Slide the jaw slowly from one end to the other. It should feel smooth, with no gritty spots or changes in resistance.
- The Zero Test: Open the tool to its full length and close it quickly. It should return exactly to 0.000 or the zero mark on the dial.
- The Flex Test: Lock the carriage and gently try to wiggle the jaws. There should be minimal movement.
- The Depth Rod Check: Extend the depth rod and ensure it is straight and firmly attached to the carriage.
Summary of Mechanical Trade-offs
Choosing between an electronic sensor and a mechanical dial comes down to your environment and your personal preference. Neither is “perfect,” but one will likely suit your workflow better than the other.
If you work in a clean environment and need to switch between inches and millimeters frequently, the electronic tool is the clear winner. Its high resolution and easy-to-read screen make it a favorite for modern fabricators. However, you must be prepared to manage batteries and keep the scale clean.
If you work in a dirty, oily shop or simply prefer a tool that never needs a battery, the mechanical dial is a workhorse. It provides excellent visual feedback and can handle a bit more environmental abuse, provided you keep the gear rack clear of large chips. It is a classic design that has proven its worth over decades of industrial use.
Regardless of which technology you choose, focus on the build quality. Look for hardened stainless steel, a thick beam, and adjustable gibs. These mechanical features are what ensure the tool will remain accurate long after the “new tool” smell has faded.
Frequently Asked Questions
Which tool is more accurate for general metalworking? Both can be equally accurate if they are well-made. A dial tool usually measures to 0.001 inches, while an electronic one often goes to 0.0005 inches. For most shop tasks, like checking stock size or measuring a bolt, 0.001 inches is more than enough precision.
Do electronic tools fail more often than dial tools? Electronic tools have more “failure points” like batteries and circuit boards, but they have fewer moving parts to wear out. Dial tools are purely mechanical, but their gears are very sensitive to dust and chips. In a very dirty shop, a dial tool might actually require more maintenance.
Can I use these tools to check for spindle runout? While you can use them to measure the diameter of a spindle at different points, they are not designed to measure Total Indicated Runout (TIR). For that, you need a dedicated dial indicator and a magnetic base. These sliding tools are best for linear dimensions like length, width, and depth.
What happens if I drop my dial tool? Dropping a dial tool often results in the needle “jumping” a tooth on the gear rack. This means the tool will no longer return to zero. You can sometimes fix this by rotating the bezel, but if the internal gears are bent, the tool may lose its accuracy across its entire range.
Are electronic tools waterproof? Only if they have a specific IP (Ingress Protection) rating, such as IP67. Standard electronic tools can be damaged by a single drop of water or coolant getting into the housing. If you work around fluids, always look for a rated “coolant-proof” model.
How often should I oil my measuring tools? You should apply a very light coat of high-quality instrument oil to the beam once a week, or more often if you work in a humid environment. Wipe off any excess so that dust doesn’t stick to the oil. Never use heavy grease, as it will gum up the mechanism.
Why does my digital screen flicker? Flickering is usually a sign of a low battery or a dirty scale. Try cleaning the beam with a dry, lint-free cloth first. If that doesn’t work, replace the battery with a high-quality silver-oxide cell rather than a cheap alkaline one.
Is a “covered rack” on a dial tool worth it? Yes. A covered rack protects the delicate gear teeth from the majority of shop debris. It significantly extends the life of the tool in a grinding or machining environment.
How do I know if my tool is worn out? If you can see light through the jaws when they are closed, or if the sliding carriage feels “sloppy” even after adjusting the gibs, the tool has reached the end of its precision life. At that point, it may still be fine for rough carpentry, but it should not be used for precision metalwork.
Why is my dial needle not pointing straight up at zero? This is normal. Most dial tools allow you to rotate the outer ring (the bezel) to align the zero mark with wherever the needle happens to land when the jaws are closed. This allows you to compensate for small amounts of dust or temperature changes.
(This article was written by one of our staff writers, Steven Brooks. Visit our Meet the Team page to learn more about the author and their expertise.)