How to Build a Mobile Rolling Pipe and Bar Stock Cart (Plan)
Nothing stops a project faster than tripping over a ten-foot stick of square tubing that has been leaning against your workbench for three weeks. In my early years as a prototype technician, I spent more time moving material out of my way than I did actually welding. I remember one specific Saturday when I was building a custom utility trailer frame. I had my pieces laid out on the floor, but because I didn’t have a dedicated place for my raw stock, I was constantly shuffling heavy bars around. By the time I finally started welding, I was tired and rushed the corner joints. The result was a frame that looked more like a diamond than a rectangle. That day taught me that a shop is only as efficient as its organization.
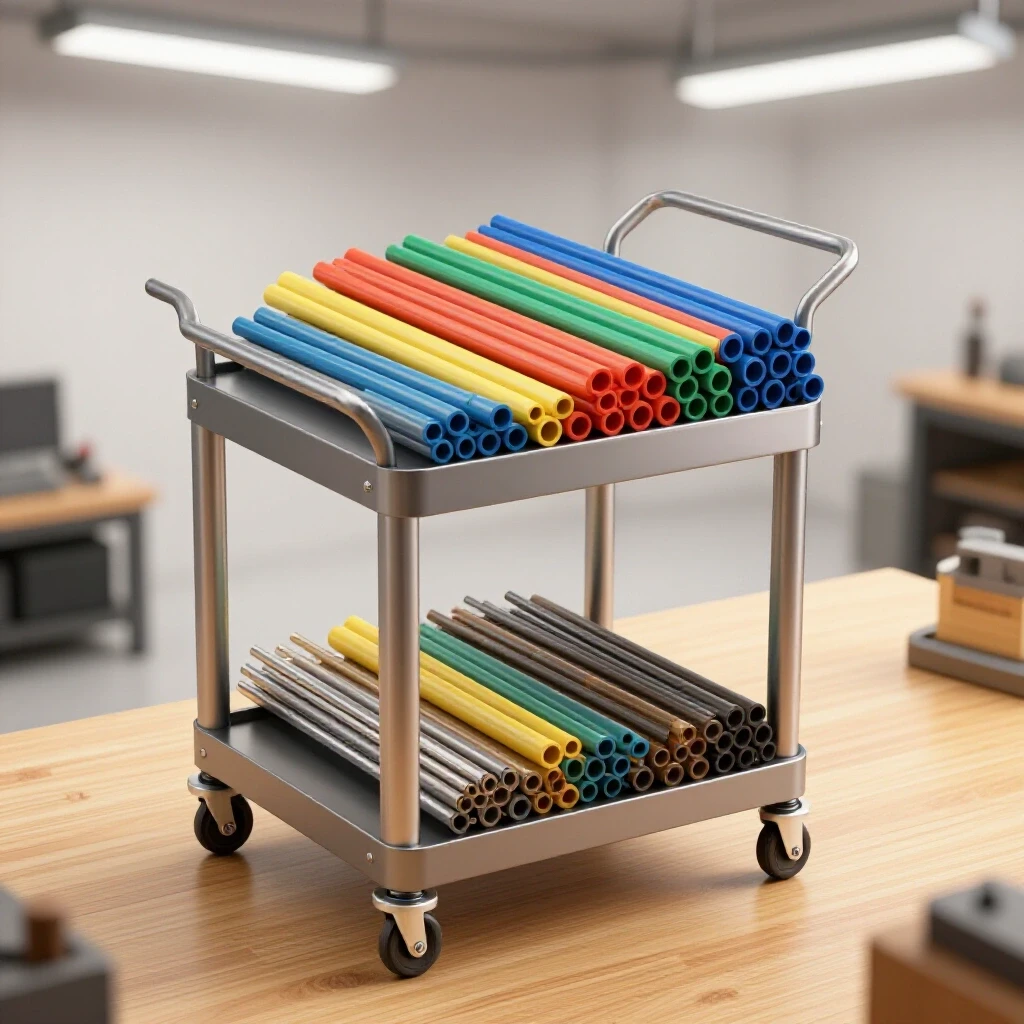
Fabricating a heavy-duty material storage rack is often the first “real” project a builder takes on to improve their workflow. It requires more than just sticking two pieces of metal together. You have to account for the weight of the steel, the precision of your layout, and the inevitable way metal moves when you hit it with an arc. If you have ever watched a perfectly square frame pull itself into a “banana” shape as it cools, you know the frustration I am talking about. This guide focuses on the practical steps to build a reliable, wheeled organizer that stays straight and square from the first cut to the final weld.
Why Precision Planning Prevents Workshop Chaos
Planning a fabrication project involves more than a rough sketch on a napkin; it requires a detailed cut list and a clear understanding of your workspace. By identifying every component before you strike an arc, you reduce waste and ensure that your material yield is maximized. This phase sets the stage for a successful, square build.
When I start a new build, I always begin with a “Master Cut List.” This is a document that lists every piece of steel I need, its length, and the angle of its cuts. For a rolling storage unit, you are looking at a base frame, vertical uprights, and horizontal arms. I suggest using 2-inch square tubing for the main structure. It provides a good balance between weight and rigidity. If you are working in a small garage, every inch of steel counts. I once miscalculated a cut list for a set of workshop fixtures and ended up three inches short on a twenty-foot stick of tubing. That mistake cost me an extra trip to the steel yard and twenty dollars in fuel.
Calculating Kerf and Material Yield for Steel Organizers
Kerf is the width of the material removed by your cutting tool, such as a saw blade or a torch. Failing to account for this 1/16th to 1/8th of an inch can result in a frame that is cumulatively short by an inch or more. Understanding kerf is essential for maintaining tight dimensional tolerances.
Most DIY builders use a dry-cut saw or a traditional abrasive chop saw. An abrasive blade usually has a kerf of about 1/8 inch. If you have ten cuts to make on a single stick of steel, you will lose over an inch of material just to the blade. I always mark my measurements, then cut on the “waste side” of the line. This ensures the finished piece is exactly the length I intended.
| Cutter Type | Typical Kerf Width | Best Use Case |
|---|---|---|
| Cold Saw | 0.080″ – 0.100″ | High precision, cool touch |
| Bandsaw | 0.025″ – 0.040″ | Minimal waste, slower speed |
| Abrasive Saw | 0.125″ | Fast, creates heat and dust |
| Plasma Cutter | 0.040″ – 0.060″ | Non-linear or thick plate cuts |
Preparing Square Stock for Accurate Layouts
Preparation is the process of cleaning and deburring your cut pieces so they fit together without gaps. A clean joint is the only way to ensure your weld penetrates deeply and your measurements stay true. Removing mill scale and burrs is a non-negotiable step for any serious fabricator.
After I make my cuts, I use a flap disc on an angle grinder to remove the mill scale around the weld zone. Mill scale is that dark, flaky coating on hot-rolled steel. If you try to weld through it, you will end up with a brittle, porous bead. I also take a file to the inside of the tubing to remove the internal burr. If that burr stays there, your pieces won’t sit flush against each other. In my experience, a 1/16-inch gap caused by a burr can lead to a 1/4-inch error across the length of a five-foot frame.
Mastering the Layout: Squaring the Base Frame
The base frame is the foundation of your entire project, and if it isn’t square, nothing else will be. Layout involves using physical markers and measurement techniques to position your steel before tacking. A square base ensures that the uprights will stand vertically and the wheels will roll straight.
I prefer to do my layout on a flat concrete floor if I don’t have a large enough welding table. I use the “3-4-5 rule” to check for squareness. This is a simple geometry trick where you measure 3 feet on one side, 4 feet on the other, and the diagonal should be exactly 5 feet. If it’s not, the corner isn’t 90 degrees. Even a small error here will be magnified once you start adding the tall uprights for your material rack. I once built a cart where the base was off by just 1/8th of an inch. By the time I reached the top of the four-foot uprights, they were leaning nearly an inch to the left.
Using Workshop Jigs and Fixtures for Alignment
Jigs are temporary tools or frames used to hold your workpieces in the exact position needed for welding. They act as an extra set of hands and prevent the metal from shifting during the tacking process. Simple jigs can be made from scrap angle iron or heavy-duty magnets.
For a project like this, I often clamp “L-shaped” scrap blocks to my work surface. These blocks act as a corner jig. I can slide my tubing into the corner, clamp it down, and know that it is held at 90 degrees. You can also use heavy-duty welding magnets, but be careful. Magnets can cause “arc blow,” which deflects your welding arc and makes the bead messy. I prefer mechanical clamps whenever possible.
- Use C-clamps or F-clamps every 12 to 18 inches.
- Ensure the clamp pressure is firm but not so tight that it bows the tubing.
- Check squareness after every clamp is tightened.
- Place a spacer under the joints if you are welding on a floor to allow for heat dissipation.
The Critical Role of Tack Weld Sizing
A tack weld is a small, temporary weld used to hold components in place before the final beads are laid. The size and placement of these tacks determine how much the metal will move when the full heat of the weld is applied. Tacks must be strong enough to resist the pull of cooling metal.
I typically use tacks that are about 1/4 inch long. For 2-inch square tubing, I place one tack in the center of each of the four sides of the joint. I never weld a full side until the entire frame is tacked and checked for square. If I find an error, a 1/4-inch tack is easy to cut with a thin zip-wheel on a grinder. A full weld, however, requires a lot of “surgical” grinding to fix. I’ve spent hours undoing full welds because I was too confident in my initial layout.
Managing Thermal Distortion through Strategic Weld Sequencing
Weld sequencing is the specific order in which you apply welds to a structure to balance the forces of heat shrinkage. As steel cools, it contracts, pulling the connected pieces toward the weld. By sequencing your welds correctly, you can use these pulling forces to cancel each other out.
When you weld a joint, the metal reaches several thousand degrees. As it cools back to room temperature, it shrinks. If you weld the entire top of a frame first, the cooling metal will pull the ends of the frame upward. To combat this, I use a “staggered” approach. I weld one corner, then move to the opposite corner of the frame. This distributes the heat evenly across the entire structure.
| Sequencing Strategy | How it Works | Result |
|---|---|---|
| Back-stepping | Welding in short sections toward the start | Reduces overall longitudinal pull |
| Opposing Pairs | Welding side A, then immediately side B | Cancels out angular distortion |
| Intermittent Tacking | Heavy tacks every 2 inches | Holds the joint rigid during cooling |
| Heat Sinking | Placing heavy copper or steel blocks nearby | Pulls heat away from the weld zone |
Why Weld Shrinkage Warps Square Structures
Thermal expansion and contraction are physical realities that cannot be ignored. When you heat one side of a tube, that side expands. When it cools, it shrinks more than it expanded, creating a permanent bend. This is often called “angular pull.”
Think of the weld bead as a very strong rubber band. As it cools, it “tightens” and pulls the two pieces of metal together. If you only weld on the outside of a corner, the joint will close up, becoming less than 90 degrees. To prevent this, I always weld the inside of the corner first, or I use a heavy clamp to “over-set” the joint by about 1 degree. This way, when the weld pulls, it pulls the joint perfectly into square.
Executing the Staggered Weld Pattern
The staggered pattern is the most effective way to keep a large frame straight. It involves jumping from one side of the project to the other, allowing one area to cool while you work on another. This prevents any single area from becoming a “heat soak” that causes massive warping.
- Weld the top of the front-left corner.
- Move to the top of the back-right corner.
- Weld the top of the front-right corner.
- Move to the top of the back-left corner.
- Flip the frame and repeat the sequence for the bottom sides.
- Wait for the metal to be cool enough to touch before removing your clamps.
Vertical Alignment and Arm Placement for Material Racks
Once the base is solid, the next challenge is ensuring the vertical uprights stay perfectly plumb. These uprights will carry the weight of your steel stock, so they must be welded securely and aligned accurately. Even a slight tilt in an upright will make the storage arms uneven.
I use a magnetic level to check for “plumb” (verticality) in two directions. First, I check from front to back, then from side to side. I tack the upright at the base, check the level, and then use a “cheater pipe” to gently nudge the upright if it’s leaning. Once it is perfectly vertical, I add three more tacks around the base. This is where a second pair of hands is very helpful, but you can do it alone with good clamping and a steady eye.
Squaring Uprights with Temporary Bracing
Temporary bracing involves welding small scraps of metal to hold a component in place while the main welds are completed. These braces act as a rigid skeleton that prevents the heat of the main welds from pulling the uprights out of alignment.
If I am working on a tall rack, I will often tack a piece of angle iron diagonally from the base to the upright. This creates a triangle, which is the strongest shape in fabrication. With the diagonal brace in place, I can weld the base of the upright with full heat, knowing it won’t move. Once the weld is cool, I simply grind off the small tacks holding the brace and move it to the next upright. It adds a few minutes to the build, but it saves hours of trying to straighten a leaning post later.
Setting Arm Intervals for Varied Stock Sizes
The arms are the horizontal pieces that actually hold your pipe and bar stock. They need to be spaced appropriately to hold everything from 20-foot sticks to 3-foot remnants. I find that a spacing of 12 to 18 inches between arms works best for most home shops.
I use a “story pole” to mark the arm heights. A story pole is just a scrap piece of wood or metal where I have marked the exact locations for every arm. I hold this up to each upright and transfer the marks. This ensures that the arm on the left upright is at the exact same height as the arm on the right upright. If they are off by even 1/4 inch, your steel stock will rattle and won’t sit flat.
- Mark arm heights from the bottom up.
- Use a square to ensure each arm is at 90 degrees to the upright.
- Tack the top of the arm first, as the weld will pull the arm upward.
- Check the horizontal level of the arm before finishing the weld.
Final Assembly and Mobility Considerations
The final stage of the build involves adding the mobility components. A material rack is only useful if you can move it around your shop to wherever you are working. This requires a rigid base and high-quality casters that can handle the weight of solid steel bars.
I always place my casters as close to the corners of the base frame as possible. This provides the widest footprint and the most stability. If you tuck the wheels too far under the frame, the rack becomes “tippy” when you load the top shelves. I use swivel casters on all four corners for maximum maneuverability in tight garage spaces. I’ve used fixed casters on one end before, and while it’s easier to push in a straight line, it’s a nightmare to parallel park against a wall.
Caster Mounting and Base Rigidity
Casters should be bolted to mounting plates rather than welded directly to the frame. This allows you to replace a damaged wheel easily in the future. I weld 1/4-inch thick steel plates to the bottom corners of the frame, drill holes, and then bolt the casters through those plates.
To ensure the base doesn’t “diamond” or twist under load, I often add a diagonal gusset to the corners. A gusset is a triangular piece of plate steel that reinforces a joint. By welding a 3-inch gusset into each corner of the base, you significantly increase the frame’s resistance to twisting. This is especially important if your shop floor is uneven. A rigid frame will keep all four wheels on the ground, whereas a flexible frame will let one wheel lift, making the rack unstable.
Post-Weld Alignment and Straightening Techniques
Even with the best sequencing, some distortion is likely. Post-weld alignment is the process of checking the finished structure and making minor corrections. This can involve “flame straightening” or using mechanical force to bring a piece back into square.
If an arm has pulled upward too much, I sometimes use a technique called “heat shrinking.” I take an oxy-acetylene torch and heat a small spot on the side I want the metal to move toward. As that spot cools, it shrinks and pulls the metal back into position. It’s a bit of an art form, but it’s a vital skill for a custom fabricator. Most of the time, however, a heavy dead-blow hammer and a bit of patience are all you need to make those final 1/16th-inch adjustments.
- Check the total height of all arms.
- Verify the distance between uprights at the top and bottom.
- Ensure the cart rolls without wobbling.
- Check for any sharp edges or “cold” welds that need a second pass.
Building for the Long Haul
Fabricating your own workshop equipment is a rite of passage. It’s about more than just saving money; it’s about creating a tool that fits your specific needs and learning the physics of metal along the way. I’ve built dozens of these types of organizers over the last 13 years, and every one of them taught me something new about heat control and layout precision.
The key is to respect the material. Steel is a living thing when it gets hot. It moves, it breathes, and it pulls. If you try to fight it with brute force, you will lose. But if you use the strategies we’ve discussed—accurate kerf calculations, rigid fixturing, and smart weld sequencing—you can guide the metal into the shape you want. When you finally load those first few sticks of tubing onto your new rack and wheel it effortlessly across the shop, you’ll know that the extra time spent on the layout was worth every second.
FAQ: Common Challenges in Metal Rack Fabrication
Why does my frame warp even when I use clamps? Clamps hold the metal in place, but they don’t stop the internal stresses of the weld. When you release the clamps, the metal “relaxes” into a warped shape. To prevent this, use more tacks and a staggered weld sequence to balance the heat.
What is the best way to ensure my uprights are perfectly vertical? Use a magnetic bubble level or a laser level in two planes. Tack the base on one side, check for plumb, adjust, and then tack the opposite side. Use temporary diagonal braces for the final welds.
How much weight can a DIY rolling rack typically hold? This depends on your material choice and weld quality. Using 2-inch square tubing with 1/8-inch wall thickness and 5-inch heavy-duty casters is a standard setup for most home shops. Always ensure your welds have full penetration.
Can I build this without a welding table? Yes, you can use a flat concrete floor. Use spacers (like scrap 1/4-inch plate) under your joints to keep the heat from being sucked into the concrete and to prevent the concrete from popping due to moisture expansion.
What should I do if a weld pulls a joint out of square? If it’s a small error, you can often “cold bend” it back with a long lever or a heavy hammer. If it’s a large error, you may need to cut the weld with a zip-wheel, realign, and re-weld using a better sequence.
Why are my tacks cracking when I start the main weld? Your tacks might be too small or “cold.” Ensure your tacks have good penetration and are at least 1/4 inch long. If the tack is just a surface blob, the stress of the main weld will snap it instantly.
How do I choose between swivel and fixed casters? For a material rack in a small shop, four swivel casters provide the best mobility. If you plan on moving the rack long distances over rough ground, two fixed and two swivel casters will track better.
What is the “waste side” of a cut? When you mark a line on steel, the blade has thickness (kerf). You should position the blade so that it eats into the part of the steel you aren’t using, leaving your measured piece at the exact length.
Do I really need to remove mill scale? Yes. Mill scale is an insulator and contains impurities. Welding over it leads to poor arc stability and can cause the weld to fail under the weight of your material.
How can I prevent the arms from sagging over time? Ensure the arms are welded on at least three sides (top and both sides). Adding a small triangular gusset under each arm provides significant extra support and prevents the weld from fatiguing.
What is arc blow, and how do I avoid it? Arc blow is when your welding arc wanders or spatters due to magnetic fields. This often happens near large magnets. If you experience this, move your ground clamp closer to the weld or switch from magnets to mechanical clamps.
How do I know if my weld has “penetrated” the metal? Look at the back side of the joint if possible. You should see a slight discoloration or a small bead of metal (the “root”) showing through. If the weld looks like it’s just sitting on top of the metal, it’s a “cold” weld and won’t hold.
(This article was written by one of our staff writers, Robert Kline. Visit our Meet the Team page to learn more about the author and their expertise.)