How to Choose the Optimal Height for a Welding Table (Fix)
When I first started in industrial maintenance 17 years ago, I spent a lot of time fixing machines that were perfectly fine on paper but failing in the field. I saw cast iron beds warped from poor heat treating and spindle bearings burned out because of improper preload. But the most common “failure” I encountered wasn’t in the machines themselves; it was in the interface between the tool and the person using it. I’ve walked into dozens of shops where high-end equipment sat idle because the workstations were so poorly planned that the operators were physically exhausted by noon.
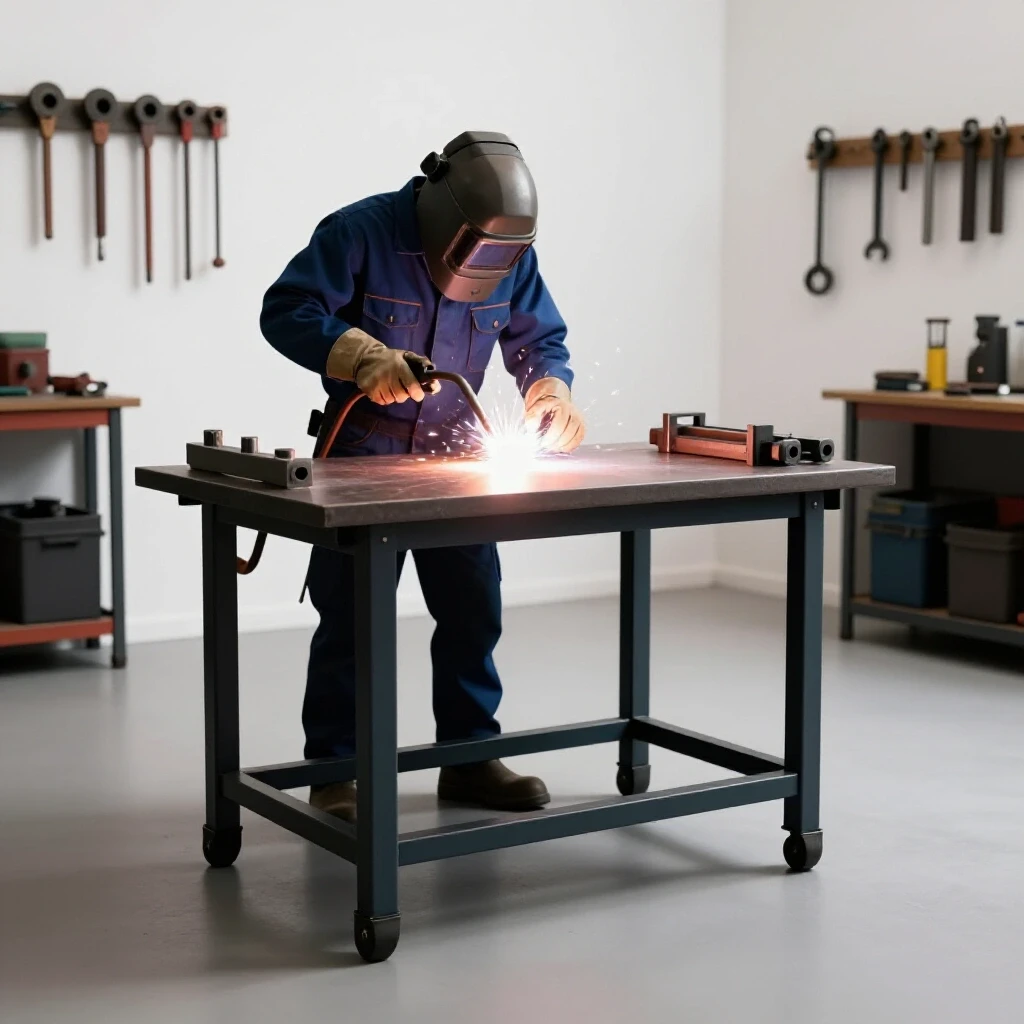
Choosing the vertical position for your primary fabrication surface is a mechanical decision, not a matter of personal preference or “marketing hype.” Much like evaluating the bedway casting grades on a new milling machine, setting your work surface elevation requires looking at the physics of the task and the dimensions of the operator. If you get this wrong, you aren’t just uncomfortable; you are losing the leverage and stability needed for high-quality metalwork.
The Mechanical Foundation of Workstation Elevation
The vertical placement of a heavy-duty work surface serves as the primary datum for every project you undertake. It is the baseline from which all your measurements and physical movements originate, much like the way a lathe bed provides the reference for the carriage and tailstock.
In my years of conducting machine tool reviews and comparing shop layouts, I have found that most people default to a “standard” height of 36 inches. This is often a mistake. A standard height assumes a standard person and a standard task, neither of which exists in a custom fabrication environment. When you are choosing workshop machinery or building out a new station, you have to look at the “total indicated runout” (TIR) of your own body—how much you have to lean, reach, or bend to interact with the workpiece.
A work surface that is too low forces the operator into a constant state of spinal flexion. This isn’t just about a sore back; it’s about losing the fine motor control in your hands because your core is struggling to stabilize your weight. Conversely, a surface that is too high forces your shoulders into a shrug, which leads to neck fatigue and reduced visibility of the arc or the cut.
Determining Your Personal Neutral Work Zone
The neutral work zone is the spatial area where your body can perform tasks with the least amount of mechanical stress. To find this, we look at the relationship between your floor and your elbow, which is the pivot point for almost all metalworking activities.
When I evaluate the ergonomics of a shop, I start by having the operator stand naturally with their arms at their sides, then bend their elbows 90 degrees. For most adults, the optimal elevation for general fabrication falls between 34 and 42 inches. This range allows the forearms to remain roughly parallel to the floor, providing a stable platform for guiding a torch or a grinder.
| Operator Height | Suggested Surface Elevation (General Fab) | Suggested Elevation (Heavy Assembly) |
|---|---|---|
| 5’4″ to 5’6″ | 34″ – 36″ | 30″ – 32″ |
| 5’7″ to 5’9″ | 36″ – 38″ | 32″ – 34″ |
| 5’10” to 6’0″ | 38″ – 40″ | 34″ – 36″ |
| 6’1″ to 6’3″ | 40″ – 42″ | 36″ – 38″ |
- Measurement Step 1: Stand in your usual shop boots.
- Measurement Step 2: Measure from the floor to the underside of your elbow.
- Measurement Step 3: For general work, subtract 2 to 4 inches from that measurement.
This “elbow minus” calculation ensures that when you are holding a tool, your hands are at a height that allows for a slight downward pressure without requiring you to hunch. It is the same logic used when setting the height of a lathe’s center—you want the action to happen where your body is strongest.
Task-Specific Vertical Offsets for Metalworking
Different metalworking processes require different levels of physical leverage and visual proximity. A height that works for precision TIG work might be a disaster for heavy-duty grinding or large-scale assembly.
In my teardown testing of various workshop setups, I’ve noticed that “all-purpose” tables often fail because they don’t account for the height of the workpiece itself. If you are building a frame out of 4-inch square tubing, your actual working height is 4 inches higher than the table surface. If your table is already at elbow height, you are now working in a “high-hands” position that will quickly fatigue your shoulders.
Precision Work vs. High-Leverage Tasks
For detail-oriented tasks like TIG welding or small parts assembly, you often need the work closer to your eyes. In these cases, a surface height that is 2 to 3 inches above elbow level can be beneficial. It allows you to sit or stand with a straight back while keeping the workpiece in clear view.
However, for tasks that require “body weight leverage,” such as using a large manual pipe bender or performing heavy grinding, the surface needs to be lower. I typically recommend a height that is 6 to 8 inches below the elbow. This allows you to use your core and legs to apply force rather than relying solely on your arm muscles.
- TIG/Detail Work: 0 to +3 inches from elbow height.
- General MIG/Stick: -2 to -4 inches from elbow height.
- Heavy Grinding/Assembly: -6 to -10 inches from elbow height.
The Impact of Surface Height on Tool Accuracy
When your work surface is at the wrong elevation, your ability to use precision measuring tools is compromised. I’ve seen seasoned fabricators struggle with spindle runout explanation and alignment because they couldn’t get a clear, level view of their dial indicators.
If a table is too high, you end up looking at your measuring tools from an angle, which introduces parallax error. If it’s too low, you are constantly stooping, which makes it difficult to hold a steady hand when using height gauges or squares. Much like how cast iron dampening specs affect the vibration of a machine, the stability of your body affects the “vibration” or steadiness of your measurements.
When choosing workshop machinery like a surface plate or a dedicated layout table, you must ensure the stand height places the top of the plate at a level where you can read a vernier scale without bending your neck more than 15 degrees. This small adjustment can significantly improve the accuracy of your fit-ups.
Evaluating Framework Rigidity and Vibration Dampening
While height is the primary focus, the structural integrity of the support system is what maintains that height under load. When I compare metal lathe comparison guides, I always look at the weight and the casting of the base. The same scrutiny should be applied to your work surface support.
A thin-walled tube frame might be the right height, but it will lack the mass needed to dampen harmonics during grinding or hammering. This vibration travels through the table and into the operator, causing “white finger” or general nerve fatigue.
- Mass Matters: A heavier frame acts as a heat sink and a vibration dampener.
- Leg Design: Square tubing with a wall thickness of at least 3/16″ is standard for professional-grade supports.
- Footing: Heavy-duty leveling feet are essential for ensuring the surface remains true on uneven shop floors.
If you are evaluating a pre-built table or designing your own, look at the “torsional stiffness.” If you push on the corner of the table, does it sway? A table that sways is a table that will never allow for precision alignment. It is the shop equivalent of a lathe with a flexible bed—no matter how good the motor is, the output will be subpar.
Practical Steps for Testing Your Ideal Elevation
Before you commit to a permanent height for a new fabrication surface, I highly recommend a “mock-up” phase. This is a standard practice in industrial maintenance when we are repositioning controls or machinery.
- Use Adjustable Stands: Set up two or three adjustable jack stands and place a thick piece of plywood or a spare steel plate on top.
- Simulate Your Most Common Task: If you spend 70% of your time MIG welding 2-inch tubing, get some scrap tubing and actually go through the motions of welding a joint.
- Work for 30 Minutes: You won’t feel the strain of an improper height in five minutes. You need at least half an hour of continuous movement to see where the “hot spots” develop in your back or shoulders.
- Adjust and Repeat: Move the surface up or down by 2-inch increments until the fatigue disappears.
This empirical approach beats any “milling machine buying tips” or generic guide you’ll find online. It’s about the mechanical reality of your specific body and your specific workflow.
The Cost of Ignoring Ergonomic Alignment
In the world of machine tool reviews, we often talk about the “cost of ownership.” This usually refers to consumables, electricity, and replacement parts. However, the biggest cost in any shop is the operator’s health and productivity.
A work surface set at an incorrect height is a “maintenance debt” you pay every day. It leads to repetitive strain injuries that can take months to heal. From a purely financial perspective, the time lost to slow movement and frequent “stretch breaks” far outweighs the cost of taking the time to set your station height correctly at the start.
I’ve seen shops where the “budget” option was to use old desks or repurposed shipping crates as work surfaces. Within a year, those shops usually have a high turnover rate or a collection of workers with chronic wrist and back issues. Investing the time to calculate and set the proper vertical alignment is just as important as checking the oil in a gearbox or the tension on a drive belt.
Integrating Modern Shop Technology
Today’s shops are increasingly using digital tools to assist in fabrication. Whether it’s a digital readout (DRO) for a mill or a digital angle finder for tube bending, these tools need to be visible.
When setting your surface height, consider where your digital interfaces will live. If your table is at 40 inches, and your digital readout is mounted at 60 inches, you are constantly looking up and down. This “neck-craning” is a major source of fatigue. Aim to have all your primary visual data points within a 30-degree cone of your natural line of sight when standing at your work surface.
Summary of Key Benchmarks
To wrap this up, let’s look at the hard numbers. These are the metrics I use when auditing a workspace for mechanical efficiency.
- Standard Deviation: Your work surface should be within +/- 1 inch of your calculated “elbow minus” height for general work.
- Load Rating: A professional-grade surface support should handle at least 500 lbs without measurable deflection.
- Clearance: Ensure there is at least 4 inches of toe room under the frame so you can stand close to the work without leaning forward.
- Leveling Range: Your support feet should offer at least 2 inches of adjustment to compensate for floor slope.
By treating the height of your work surface as a critical mechanical specification rather than an afterthought, you ensure that your shop remains a productive, safe, and accurate environment. Don’t let the marketing hype of “one size fits all” tables dictate your comfort. Use the data, measure your own “TIR,” and build a foundation that supports your best work.
Frequently Asked Questions
Why shouldn’t I just use the standard 36-inch height that most tables come with? The 36-inch standard is a carryover from kitchen cabinetry and light-duty workbenches. It is designed for the “average” person (roughly 5’9″) doing light tasks. In metal fabrication, you are often using heavy tools or working on tall workpieces, which changes the ergonomic requirements significantly.
How does my footwear affect the height I should choose for my work surface? Your footwear is part of your body’s “stack height.” If you switch from thin-soled sneakers to heavy-duty work boots with a 2-inch heel, your elbow height changes by 2 inches. Always measure your ideal surface elevation while wearing the boots you use most often in the shop.
If I do both TIG welding and heavy grinding, what height should I choose? In a fixed-height situation, it is usually better to optimize for the task you do most often. If you do an equal amount of both, choose the lower “heavy grinding” height. It is much easier (and safer) to use a small “riser” or a tabletop positioner to bring TIG work up to eye level than it is to try and grind on a surface that is too high.
Does the thickness of the table top matter when calculating height? Yes. Your goal is to set the working surface height. If you are using a 1-inch thick steel plate, that inch must be accounted for in your frame height. Always measure to the top of the final assembly, not just the support structure.
Can I use a stool to compensate for a table that is too high? A stool can help for seated tasks like TIG welding, but it limits your mobility. In metalworking, you often need to move around the workpiece to maintain the proper torch angle or to reach different areas. Relying on a stool to fix a height issue often results in “reaching,” which is a major cause of shoulder strain.
What is the “elbow rule” exactly? The elbow rule is a guideline that suggests your primary work should happen just below the level of your elbows when your arms are at a 90-degree angle. This position keeps your wrists in a neutral “handshake” position, which reduces the risk of carpal tunnel and other repetitive strain injuries.
How do I account for the height of a vise? A vise usually adds 6 to 10 inches to your working height. If you plan to do a lot of filing or sawing in a vise, the top of the vise jaws should be at elbow height. This often means having a dedicated, lower section of your bench specifically for the vise.
Is there a difference in height requirements for standing vs. sitting? Yes. When sitting, your “elbow height” changes because your torso is compressed and your legs are no longer part of the equation. Most seated workstations are significantly lower (usually 28-30 inches). If you plan to work primarily seated, you must re-measure from the seat of the chair to your elbow.
How does table height affect my visibility of the weld puddle? If the table is too low, you have to bend your neck and back to get close enough to see the puddle through your hood. This not only causes pain but also puts your head closer to the welding fumes. A properly height-adjusted table allows you to maintain a safe distance while keeping the work in your natural line of sight.
What is the best way to adjust the height if I share the shop with someone of a different stature? In a shared shop with fixed-height tables, the best solution is to build the table for the tallest user. Shorter users can then use stable, wide wooden platforms (often called “duckboards”) to raise their standing height. It is much safer for a short person to stand on a platform than for a tall person to work hunched over all day.
(This article was written by one of our staff writers, Steven Brooks. Visit our Meet the Team page to learn more about the author and their expertise.)