How to Replace Worn Bearings on Rolling Shop Carts (Guide)
There is a specific kind of frustration that comes from a rolling cart that refuses to roll. You have a five-hundred-pound welder or a stack of precision-cut plate on a mobile platform, and instead of a smooth glide, you get a jarring, stuttering resistance. Over my eighteen years as a millwright and diagnostic specialist, I have learned that these small mechanical failures are often the loudest signals of a shop’s overall health. A cart that drags is not just a nuisance; it is a safety hazard and a drain on your daily productivity.
When a mobile unit starts to track poorly or emits a high-pitched metallic scream, most people just kick the wheel and keep pushing. As a diagnostic-minded fabricator, I look at it differently. I see a failure in the rotational assembly. This usually means the internal rolling elements have succumbed to metal-on-metal friction, debris ingress, or load-induced deformation. My approach to resolving these issues is the same one I use for aligning a lathe or troubleshooting weld porosity: isolate the variable, measure the deviation, and execute a surgical repair.
In this guide, I will walk you through my systematic process for identifying and swapping out failed rotational components in your shop’s mobile fleet. We will move past the guesswork and focus on the technical precision required to restore smooth movement to your most essential shop assets.
Diagnosing Mechanical Play and Rotational Friction
This stage involves identifying exactly why a wheel assembly is failing by testing for radial movement and listening for specific acoustic signatures. By isolating the wheel from the cart’s weight, you can feel the internal state of the races and rolling elements without interference from the frame or floor.
In my experience, most rolling failures fall into two categories: contamination or structural fatigue. If you hear a “crunchy” sound when the wheel spins, you are likely dealing with metal chips or grinding dust that has bypassed the seals. If the wheel wobbles side-to-side, the internal clearances have opened up due to wear. I always start by lifting the cart on jack stands and spinning each wheel by hand.
I use a simple “push-pull” test to check for radial play. Grab the wheel at the twelve and six o’clock positions and try to rock it. Any perceptible movement usually indicates that the bearing’s internal tolerances have been exceeded. In a precision environment, we look for clearances in the range of 0.001 to 0.003 inches. If you can see the movement with the naked eye, the component is well past its service life.
- Radial Play: Up-and-down or side-to-side movement within the hub.
- Axial Play: Movement along the length of the axle.
- Acoustic Roughness: Grinding or clicking sounds during free rotation.
- Thermal Spikes: Heat buildup on the hub after a long move across the shop.
Identifying Component Specifications and Fitment
Before you reach for the teardown tools, you must accurately identify the replacement parts needed by measuring the bore, outer diameter, and width. Using a digital caliper is essential here, as a difference of just 0.5 millimeters can mean the difference between a secure press-fit and a loose, useless assembly.
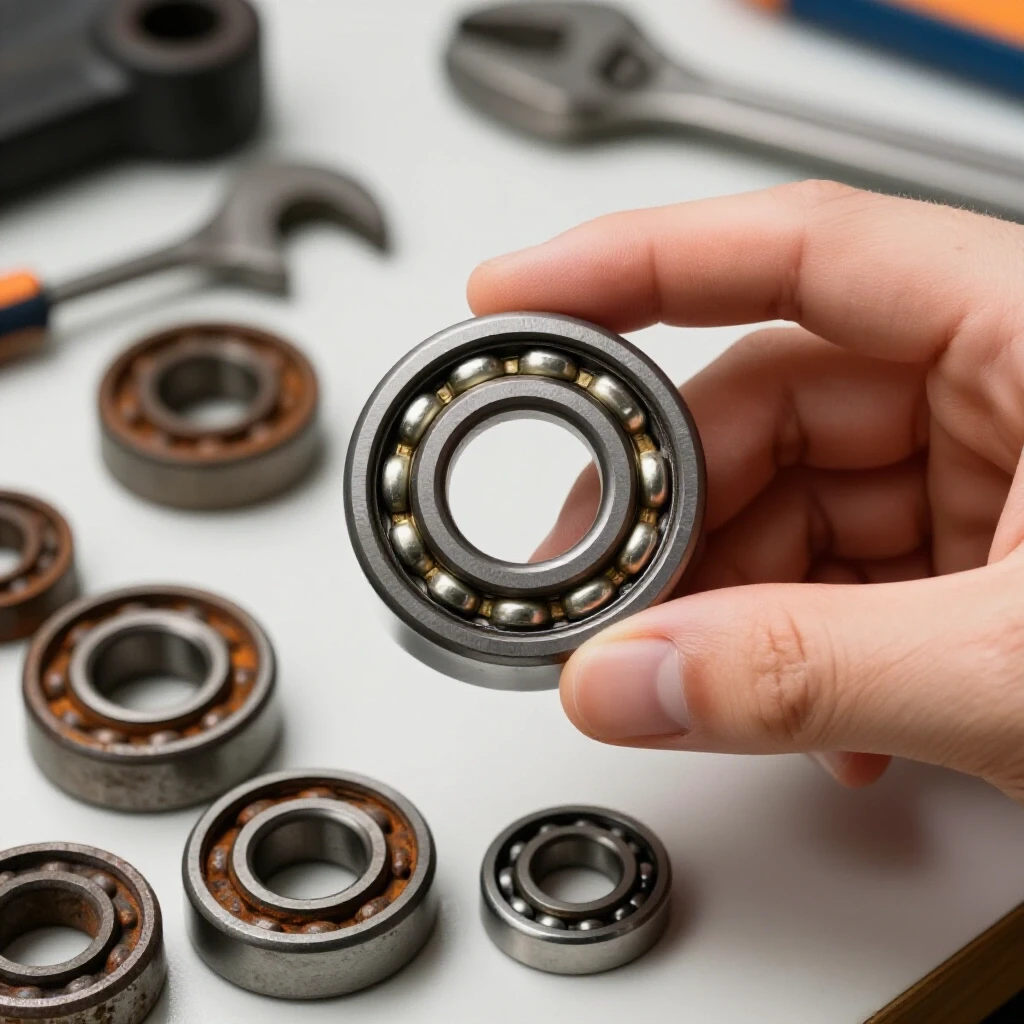
I have seen many fabricators order parts based on the wheel’s brand name, only to find the manufacturer changed internal specs mid-production. I prefer the “measure twice, order once” philosophy. I pull the wheel, wipe away the grease, and look for the stamped part number on the bearing race. Common numbers like 6202 or 6004 tell you everything about the dimensions and load ratings.
If the number is worn off, I use my calipers to take three critical measurements. First is the Bore (ID), which is the inside diameter where the axle sits. Second is the Outer Diameter (OD), which fits into the wheel hub. Third is the Width (W). I also check for the “Z” or “RS” suffixes. A “2RS” suffix means the part has two rubber seals, which is my preferred choice for metalworking shops because it keeps out fine grinding dust.
Common Bearing Measurement Reference Table
| Measurement Point | Description | Why it Matters |
|---|---|---|
| Bore (ID) | Diameter of the inner race | Determines axle compatibility |
| Outer Diameter (OD) | Diameter of the outer race | Ensures a snug fit in the wheel hub |
| Width (W) | Thickness of the assembly | Prevents offset or rubbing against the fork |
| Static Load Rating | Maximum weight at rest | Prevents flat-spotting of the races |
| Dynamic Load Rating | Maximum weight in motion | Determines longevity under heavy use |
Systematic Extraction of Worn Components
Removing a seized or pressed-in bearing requires controlled force to avoid distorting the wheel hub or scarring the axle surface. Using a dedicated puller or an arbor press is always superior to using a hammer and a drift punch, which can easily crack cast-iron or plastic wheels.
In my shop, I treat extraction as a delicate operation. If the bearing is stubborn, I often use a heat gun to expand the wheel hub slightly. Aluminum hubs expand faster than steel bearings, which can break the bond of rust or old adhesive. I aim for a temperature of about 150 to 200 degrees Fahrenheit. You don’t want to melt the wheel, just nudge the tolerances in your favor.
If you don’t have a press, a blind-hole puller is a lifesaver. It expands inside the bore and allows you to use a slide hammer to pop the bearing out from the inside. This prevents you from having to drive a punch through the opposite side, which often results in the punch slipping and gouging the internal bore.
- Clean the area: Remove all external snap rings or cotter pins.
- Apply Penetrant: Use a high-quality penetrating oil and let it sit for ten minutes.
- Support the Hub: Place the wheel on a hollow cylinder or a set of parallel blocks so the bearing has a clear path to exit.
- Apply Even Pressure: Use the press or puller to move the bearing out in one smooth motion.
- Inspect the Bore: Check for burrs or scoring that could interfere with the new installation.
Selecting the Right Shielding for Metalworking Environments
Not all bearings are created equal, especially in a fabrication shop where the air is filled with abrasive particles and welding spatter. Choosing the wrong shielding type is a primary cause of premature failure in rolling shop equipment.
In a clean warehouse, an “open” bearing or one with metal shields (ZZ) might last for years. However, in our world, those metal shields have a tiny gap that allows microscopic metal dust to enter. Once that dust mixes with the internal grease, it creates an abrasive paste that grinds down the balls and races. This is why I almost always specify double-sealed (2RS) replacements.
The rubber seals on a 2RS bearing make physical contact with the inner race. This creates a slightly higher starting friction, but the protection it offers against “black dust” and “grinding grit” is worth the trade-off. It keeps the factory-packed grease in and the shop floor debris out.
- Open: No shields. High speed, zero protection. Avoid for shop carts.
- Metal Shielded (Z or ZZ): Protects against large debris. Does not stop fine dust or liquids.
- Rubber Sealed (RS or 2RS): Best for fabrication shops. Provides a physical barrier against contaminants.
- Stainless Steel: Use these if your shop floor is frequently washed down or if you work with corrosive chemicals.
Precision Installation and Seating Procedures
The most critical moment in this process is the installation of the new component. You must never apply pressure to the inner race when pressing a bearing into a hub, as this forces the load through the rolling elements and can cause “brinelling”—tiny permanent indentations in the race.
I use a bearing driver set or a socket that matches the diameter of the outer race exactly. The goal is to transfer the force of the press only through the part of the bearing that is making contact with the wheel. If you feel the press “bottom out,” stop immediately. Over-pressing can distort the wheel hub or even crush the bearing’s internal clearances.
Before I press the new part in, I like to put the bearings in the freezer for an hour. This shrinks the steel by a fraction of a thousandth of an inch. At the same time, I might slightly warm the wheel hub. This “shrink-fit” technique often allows the bearing to slide in with minimal force, preserving the integrity of the interference fit.
Installation Checklist for Smooth Operation
- Verify Bore Cleanliness: Use a Scotch-Brite pad to remove any oxidation or old loctite from the hub.
- Check Axle Straightness: Roll the axle on a flat surface (like a welding table) to ensure it isn’t bent.
- Apply Anti-Seize: A light coat of nickel anti-seize on the axle can prevent future rust-bonding.
- Align the Bearing: Ensure the bearing is perfectly square to the bore before applying pressure.
- Test Rotation: Once seated, the wheel should spin freely with no “tight spots” or drag.
Case Study: Resolving a Chronic Tracking Issue on a Heavy Plasma Cart
A few years ago, I was asked to look at a large CNC plasma water table that sat on a heavy-duty mobile frame. The operators complained that every time they tried to move the table for cleaning, it would “crab” to the left, requiring three people to steer it. This was a classic case of uneven rolling resistance.
Upon inspection, I found that the front-left caster was dragging. When I pulled the wheel, the bearings didn’t just look worn; they were completely seized. The heat from the plasma cutting process, combined with the fine metal dust and water overspray, had turned the internal lubricant into a solid, rust-colored brick.
I replaced the standard shielded bearings with high-load, 2RS sealed stainless steel versions. I also discovered that the axle had been worn down by 0.010 inches because the seized bearing had been spinning on the shaft rather than internally. I had to weld up the axle and turn it back down on the lathe to restore the proper fit. After the repair, the table could be moved by a single person. The lesson here was that the environment (heat and water) dictated the part choice, not just the load.
Troubleshooting Common Rolling Failures
Even with new parts, issues can persist if the root cause isn’t fully addressed. I use a process of elimination to track down “ghost” vibrations or persistent drag. If a cart still feels heavy after a repair, the issue might be in the caster swivel or a slight misalignment of the cart frame itself.
| Symptom | Potential Root Cause | Diagnostic Step |
|---|---|---|
| Persistent Squeak | Lack of lubrication in the swivel race | Inject grease into the swivel head zerk fitting |
| “Flat Spot” Feeling | Bearing brinelling or wheel material deformation | Inspect wheel tread for flat areas from heavy loads |
| Cart Pulls to One Side | Uneven bearing drag or bent caster fork | Compare the free-spin time of all four wheels |
| Grinding Under Load | Bearing race failure or axle shoulder rubbing | Check for metal shavings around the hub area |
| Wheel Wobble | Excessive internal clearance or worn axle | Measure axle diameter with a micrometer |
Advanced Maintenance and Longevity Strategies
To keep your mobile equipment running at peak performance, you need a proactive maintenance schedule. I recommend a “six-month roll-call” for every cart in the shop. This isn’t just about greasing; it’s about inspecting the structural integrity of the wheels and the security of the fasteners.
In my shop, I use a vibration-resistant thread locker on all axle bolts. Rolling carts are subject to constant micro-vibrations from floor cracks and debris, which can vibrate nuts loose over time. A loose axle allows the inner race to spin on the shaft, which eventually destroys the axle and requires a much more expensive repair.
I also keep a “Bearing Log” for my heaviest equipment. I track when the components were last replaced and what specific part numbers were used. This saves hours of diagnostic time down the road. If I see a specific cart failing every three months, I know I need to upgrade to a higher dynamic load rating or a different sealing solution.
- Wipe Down: Regularly clean metal chips away from the wheel hubs.
- Lubrication: If using greaseable bearings, don’t over-grease; it can blow out the seals.
- Load Management: Never exceed the rated capacity of the casters. A 1,000lb cart needs four 300lb-rated wheels to have a safety margin.
- Floor Care: Keep the shop floor clear of welding lead scraps and zip-tie tails, which are notorious for tangling in wheels and destroying seals.
Frequently Asked Questions
How do I know if I need to replace the whole wheel or just the internal components? If the wheel tread is cracked, “chunking,” or has flat spots from being dragged while locked, you should replace the entire wheel. However, if the wheel itself is in good shape but it wobbles or makes noise, replacing the internal rolling elements is a cost-effective way to restore performance.
Can I just spray WD-40 into a noisy bearing to fix it? No. WD-40 is a solvent, not a long-term lubricant. While it might temporarily quiet a squeak by thinning out the remaining grease, it will eventually wash away the lubrication entirely, leading to a total seizure. If a bearing is making noise, the internal surfaces are already damaged.
What is an “interference fit,” and why does it matter? An interference fit (or press-fit) is when the bearing is slightly larger (usually by 0.0005 to 0.001 inches) than the hole it is going into. This ensures the outer race stays stationary within the wheel hub. If the fit is loose, the race will spin inside the wheel, wearing out the hub and causing the wheel to fail.
How do I measure the bore if I don’t have a digital caliper? While a caliper is the gold standard, you can sometimes find the bore size by checking the axle diameter with a high-quality ruler or by looking for the part number on the old bearing. However, for precision work, I highly recommend investing in a basic set of calipers; they are essential for any fabrication diagnostic work.
Why did my new bearing fail after only a month of use? Premature failure is usually caused by one of three things: improper installation (hitting the inner race), choosing the wrong seal type (using open bearings in a dusty shop), or overloading the cart beyond the bearing’s static load rating.
What tools are absolutely necessary for this job? You will need a way to support the cart (jack stands), a set of wrenches for the axle, a cleaning agent (brake cleaner), and a method for pressing the new parts in (an arbor press or a bearing driver kit). A heat gun and a freezer are also very helpful for stubborn fits.
Should I use grease or oil for shop cart wheels? Shop cart bearings are almost always grease-lubricated. Grease stays in place better than oil and provides a better seal against contaminants. Most replacement bearings come “greased for life” and are sealed, so you don’t need to add anything.
What does the ABEC rating mean for my shop carts? ABEC ratings (1, 3, 5, 7, 9) measure the precision and tolerances of the bearing. For a shop cart moving at walking speeds, an ABEC 1 or 3 is perfectly adequate. Higher ratings are for high-speed spindles (like a router or lathe) and offer no real benefit for a rolling cart.
How can I prevent my welding cart from “crabbing” or pulling to one side? Ensure that all four wheels have the same rolling resistance. If one wheel has old, thick grease and the others have new, thin grease, the cart will pull toward the side with more resistance. Also, check that your caster forks are not bent, as this changes the “lead” of the wheel and affects tracking.
Is it worth it to buy expensive brand-name bearings for a simple cart? It depends on the load. For a light utility cart, a generic bearing is fine. For a heavy welding power source or a surface plate stand, I prefer trusted brands like SKF, NSK, or Timken. The metallurgy and heat treatment in premium brands are much more consistent, leading to a longer service life under heavy pressure.
(This article was written by one of our staff writers, Paul Whitaker. Visit our Meet the Team page to learn more about the author and their expertise.)