How to Safely Grind and Polish Stainless Steel (DIY Guide)
In my fourteen years inspecting industrial steel components and managing shop floors, I have seen that the most dangerous moment in a project isn’t always the heavy lift or the initial cut. Often, it is the final stage where we refine the surface. I once inspected a heavy-duty stainless frame that failed under a nominal load. The culprit wasn’t a bad weld, but a deep gouge from an aggressive 40-grit grinding disc that had created a stress riser. That tiny notch acted like a perforated line on a piece of paper, inviting a crack to form and travel.
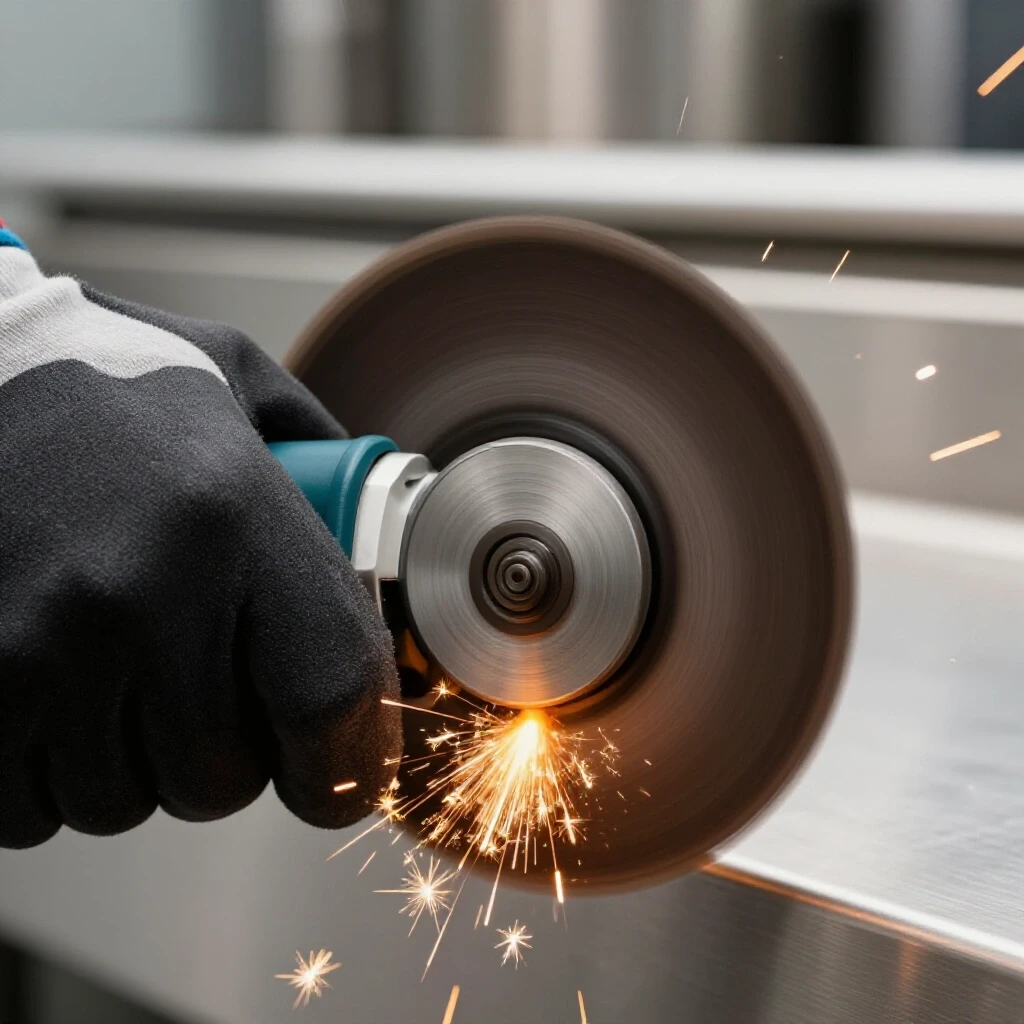
Refining stainless steel surfaces requires a different mindset than working with mild steel. Stainless, specifically the 300-series austenitic alloys common in home shops, is a stubborn material. It doesn’t dissipate heat well. It work-hardens quickly. If you push it too hard, it pushes back by warping or losing its corrosion resistance. My goal is to share the technical rigor I’ve learned from years of failure analysis so you can achieve a professional finish without compromising the structural integrity of your project or your personal safety.
Understanding Material Stress and Thermal Loads in Stainless Finishing
Surface refinement is the process of using controlled abrasives to remove material and achieve a specific texture. Because stainless steel has low thermal conductivity, heat generated by friction stays trapped at the surface. If temperature thresholds are exceeded, the metal can undergo localized expansion, leading to warping or “oil-canning” in thinner gauges.
When I evaluate a structural failure, I look at the heat-affected zone (HAZ). Even without a welding torch, a high-speed grinding disc can create enough heat to alter the grain structure of the metal. If you see “blueing” on the surface, you have reached temperatures above 400°F (204°C). This isn’t just an aesthetic issue. Excessive heat can deplete the chromium at the surface, which is what makes stainless “stainless.”
To manage these physical forces, you must respect the material’s limits. I recommend a “light and fast” approach. Instead of leaning into the tool, let the abrasive do the work. This keeps the surface temperature low and prevents the internal stresses that lead to distortion.
| Material Property | Stainless Steel (304/316) | Mild Steel (A36) | Impact on Finishing |
|---|---|---|---|
| Thermal Conductivity | ~16.2 W/m-K | ~50 W/m-K | Stainless holds heat 3x longer; higher warp risk. |
| Coefficient of Expansion | 17.2 µm/m-°C | 12.0 µm/m-°C | Stainless expands more when hot; alignment is harder. |
| Work Hardening Rate | High | Low | Surface gets harder as you grind; requires fresh abrasives. |
Essential Workshop Safety Checklist for Abrasive Work
Workshop safety is a systematic approach to identifying and neutralizing hazards before they cause harm. For stainless steel finishing, the primary risks are respiratory irritation from metallic dust and physical injury from high-velocity sparks or shattered discs. A clean, organized safety zone is the foundation of a successful build.
In my early years, I witnessed a near-miss where a grinding disc shattered because it was rated for a lower RPM than the tool was spinning. Now, I never start a tool without verifying the “Match-Rating.” Your disc must always be rated for an RPM higher than your grinder’s maximum output.
- Respiratory Protection: Use a P100-rated respirator. Stainless steel dust contains chromium and nickel, which are hazardous if inhaled over time.
- Eye and Face Protection: Wear Z87+ rated safety glasses under a full-face shield. Sparks from stainless are hotter and sharper than those from mild steel.
- Hearing Protection: High-frequency noise from grinding can cause permanent damage. Use earplugs with a Noise Reduction Rating (NRR) of at least 25 dB.
- Spark Containment: Ensure your work area is clear of flammable materials. Stainless sparks can travel up to 20 feet and smolder in sawdust or oily rags.
Selecting the Right Tools for Surface Refinement
Tool selection is about matching the mechanical force of the machine to the sensitivity of the metal. For home shops, a 4.5-inch variable-speed angle grinder is the most versatile tool. High speeds are useful for initial material removal, but lower speeds are mandatory for polishing to prevent burning the metal.
I prefer variable-speed units because they allow for “surface feet per minute” (SFM) adjustments. If you run a buffing wheel at 11,000 RPM, you will likely melt your polishing compound and smear it across the workpiece, or worse, catch an edge and kick the tool back.
- Variable Speed Grinder: Look for a range of 2,800 to 11,000 RPM.
- Backing Pads: Use high-density rubber pads for flat surfaces and flexible pads for contours.
- Flap Discs: These are more forgiving than rigid grinding stones and provide a more consistent finish.
- Non-Woven Abrasives: Also known as “Scotch-Brite” wheels, these are essential for blending and removing scratches without removing structural metal.
The Sequential Grit Progression Strategy
Achieving a mirror-like or brushed finish is a linear process of replacing large scratches with smaller ones. If you skip a step, the deeper scratches from the previous grit will remain visible, creating “valleys” that can trap moisture and lead to localized corrosion.
In industrial inspections, we use a profilometer to measure surface roughness (Ra). For a DIY project, you can use the “Visual Uniformity” test. Before moving from an 80-grit disc to a 120-grit disc, ensure the entire surface has the same scratch pattern. If you see a stray deep line, go back.
- Step 1: Leveling (60–80 Grit): Use this to flatten high spots or smooth out heavy surface imperfections. Move the tool in long, sweeping motions.
- Step 2: Blending (120–180 Grit): This grit starts to give the metal a uniform “brushed” look. It removes the aggressive marks from the leveling stage.
- Step 3: Pre-Polishing (240–400 Grit): At this stage, the metal will start to reflect light. The surface should feel smooth to the touch.
- Step 4: Fine Polishing (600–2000 Grit): These are often wet-sanding steps or specialized fine-grit discs used to prepare for a final buff.
Preventing Cross-Contamination and “Tea Staining”
Cross-contamination occurs when microscopic particles of carbon steel are embedded into the stainless surface. These particles will rust when exposed to air and moisture, creating orange spots known as “tea staining.” This is one of the most common failures in home-fabricated stainless projects.
I have a strict rule in my shop: stainless-only abrasives. Never use a wire brush or a grinding disc on stainless steel if it has ever touched mild steel. Even the dust from a nearby bench grinder can settle on your project and cause it to rust.
- Dedicated Tools: Mark your stainless-only brushes and discs with a blue permanent marker.
- Work Surface Protection: Cover your steel welding table with a clean sheet of plywood or a dedicated stainless-steel topper.
- Post-Finishing Cleanup: Once the mechanical finishing is done, wipe the surface with a clean microfiber cloth and denatured alcohol to remove any lingering metallic dust.
Managing Heat and Preventing Warpage
Thermal distortion is a physical reality when refining thin-gauge stainless. Because the metal expands significantly when heated, localized grinding can cause the piece to “bow” toward the heat source. This is particularly problematic for decorative panels or precision-fit components.
To avoid this, I use the “Stitch Grinding” technique. Instead of working on one spot until it is finished, move around the workpiece. Spend 30 seconds on the left side, then move to the right. If the metal is too hot to touch with a gloved hand, it is too hot to continue.
- Cooling Time: Allow the metal to return to room temperature naturally. Never quench stainless steel in water, as this can cause brittle phases to form in the grain structure.
- Backing Bars: If you are working on a flat sheet, clamp it to a thick copper or aluminum block. These materials act as “heat sinks,” pulling the thermal energy away from the stainless.
Final Inspection and Quality Verification
The final step is a diagnostic inspection to ensure the surface is structurally sound and free of defects. I use a high-intensity LED light held at an angle to the surface. This “raking light” reveals shadows in any remaining deep scratches or pits.
A common rookie mistake is over-polishing. If you spend too much time in one area, you can actually thin the metal enough to compromise its load-bearing capacity. Use a set of calipers to check the material thickness before and after finishing to ensure you haven’t removed more than 5-10% of the original wall thickness.
- Visual Check: Look for uniform scratch patterns and the absence of “blueing” (heat tint).
- Tactile Check: Run a clean, gloved finger over the surface to feel for burrs or sharp edges.
- Dimensional Check: Measure critical thicknesses to ensure structural integrity remains within your design’s safety margin (typically 2:1 for non-critical parts).
Workshop Finishing Action Plan
To keep your project on track and safe, follow this sequence for every stainless component you refine:
- Verify Disc RPM: Ensure the disc rating exceeds the tool’s maximum speed.
- Set Variable Speed: Start low (approx. 3,500 RPM) for any polishing or buffing.
- Check for Contamination: Ensure all brushes and discs are “stainless only.”
- Monitor Surface Temp: Use a non-contact infrared thermometer if you are unsure; keep the surface under 300°F.
- Clean and Protect: Wipe down with alcohol and store in a dust-free area.
By treating the finishing process with the same engineering rigor as the initial design, you ensure that your stainless steel projects are not only beautiful but also structurally reliable and safe for years to come.
Frequently Asked Questions
Why does my stainless steel look “cloudy” after I use a fine-grit disc?
Cloudiness usually indicates that the previous, coarser grit scratches were not fully removed. The fine grit is polishing the “peaks” of the metal but leaving the “valleys” of the deeper scratches untouched. Go back one grit level and ensure the surface is perfectly uniform before proceeding.
Can I use a standard steel wire brush to clean stainless?
No. Standard steel brushes leave behind carbon steel particles that will cause the stainless to rust. Always use a 300-series stainless steel wire brush, and keep it in a separate, labeled container so it isn’t used on mild steel by mistake.
What is the safest way to hold small stainless parts while grinding?
Never hold small parts by hand. Use a bench vise with “soft jaws” (aluminum or plastic covers) to prevent marring the stainless. For very small parts, consider clamping them to a larger sacrificial piece of wood or metal.
Is it necessary to wear a respirator if I am working outside?
Yes. Stainless steel dust is heavy and can linger in your immediate breathing zone even with a light breeze. A P100 respirator is the only way to ensure you aren’t inhaling chromium or nickel particulates, which are known health hazards.
How do I know if I have “burnt” the stainless steel?
If the metal turns straw-colored, purple, or deep blue, you have overheated it. This “heat tint” indicates that the protective chromium oxide layer has been compromised. You must mechanically grind away the colored area until you reach “white” metal to restore corrosion resistance.
What is the best RPM for buffing stainless steel to a mirror finish?
For a 4.5-inch buffing wheel, stay between 3,000 and 4,500 RPM. Higher speeds generate too much heat, which can melt the polishing compound and cause it to “smear,” making it nearly impossible to get a clear reflection.
Why do my flap discs seem to “glaze over” and stop cutting?
Stainless steel is a gummy material that can load up the abrasive. This often happens if you use too much pressure or too high an RPM. Try reducing your speed and using a “dressing stick” or a piece of scrap material to clean the disc, but usually, it means the abrasive is spent and needs replacement.
Can I use water to cool the metal while I am grinding?
Wet sanding is common for very high grits (over 600), but you should never spray water on a piece while using an electric angle grinder due to the risk of electrocution. If you need to cool the part, stop grinding and let it air cool or use a dedicated pneumatic tool designed for wet environments.
What should I do if I find a small crack during the polishing phase?
If a crack appears, you must stop. Polishing can sometimes reveal “tight” cracks that were hidden by the initial rough surface. You will likely need to grind out the crack entirely and re-weld the area, as polishing over a crack will not fix the underlying structural failure.
How do I prevent my stainless sheet from “warping” when I’m just polishing one side?
The heat from polishing causes the side you are working on to expand. To minimize this, use very light pressure and frequent breaks. You can also clamp the sheet to a thick metal “chill plate” to help dissipate the heat more evenly across the entire surface.
(This article was written by one of our staff writers, James Harlan. Visit our Meet the Team page to learn more about the author and their expertise.)