Avoid Buying Low-Quality Metalworking Accessories (Tips)
Setting up a metalworking shop in a residential garage is a challenge of balance. You are likely looking at an empty space and wondering how to fill it with the right gear without draining your savings. When I started my first shop in 2013, I learned quickly that the most expensive tool is the one you have to buy twice because the first one failed. My background as an industrial maintenance technician taught me that reliability stems from material quality and tolerance consistency. This guide focuses on identifying durable fabrication components that will serve you for years while keeping your startup costs manageable.
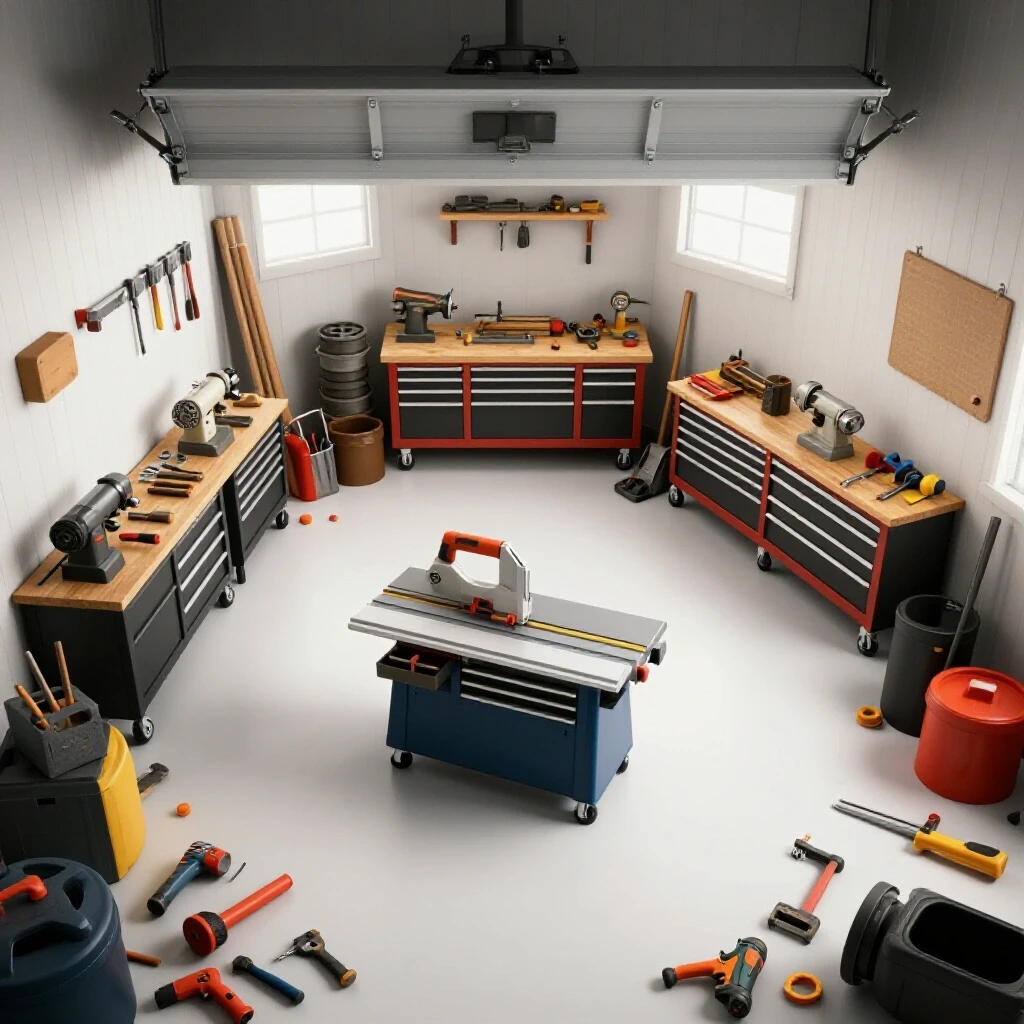
Establishing a Functional Starter Metal Workshop Layout
A functional layout involves mapping the physical flow of materials and the electrical capacity of your space to ensure safety and efficiency. It requires understanding the footprint of each machine and the clearance needed for long stock, while also accounting for the specific power draw of welding and grinding equipment.
Assessing Electrical Capacity and Power Requirements
The electrical capacity of a home shop is the most significant limiting factor for any beginner. Most standard garages are wired with a single 15A or 20A circuit, which is often shared with household lights or appliances. Understanding your tool’s amperage draw is essential to prevent frequent breaker trips and potential fire hazards.
When I moved into my current workspace, I had to map every outlet back to the breaker box. A typical entry-level welder may require a dedicated 20A circuit for stable performance, especially when working on thicker materials. If you run a high-draw grinder on the same circuit as your lights, you will notice flickering or a sudden loss of power. I recommend a dedicated circuit for any tool that generates heat or high torque.
- 15A Circuits: Suitable for small hand tools, LED lighting, and light-duty drills.
- 20A Circuits: Required for most 110V welders, larger angle grinders, and chop saws.
- 220V/240V Circuits: Essential for industrial-grade welders and large air compressors.
Defining Physical Clearance and Work Zones
Work zones are designated areas where specific tasks like cutting, welding, or grinding occur to minimize cross-contamination and hazards. Proper planning ensures that sparks from a grinder do not land on flammable materials or interfere with precision measuring tasks in a clean zone.
I follow a simple rule: keep the “hot” tasks separate from the “clean” tasks. In a small garage, this might mean having a mobile welding table that can be moved near the door for better airflow. You need at least 36 inches of clearance around stationary tools to move safely. For long pieces of steel, ensure you have a clear path for loading and unloading without hitting walls or storage racks.
- Hot Zone: Welding and grinding area, ideally near ventilation.
- Cold Zone: Bench work, assembly, and precision measurement.
- Storage Zone: Vertical racks for metal stock to save floor space.
| Tool Class | Typical Amp Draw (110V) | Recommended Circuit | Footprint (Sq. Ft) |
|---|---|---|---|
| Angle Grinder (4.5″) | 6A – 10A | 15A | 1 |
| Bench Grinder | 3A – 5A | 15A | 2 |
| Entry-Level Welder | 15A – 20A | 20A Dedicated | 4 |
| Metal Chop Saw | 15A | 20A | 5 |
| Drill Press | 5A – 8A | 15A | 3 |
Prioritizing Reliable Fabrication Consumables
Consumables are the items that wear out during use, such as drill bits, grinding wheels, and saw blades. Selecting high-performance consumables is critical because inferior materials glaze over, break easily, or produce inaccurate cuts, which increases the total cost of your project over time.
Understanding Material Hardness and Edge Retention
Material hardness refers to a tool’s ability to resist deformation, while edge retention is how long a cutting surface stays sharp under heat and friction. For metalworking, tools made from High-Speed Steel (HSS) or Cobalt are standard because they maintain their integrity at higher temperatures than carbon steel.
In my maintenance career, I saw how quickly a low-quality drill bit would dull when hitting stainless steel. This happens because the friction generates heat that exceeds the tool’s tempering temperature. When you choose bits with a higher cobalt content, usually around 5% to 8%, you gain significant heat resistance. This means you spend less time at the sharpener and more time fabricating.
- HSS (High-Speed Steel): Good for general purpose mild steel and aluminum.
- Cobalt (M42): Superior for stainless steel and harder alloys due to heat resistance.
- Carbide-Tipped: Excellent for high-speed cutting but can be brittle if dropped.
The Impact of Abrasive Ratings on Workflow
Abrasive ratings indicate the grit size and the bonding material of grinding and cutting wheels, which determines how fast they remove material and how long they last. Choosing the right abrasive prevents “loading,” where metal particles clog the wheel, rendering it useless and potentially dangerous.
I have tracked the lifespan of various grinding discs in my shop logs. A high-quality ceramic or zirconia alumina disc might cost more initially, but it often outlasts multiple standard aluminum oxide discs. This is because the grains fracture in a way that reveals new, sharp edges. For a beginner, using a disc that cuts cooler and faster reduces the physical strain on your arms and the mechanical strain on your grinder.
- Aluminum Oxide: Standard for general grinding on mild steel.
- Zirconia Alumina: Self-sharpening and durable for heavy stock removal.
- Ceramic: The highest performance for stainless steel, offering the longest life.
Vetting Precision-Rated Tooling and Attachments
Precision-rated tooling includes measuring devices and machine attachments that must maintain tight tolerances to ensure parts fit together correctly. Reliability in these tools is measured by their repeatability and the quality of their locking mechanisms, which prevent measurements from shifting during use.
Tolerance Consistency in Measuring Tools
Tolerance consistency is the ability of a measuring tool to provide the same result every time it is used on the same object. For a metalworker, even a discrepancy of 1/64th of an inch can lead to poor weld fitment or mechanical interference in a finished project.
When I evaluate calipers or squares, I look for “zero-point” stability. If you close a pair of calipers and they don’t read zero every time, they are unreliable. Similarly, a machinist square must be hardened and ground to ensure it remains at exactly 90 degrees even after being bumped on a workbench. Investing a larger portion of your budget into these items is a wise move for long-term accuracy.
- Dial Calipers: Preferred by many for their lack of batteries and easy-to-read scale.
- Machinist Squares: Essential for checking the 90-degree alignment of your cuts.
- Steel Rules: Look for etched markings rather than painted ones for durability.
Selecting Durable Bench Attachments
Bench attachments, such as vises and clamps, are the foundation of your workspace, holding workpieces securely during high-torque operations. A reliable attachment features high-tensile strength materials and smooth lead screws that do not bind or slip under heavy pressure.
I once used a lightweight cast-iron vise that cracked while I was trying to bend a piece of flat bar. That taught me the value of ductile iron or forged steel. For a home shop, a 4-inch to 6-inch vise with a swivel base is often the most versatile choice. Ensure the jaws are replaceable, as they will eventually wear down or become scarred from use.
- Vise Selection: Look for ductile iron (60,000 PSI) for better impact resistance.
- Clamping Force: C-clamps and F-style clamps should have heavy-duty pads to prevent marring.
- Magnetic Bases: Useful for holding indicators or lights, but must have a strong “on/off” switch.
Implementing Garage Workshop Ventilation Standards
Effective ventilation is the process of removing hazardous fumes, dust, and gases from the workspace to maintain a safe breathing environment. In a confined garage, this requires a combination of source extraction and general air exchange to meet safety guidelines for metalworking.
Calculating Required CFM for Air Exchange
CFM, or Cubic Feet per Minute, measures the volume of air an exhaust fan can move. To keep a shop safe, you generally want to cycle the entire volume of air in the room every few minutes, especially when welding or grinding, which releases fine particulate matter into the air.
I use a simple formula: (Length x Width x Height) / 5. This tells you the CFM needed to exchange the air every five minutes. If your garage is 20x20x10 feet (4,000 cubic feet), you need a fan capable of at least 800 CFM. However, for welding fumes, source extraction—where the air is pulled right from the point of the weld—is far more effective than just opening a window.
- General Ventilation: High-volume fans to clear the entire room.
- Source Extraction: Flexible ducts or fume extractors placed near the work.
- Personal Protection: N95 or P100 respirators are essential secondary layers.
Managing Grinding Dust and Metallic Particulates
Metallic particulates are tiny shards of metal and abrasive material that can damage your lungs and settle on every surface in your shop. Proper management involves using dust shrouds on grinders and dedicated vacuum systems with HEPA filtration to capture these particles at the source.
In my shop, I noticed that fine dust would settle on my precision tools, causing them to rust or jam. I started using a magnetic dust collector near my bench grinder and a shop vac with a cyclonic separator. This setup prevents the fine metal dust from reaching the vacuum’s motor, extending its life and keeping the air significantly cleaner.
- Magnetic Traps: Use magnets to catch steel dust before it becomes airborne.
- Cyclonic Separators: Removes heavy debris from the air stream before it hits the filter.
- Surface Cleaning: Use a vacuum rather than compressed air to avoid blowing dust back into the air.
Strategic Tooling-to-Machine Cost Ratios
A tooling-to-machine cost ratio is a planning metric used to determine how much of your total budget should be spent on the machine itself versus the accessories needed to run it. Beginners often overspend on the machine and find they have no funds left for the high-quality consumables required to make it functional.
Allocating Your Fabrication Budget
I recommend allocating about 30% to 40% of your total budget to accessories, safety gear, and precision tools. If you spend your entire budget on a high-end welder but use the cheapest possible wire and a low-grade helmet, your results will suffer. A balanced approach ensures that every link in your fabrication chain is strong.
When I tracked my startup costs, I found that the “hidden” expenses—like gas bottle rentals, grinding discs, and high-quality drill bits—added up quickly. By planning for these costs upfront, you avoid the frustration of having a new machine sit idle because you cannot afford the consumables to use it.
- Machine Cost: The primary investment (e.g., the welder or band saw).
- Tooling/Consumables: The ongoing costs (e.g., blades, wire, gas).
- Safety Gear: Non-negotiable protection (e.g., helmet, gloves, apron).
| Category | Recommended Budget % | Priority Level |
|---|---|---|
| Primary Machine | 50% – 60% | High |
| High-Quality Consumables | 15% – 20% | High |
| Precision Measuring Tools | 10% | Medium |
| Safety Gear (PPE) | 10% | Critical |
| Shop Storage/Org | 5% | Medium |
Tracking Tool Lifespan and Replacement Cycles
Tracking how long your tools last helps you identify which brands or types of consumables offer the best value for your specific workflow. By keeping a simple log of when you change a saw blade or buy a new box of welding tips, you can make data-driven decisions on future purchases.
I maintain a spreadsheet where I note the date of purchase and the date of failure for high-wear items. This habit revealed that a slightly more expensive band saw blade lasted four times longer than the bargain version. This kind of record-keeping turns “guesses” into “knowledge,” allowing you to refine your budget over time.
- Date of Purchase: Record when the item entered service.
- Usage Hours: Estimate how many hours the tool was actively used.
- Failure Mode: Note if it broke, dulled, or simply wore out.
Essential Workshop Safety Integration
Safety integration involves embedding protective measures into the very fabric of your shop layout and daily habits. It follows standards similar to those set by OSHA or the American Welding Society to ensure that your hobby does not result in long-term health issues or immediate injury.
Eye and Face Protection Ratings
Eye protection is categorized by ANSI Z87.1 ratings, which specify the impact resistance of lenses and shields. For metalworking, you need protection that can withstand high-speed fragments from grinding wheels and the intense ultraviolet light produced by welding.
I never step into my shop without Z87+ rated glasses. The “+” indicates high-velocity impact protection. When welding, a modern auto-darkening helmet is a game-changer for beginners, as it allows you to see your workpiece clearly before you strike an arc, reducing “arc flash” and improving the quality of your starts.
- Z87+ Glasses: The minimum requirement for all shop activities.
- Face Shields: Necessary for heavy grinding or using a chop saw.
- Welding Helmets: Must meet ANSI Z87.1 and offer variable shade settings (9-13).
Fire Prevention and Electrical Safety Checklists
Fire prevention in a metal shop focuses on controlling sparks and managing flammable materials. This includes having the correct type of fire extinguisher nearby and ensuring your electrical system is not overloaded.
My shop has a dedicated fire station with a Class ABC extinguisher and a fire blanket. I also make it a habit to perform a “fire watch” for 30 minutes after I finish welding or grinding. This involves simply staying in the shop to ensure no stray sparks are smoldering in a corner or a bin of sawdust.
- Extinguisher Type: Class ABC is best for wood, liquid, and electrical fires.
- Spark Shields: Use welding blankets to protect nearby equipment and walls.
- Circuit Load: Never use extension cords for high-draw machines like welders.
Conclusion: Building Your Shop with Confidence
Starting a metalworking journey is about more than just buying tools; it is about building a system that supports your creativity and safety. By focusing on material quality, understanding your power limits, and keeping meticulous records, you can create a professional-grade environment on a realistic budget. Remember that every expert was once a beginner who decided to invest in quality over quantity. Take it one step at a time, prioritize your safety gear, and enjoy the process of turning raw steel into something functional.
Frequently Asked Questions
What are the signs of a low-quality grinding wheel?
Low-quality wheels often vibrate excessively, wear down very quickly, or “glaze over,” which means the metal particles fill the gaps in the abrasive. If you notice a wheel is bouncing or not cutting even with pressure, it likely lacks the proper bonding agent or grit quality for the material you are working on.
How can I tell if a drill bit is actually made of Cobalt?
Cobalt bits are generally not gold-colored (which is often a titanium nitride coating on standard HSS). They usually have a dull, bronze-like or greyish-steel appearance throughout the entire bit. The most reliable way to tell is by checking the shank for an “M35” or “M42” stamping, which indicates the cobalt grade.
Why does my welder keep tripping the circuit breaker?
This usually happens because the welder is drawing more amperage than the circuit is rated for, or there are other items (like a fridge or lights) on the same line. Ensure your welder is on a dedicated 20A circuit and avoid using thin extension cords, which cause a voltage drop and increase the amp draw.
Is an auto-darkening welding helmet worth the extra cost for a beginner?
Yes, it is one of the best investments you can make. It allows you to keep both hands on your torch and see exactly where you are starting your weld. This leads to fewer mistakes, better safety, and a much faster learning curve compared to a traditional “flip-down” helmet.
How often should I replace my shop’s respirator filters?
If you start to smell fumes or if breathing becomes noticeably more difficult, it is time to change the filters. In a typical hobby shop, P100 filters should be replaced every 30 to 40 hours of active use, or sooner if you are working in a very dusty environment.
What is the difference between a “machinist” square and a “carpenter” square?
A machinist square is made of hardened steel and ground to extremely tight tolerances (often within 0.0001 inches). A carpenter’s square is usually stamped from aluminum or thin steel and is designed for wood tolerances, which are not precise enough for many metal fabrication tasks.
Can I use a standard shop vac for metal grinding dust?
You can, but you must use a high-efficiency filter (HEPA) and ideally a cyclonic separator. Standard paper filters will quickly clog with fine metallic dust, and there is a small risk of hot sparks igniting the debris inside the vacuum bag if you are not careful.
Why do some saw blades cost three times more than others?
Higher-priced blades typically feature better tooth geometry, superior carbide grades, and “vibration dampening” slots. These features allow the blade to run cooler and stay sharp significantly longer, often making them cheaper per cut than the budget options.
What is “duty cycle” and why does it matter for my budget?
Duty cycle is the percentage of a 10-minute period a machine can run at its rated output before it needs to cool down. A 20% duty cycle means you can weld for 2 minutes and must rest for 8. Understanding this prevents you from overworking a budget machine and burning out the internal components.
How do I maintain my precision measuring tools?
Keep them clean, lightly oiled with a rust preventative, and stored in their original cases. Never drop them or use them as scrapers or prying tools. Periodically check them against a known standard (like a 1-2-3 block) to ensure they are still accurate.
(This article was written by one of our staff writers, Michael Thompson. Visit our Meet the Team page to learn more about the author and their expertise.)