How to Choose the Right Fasteners for Steel Builds (Guide)
I remember standing in my shop three years ago, looking at a heavy-duty storage rack I had just finished. I used standard bolts from a big-box store, thinking a bolt is just a bolt. Two days later, a shelf holding 400 pounds of steel plate sagged because the hardware had literally stretched. That was a wake-up call. In my 14 years of inspecting industrial steel builds, I have seen how a single incorrect choice in hardware can lead to a catastrophic structural failure. We often focus so much on the steel itself that we treat the parts holding it together as an afterthought.
When you are building a frame or a machine base in your own shop, the anxiety of “will it hold?” is real. You are dealing with physical forces that do not care about your hard work or your budget. If a joint fails, it usually happens at the connection point. My goal is to help you move past the guesswork. We will look at how to analyze load paths, decode the markings on bolt heads, and understand why torque is more than just “making it tight.” By the end of this guide, you will have a data-driven approach to securing your steel projects safely.
Understanding Mechanical Stress and Load Paths in Steel Assemblies
Mechanical stress refers to the internal forces that particles of a structural member exert on each other. Load paths are the routes that forces take through a structure to the ground. Understanding these ensures that the hardware you choose can handle the specific direction and magnitude of the weight applied.
When I evaluate a design, I first look at how the weight moves. Is it pulling the bolt apart (tension) or trying to slide the plates across each other (shear)? Most failures in home shops happen because a fabricator used a bolt designed for tension in a high-shear application. For example, a heavy gate hinge puts a massive shear load on the top bolt. If that bolt is too small or the wrong grade, it will eventually deform or snap.
You also need to consider the structural metal load capacity of the steel itself. If you use a Grade 8 bolt in thin, soft 1018 cold-rolled steel, the bolt might be fine, but it could tear right through the metal. I always aim for a safety factor of at least 3:1 for static loads and 5:1 for anything that moves. This means if your load is 1,000 pounds, your hardware should be rated for at least 3,000 pounds.
- Tension: Force pulling along the axis of the bolt.
- Shear: Force acting perpendicular to the bolt axis.
- Yield Strength: The point where the bolt permanently deforms.
- Tensile Strength: The point where the bolt actually breaks.
Decoding Bolt Grades and Tensile Strength Ratings
Bolt grades are classification systems that define the mechanical properties of a fastener, such as its minimum yield and tensile strength. These ratings are usually marked on the head of the bolt using lines or numbers, helping fabricators match the hardware’s capacity to the project’s requirements.
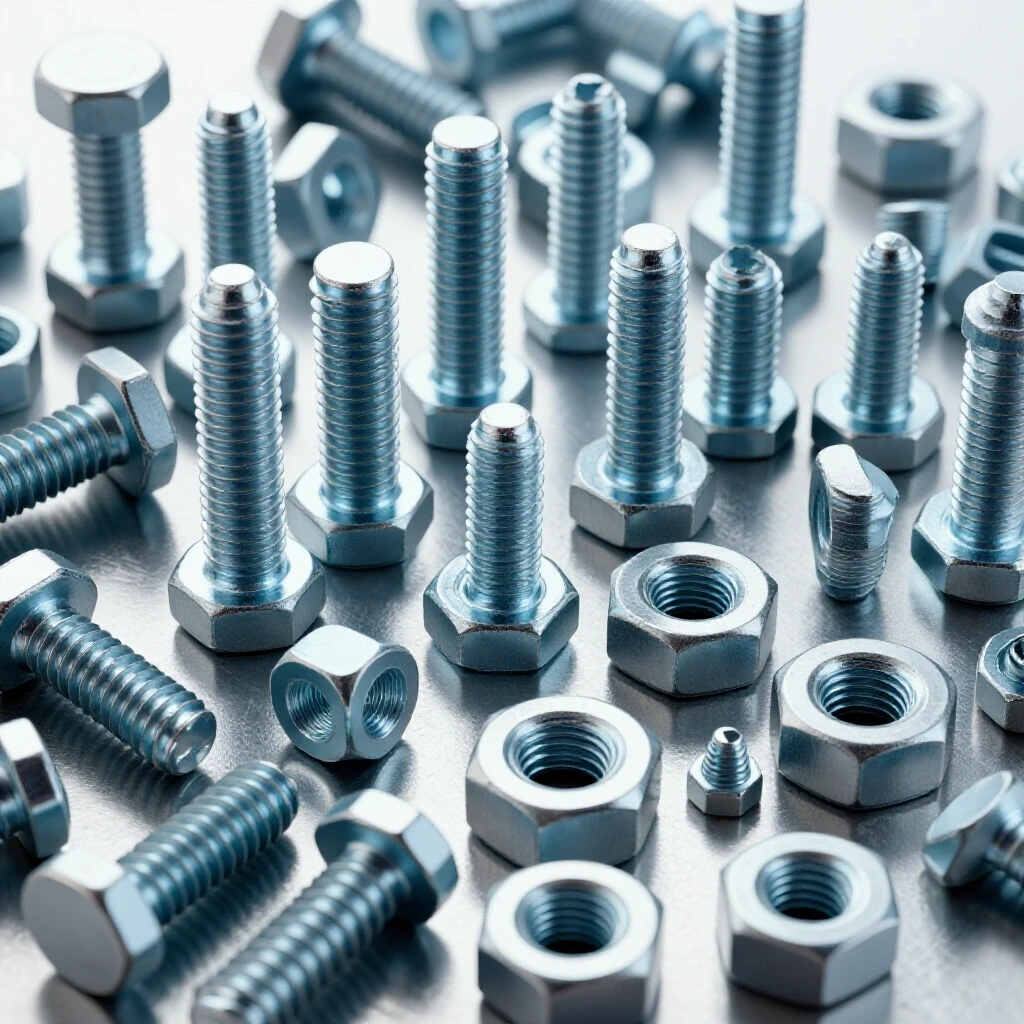
In the US, we mostly use SAE grades. A Grade 2 bolt has no markings and is made of low-carbon steel. I rarely use these for anything structural. Grade 5 has three radial lines and is common in automotive and light structural work. Grade 8 has six lines and is the gold standard for high-stress garage fabrication safety. If you see a metric bolt, it will have numbers like 8.8, 10.9, or 12.9. A 10.9 metric bolt is roughly equivalent to an SAE Grade 8.
I once inspected a trailer frame where the builder used Grade 2 bolts because they were cheaper. Under the vibration of the road, the bolts reached their yield point and stretched. Once a bolt stretches, it loses its “clamp load,” and the whole joint becomes loose. This leads to a “clunking” sound, which is the sound of your project failing. Always check the head markings before you install.
| Bolt Grade | Material | Yield Strength (PSI) | Tensile Strength (PSI) |
|---|---|---|---|
| SAE Grade 2 | Low Carbon Steel | 57,000 | 74,000 |
| SAE Grade 5 | Medium Carbon Steel | 92,000 | 120,000 |
| SAE Grade 8 | Alloy Steel, Quenched | 130,000 | 150,000 |
| Metric 8.8 | Medium Carbon Steel | 92,800 | 116,000 |
| Metric 10.9 | Alloy Steel, Quenched | 136,000 | 151,000 |
The Critical Role of Shear Strength in Structural Joints
Shear strength is the maximum load a fastener can withstand when a force is applied perpendicular to its axis, tending to “cut” through the shank. In many steel frames, shear is the primary force acting on bolts, making it a vital metric for preventing sudden joint failure.
One of the biggest mistakes I see is putting the threaded part of a bolt in the “shear plane.” The shear plane is the gap where two metal plates meet. If the threads are in that gap, the load-bearing area is much smaller because the root of the thread is thinner than the shank. This can reduce the shear capacity by as much as 25%.
I always try to use a bolt with a “grip length” (the unthreaded part) that spans the entire thickness of the plates being joined. Only the very end of the bolt, where the nut goes, should be threaded. If you can’t find the perfect length, use a slightly longer bolt and add a hardened washer to ensure the threads stay out of the joint. This simple change drastically improves structural metal load capacity.
- Single Shear: One interface where the bolt could be cut (e.g., a simple lap joint).
- Double Shear: Two interfaces (e.g., a clevis pin arrangement), which doubles the strength.
- Thread Exclusion: Keeping threads out of the shear zone to maintain maximum cross-sectional area.
Ensuring Proper Thread Engagement and Nut Selection
Thread engagement is the distance or number of threads that are in contact between a male and female fastener. Correct engagement ensures that the load is distributed evenly across the threads, preventing stripping or pull-out failures under heavy tension or vibration.
A general rule I follow is the “1.5x Diameter Rule.” If you are using a 1/2-inch bolt, you want at least 3/4 of an inch of thread engagement into the receiving material or nut. For standard nuts, this is usually handled by the height of the nut itself, but if you are tapping a hole into a steel plate, you need to make sure the plate is thick enough.
Don’t forget that nuts have grades too. If you use a Grade 8 bolt with a Grade 2 nut, the nut threads will simply strip out long before the bolt reaches its strength. I always match the nut grade to the bolt grade. Also, consider using nylon-insert lock nuts (Nylocs) or all-metal prevailing torque nuts for any project that will experience vibration, like a generator mount or a vehicle bracket.
- Measure the bolt diameter.
- Multiply by 1.5 to find the minimum engagement depth.
- Check that at least two full threads extend past the nut after tightening.
- Verify the nut has the same marking or grade as the bolt head.
Managing Torque Values and Preload for Joint Stability
Torque is the rotational force applied to a fastener to create “preload,” which is the tension that clamps the joint together. Proper preload prevents the bolt from loosening under vibration and ensures the joint behaves as a single rigid unit rather than a loose assembly.
Many people think torque is just about keeping the nut from falling off. In reality, a properly torqued bolt acts like a very stiff spring. It stretches slightly, and that tension creates friction between the two steel plates. This friction is what actually carries the load in many “friction-grip” joints. If you don’t torque it enough, the plates can slide, which leads to shear failure.
I use a calibrated torque wrench for every structural connection. It is important to know if your threads are “dry” or “lubricated.” Lubricating a bolt with oil or anti-seize reduces friction during turning, which means you can easily over-stretch the bolt even if the torque wrench says you are at the right number. Most standard torque charts are for dry threads unless stated otherwise.
| Bolt Size (Grade 8) | Dry Torque (ft-lbs) | Lubricated Torque (ft-lbs) |
|---|---|---|
| 1/4″-20 | 12 | 9 |
| 3/8″-16 | 45 | 35 |
| 1/2″-13 | 110 | 80 |
| 5/8″-11 | 220 | 170 |
| 3/4″-10 | 380 | 280 |
Protecting Hardware Against Corrosion and Hydrogen Embrittlement
Corrosion protection involves applying coatings like zinc or galvanization to fasteners to prevent oxidation and structural degradation. Hydrogen embrittlement is a specific risk in high-strength bolts where absorbed hydrogen makes the metal brittle, leading to sudden, unpredictable fractures under load.
In my workshop, I usually choose clear zinc-plated bolts for indoor projects. For anything that stays outside, like a trailer or a yard gate, I use hot-dip galvanized hardware. Be careful with stainless steel; while it doesn’t rust, it is much softer than a Grade 8 carbon steel bolt. If you use stainless for a high-load structural joint, it may fail prematurely.
Another hidden danger is “galling.” This happens mostly with stainless steel where the threads essentially cold-weld themselves together as you tighten them. I once had to cut a $50 bracket off a project because a stainless nut seized halfway on. Always use a nickel-based anti-seize lubricant when working with stainless steel fasteners to prevent this.
- Zinc Plating: Good for general use, low corrosion resistance.
- Hot-Dip Galvanized: Thick coating, excellent for outdoors, requires oversized nuts.
- Stainless Steel (304/316): Excellent corrosion resistance but lower tensile strength than Grade 8.
- Black Oxide: Primarily for aesthetics or oiled environments; offers almost no rust protection.
Implementing a Workshop Safety Checklist for Structural Hardware
A safety checklist is a systematic approach to verifying that every fastener in a build meets the design specifications. This process includes checking head markings, verifying torque settings, and inspecting for physical defects or incorrect materials before the final load is applied.
Before I ever put a load on a project, I do a final walk-through. I call this the “nut and bolt check.” I take a paint pen and mark each bolt head after I have verified its torque. This gives me a visual confirmation that nothing was missed. This is a standard practice in professional racing and aerospace for a reason—it works.
I also look for signs of “crush” in the base metal. If the washer is sinking into the steel, the material might be too soft for the load. In those cases, I switch to a larger diameter “fender” washer or a thicker hardened structural washer to spread the force. Your workshop safety checklist should be your final line of defense against a project failure.
- Verify all bolt heads have the correct grade markings for the design.
- Ensure washers are present under both the bolt head and the nut to protect the steel.
- Confirm that at least two threads are visible beyond the nut.
- Check that the shank (unthreaded part) is sitting in the shear plane.
- Use a torque wrench to reach the calculated preload.
- Mark each tightened fastener with a paint pen to prevent missed joints.
- Inspect for any “necking” (thinning) of the bolt, which indicates over-tightening.
Practical Steps for Successful Steel Fastening
Choosing the right hardware is about more than just picking the strongest bolt. It is about understanding how that bolt interacts with your steel and the loads you are applying. I have seen 1/2-inch Grade 8 bolts fail because they were over-torqued, and I have seen tiny 1/4-inch bolts hold perfectly because the load path was designed correctly.
Start by sketching your joint and identifying the forces. If you are unsure, go one size up on the bolt diameter. The cost difference is usually pennies, but the increase in safety is significant. Always keep your fasteners organized in your shop by grade and size. Mixing Grade 2 and Grade 8 bolts in the same bin is a recipe for a future mistake.
As you move forward with your builds, treat the hardware with the same respect you give your power tools. A bolt is a precision-engineered component. When you use it correctly, it provides a reliable, predictable connection that will keep your projects—and yourself—safe for years to come.
Frequently Asked Questions
What happens if I use a bolt that is too strong for the steel? If you use a high-strength Grade 8 bolt in very thin or soft steel, the bolt will not fail, but the steel might. The high clamping force can cause the bolt to “pull through” the metal or cause the holes to elongate under load. Always ensure the material thickness is sufficient for the bolt size.
Can I reuse bolts that have been tightened once? For non-critical items, reuse is usually fine. However, for structural joints, I recommend using new hardware. High-strength bolts can experience “permanent set” or minor stretching when torqued to their limit. Reusing them can lead to unpredictable torque readings and potential fatigue failure.
How do I know if a bolt is metric or standard just by looking at it? Standard (SAE) bolts use radial lines on the head to indicate grade. Metric bolts use numbers (like 8.8 or 10.9). Additionally, the thread pitch is different. If a nut doesn’t spin on easily by hand, do not force it; you likely have a mismatch between metric and standard threads.
Why should I use a washer? Washers serve two main purposes: they distribute the clamping pressure over a larger area to prevent the metal from crushing, and they provide a smooth surface for the nut to turn against, which ensures more accurate torque readings.
What is the difference between a fine thread and a coarse thread bolt? Fine threads have a larger “stress area” and are slightly stronger in tension. They are also less likely to vibrate loose. Coarse threads are more common, faster to install, and less likely to cross-thread or strip in softer materials. For most structural steel builds, coarse threads are the standard.
Should I use Loctite or a lock washer? In high-vibration environments, I prefer nylon-insert nuts or specialized “wedge-lock” washers (like Nord-Lock). Split lock washers are common but can sometimes flatten out and lose effectiveness. Thread-locking compounds (Loctite) are excellent for permanent assemblies but make future disassembly difficult.
What does “Grade 5” actually mean in terms of weight? A 1/2-inch Grade 5 bolt has a tensile strength of about 120,000 PSI. This doesn’t mean it can hold 120,000 pounds. You have to calculate the cross-sectional area. A 1/2-inch bolt has an area of about 0.14 square inches, so it can handle roughly 17,000 pounds in pure tension before breaking.
How do I prevent rust if I can’t find galvanized bolts? If you must use plain steel or zinc bolts outdoors, I recommend painting the heads and nuts after assembly. You can also use a “cold galvanizing” spray, which is a zinc-rich primer that provides a sacrificial layer of protection against oxidation.
Does the length of the bolt affect its strength? The length does not change the tensile strength, but a longer bolt will stretch more under the same load. This “spring effect” can actually be helpful in maintaining preload in joints that experience temperature changes or heavy vibrations.
What is “hydrogen embrittlement” and should I worry about it? This mostly affects very high-strength bolts (Grade 8 or Metric 12.9) that have been acid-cleaned or electroplated. The hydrogen gets trapped in the metal grain, making it brittle. If you buy quality, certified hardware from reputable sources, they usually perform a “baking” process to remove this risk.
(This article was written by one of our staff writers, James Harlan. Visit our Meet the Team page to learn more about the author and their expertise.)