How to Reduce Shop Machine Noise and Vibration (Easy Fix)
Setting up your first metalworking space is an exercise in balancing ambition with a bank account. When I built my first garage shop in 2013, I had exactly $2,000 and a lot of empty floor space. I remember the first time I bolted a bench grinder to a lightweight wooden table. When I flipped the switch, the entire wall of the garage hummed so loudly that my neighbor came over to check if I was running a jet engine. That experience taught me that a functional shop isn’t just about having the right tools; it is about how those tools interact with your environment. High-frequency rattles and heavy thumps are more than just annoying sounds. They represent wasted energy, potential mechanical wear, and a significant distraction that can lead to safety errors.

Many beginners face a common hurdle: they buy entry-level tools and find them louder or more prone to shaking than the industrial versions they saw in a professional shop. This often leads to “analysis paralysis,” where you worry that you bought the wrong equipment. In reality, most budget-friendly tools just need a little help settling into their new home. By focusing on stability and isolation, you can turn a noisy, vibrating garage into a professional-feeling fabrication space without spending a fortune on specialized acoustic treatments.
Establishing a Stable Foundation for Your Starter Metal Workshop
A stable foundation refers to the physical interface between your machinery and the floor or workbench. It is the first line of defense against unwanted movement that can ruin a clean cut or loosen a fastener over time.
When planning your starter metal workshop layout, you must consider the mass of your work surfaces. A common mistake I see is mounting a heavy drill press or a small lathe to a thin, unreinforced plywood top. Thin surfaces act like a drumhead, amplifying every internal movement of the motor and gears. To counter this, I recommend doubling up your bench tops. Gluing and screwing two layers of 3/4-inch plywood together creates a 1.5-inch thick slab that has enough mass to absorb minor oscillations.
If you are working with a concrete floor, ensure your benches are level. An unlevel bench creates a “rocking chair” effect. Every time the machine cycles, the bench leg lifts and strikes the floor. This creates a rhythmic tapping that can be felt through your boots. Using simple shims or adjustable feet can resolve this immediately.
Why Bench Mass Matters for Precision
Bench mass is the total weight and density of your work surface, which acts as a “sink” for mechanical energy. A heavier bench requires more energy to move, meaning the small vibrations from a motor won’t be enough to make the whole table shake.
In my early days, I used a lightweight folding table for my portable band saw. The vibration was so intense that the saw would “walk” across the table during a cut. I eventually moved it to a dedicated stand made of 2×4 lumber with a sand-filled base. The difference was night and day. The saw stayed put, the cut was straighter, and the high-pitched whine was replaced by a duller, more manageable hum.
| Bench Type | Estimated Cost | Stability Rating | Best For |
|---|---|---|---|
| Folding Plastic Table | $40 | Very Low | Light assembly only |
| Single 3/4″ Plywood | $60 | Moderate | Hand tools, light sanding |
| Double Layer Plywood | $110 | High | Bench grinders, small lathes |
| Steel Frame w/ Wood Top | $250+ | Very High | Heavy fabrication, welding |
Isolating Equipment with Simple Dampening Solutions
Isolation is the process of decoupling a machine from its mounting surface using flexible materials. This prevents the energy of the motor from traveling into the bench and turning the entire structure into a speaker.
One of the most affordable fabrication tools in your arsenal isn’t a tool at all—it is a thick rubber mat. I often point beginners toward 3/4-inch thick horse stall mats found at farm supply stores. These are made of dense, recycled rubber and are designed to withstand thousands of pounds. Cutting a small square of this mat to place under the feet of a drill press or bench grinder is one of the most effective ways to quiet a shop. It absorbs the high-frequency “ting” of metal-on-metal contact.
Another option is the use of anti-vibration pads specifically designed for machinery. These often feature a “waffle” pattern that allows the rubber to compress and expand, trapping the energy within the pad. When you install these, make sure you aren’t bolting the machine down so tightly that you crush the rubber into a solid block. The material needs a little room to breathe to do its job.
Choosing the Right Dampening Material
Different materials respond to different frequencies. Soft foams might work for a small air pump, but they will bottom out under a heavy iron tool. For metalworking, you need high-density elastomers.
- Rubber Stall Mats: Great for floor-standing tools like sanders.
- Neoprene Strips: Excellent for placing between a tool’s base and a wooden bench.
- Cork-and-Rubber Pads: These are industrial standards that provide excellent isolation for mid-sized lathes or mills.
- Sorbothane: A premium option for very sensitive measuring equipment, though it can be pricey for a budget shop.
Mechanical Tuning to Eliminate Rattle and Hum
Mechanical tuning involves checking the internal and external components of a tool to ensure everything is tight, aligned, and balanced. A loose bolt or a misaligned belt is a primary source of noise in budget metalworking tools.
As an industrial technician, the first thing I do with a new-to-me tool is a “fastener sweep.” I go through and check every nut, bolt, and screw. Manufacturers often ship tools partially assembled, and things can loosen during transit. A rattling belt guard is a classic example. It doesn’t affect the tool’s function, but it creates a distracting metallic chatter. Adding a simple rubber washer to the mounting screw of that guard can silence it instantly.
Belts are another major culprit. Many entry-level tools use stiff, V-shaped rubber belts. If a tool sits in a box for months, the belt can develop a “set” or a permanent curve. When you turn the machine on, that curve hits the pulley every rotation, causing a thumping sound. Replacing a stiff factory belt with a link-style belt can significantly smooth out the operation of a drill press or a small lathe.
The Importance of Pulley Alignment
Pulley alignment is the process of ensuring that the drive wheel on the motor is perfectly in line with the driven wheel on the tool. If they are even slightly off, the belt will rub against the side of the pulley, creating heat and a squealing noise.
To check this, you can use a simple straightedge. Lay the straightedge across the faces of both pulleys. If there is a gap at any point, loosen the set screw on one pulley and slide it along the shaft until it aligns. This simple five-minute fix reduces wear on the motor bearings and makes the tool run much smoother.
Optimizing Your Starter Metal Workshop Layout for Sound
Workshop layout refers to the strategic placement of tools and benches to maximize efficiency and safety. In a small garage, where you are dealing with limited workshop electrical setup checklists, how you arrange your space also affects noise levels.
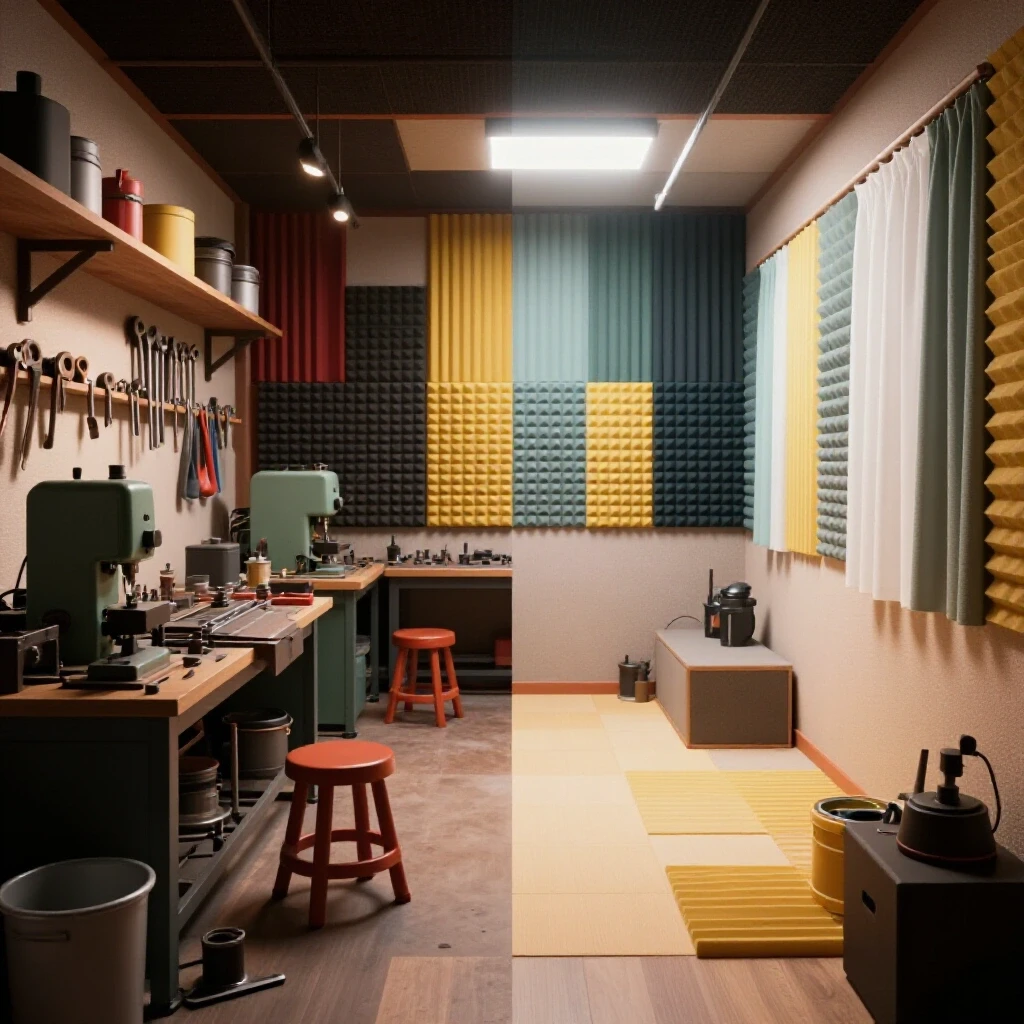
Placing a vibrating machine in the corner of a garage can create a “megaphone” effect. The sound waves bounce off the two meeting walls and amplify. If possible, move your loudest tools—like the air compressor or the bench grinder—away from the corners. If you must keep them there, consider hanging a few heavy moving blankets on the walls nearby. These blankets act as sound absorbers, catching the mid-to-high frequency noises before they can bounce back into the room.
Furthermore, consider the “sympathetic vibration” of your storage. If you have a rack of metal tubing right next to your chop saw, the saw’s vibration might cause the tubes to rattle against each other. Keeping your material storage slightly separated from your primary power tools can keep the shop much quieter during a long day of fabrication.
Managing Power and Tool Placement
When planning your beginner welder power requirements, you also need to think about where your high-draw tools sit. Running long extension cords across a shop is a safety hazard and can lead to voltage drops that make motors run roughly.
- Map out your 15A and 20A circuits.
- Place high-vibration tools (like compressors) on the sturdiest part of the floor.
- Ensure your garage workshop ventilation system isn’t mounted to a thin wall that will rattle when the fan is on high.
- Group tools by “clean” vs “dirty” zones to manage dust and noise together.
| Tool Category | Typical Draw (Amps) | Vibration Level | Recommended Mounting |
|---|---|---|---|
| Bench Grinder | 3-5A | High | Bolted with rubber pads |
| Drill Press | 5-8A | Medium | Weighted base or floor bolted |
| Small Welder | 15-20A | Low (Electrical hum) | Solid floor, clear of clutter |
| Air Compressor | 10-15A | Very High | Isolated feet, away from walls |
Low-Cost Fixes for Common Shop Tools
Every tool has its own personality and its own set of common noises. Understanding these “easy fixes” can save you from the frustration of thinking you bought a “lemon.”
For bench grinders, the most common noise source is an unbalanced wheel. Even a brand-new wheel can be slightly off-center. You can buy a simple wheel dresser for under $20. By “dressing” the wheel—essentially grinding away a tiny bit of the surface while it spins—you make it perfectly round and concentric to the shaft. This removes the “wobble” that causes the whole bench to shake.
For drill presses, the rattle often comes from the quill (the part that moves up and down). Many budget drill presses have a tension screw on the side of the head casting. Tightening this screw just enough to remove the side-to-side play, without making it hard to move the handle, can silence a noisy quill instantly.
Troubleshooting Your Equipment
- Squealing: Usually a belt or a dry bearing. Apply a drop of oil or check belt tension.
- Grinding: Could be a bearing failure or metal shavings caught in a guard.
- Rhythmic Thumping: Likely a flat spot on a belt or a nick in a pulley.
- High-Pitched Whine: Often caused by brushes in a universal motor; usually normal, but check for excessive sparking.
Safety and Budget Reconciliation
When you are tracking your startup costs, it is tempting to skip the “small stuff” like rubber pads or better fasteners. However, a shop that is loud and shaky is a shop where you will get fatigued quickly. Fatigue is the enemy of safety. According to guidelines similar to those from the American Welding Society (AWS), maintaining a controlled environment is key to consistent, safe work.
I recommend allocating about 5% of your initial tool budget specifically for “optimization.” If you have $2,000, that is $100 for shims, rubber mats, better belts, and hardware. This small investment often provides a better return in work quality than buying a slightly more expensive tool and mounting it poorly.
Always remember to check your workshop electrical setup checklists before adding new dampening or enclosures. Never cover a motor with a box to quiet it down without ensuring it has proper airflow. Motors generate heat, and overheating a tool is a much more expensive mistake than dealing with a bit of noise.
My “First Year” Rule
In my first year, I kept a log of every time a tool felt “off.” If a drill bit chattered, I didn’t just push harder; I stopped and looked at the vibration. Usually, the table was flexing. I’d spend $10 on a piece of angle iron to brace the table, and the problem would vanish. This methodical approach kept my costs low and my shop quality high.
- Identify the noise: Is it the motor, the frame, or the bench?
- Apply the cheapest fix first: Tighten bolts, then add rubber, then look at belts.
- Test and record: Did the fix work? Note it in your shop log for the next tool.
Conclusion: Building a Quiet, Capable Space
Reducing the chaos in your workshop doesn’t require a degree in acoustics or a massive budget. It requires a technician’s mindset: look for the source of the movement, isolate it, and secure it. By using heavy-duty rubber mats, double-thick bench tops, and simple mechanical adjustments, you can create a fabrication space that feels professional and stays safe.
Start with one tool. Take your bench grinder or your drill press and apply the isolation techniques we discussed. Once you hear—and feel—the difference, you’ll see that the path to a high-quality shop is paved with these small, intentional improvements. Your neighbors will thank you, and your projects will reflect the precision that comes from a stable, quiet environment.
FAQ: Managing Workshop Stability and Sound
How do I know if my machine needs isolation or if it’s just broken? If the noise is a consistent hum or vibration that matches the speed of the motor, it’s likely an isolation issue. If you hear “crunching,” “grinding,” or irregular “clacking,” those are signs of internal mechanical failure, such as a bad bearing or a broken gear. Always unplug the tool and rotate the shaft by hand to feel for resistance or rough spots.
Can I just use old carpet scraps instead of rubber mats? Carpet is better than nothing, but it’s not ideal for metalworking. It can trap metal shavings, which creates a fire hazard, and it compresses too easily, losing its dampening properties over time. Dense rubber is safer and more effective for the heavy loads of shop machinery.
Will bolting my machine to the floor make it louder? If you bolt a machine directly to a concrete floor without any dampening, the floor can actually transmit the vibration into the rest of the house. It’s always best to place a thin layer of rubber between the machine base and the concrete before tightening the bolts.
What is the cheapest way to stabilize a shaky workbench? The most cost-effective method is to add weight to the bottom. Build a low shelf on your bench and stack heavy items there, like boxes of hardware or spare steel plate. This lowers the center of gravity and increases the mass, making it much harder for the machine to move the bench.
Does belt tension affect how much a tool vibrates? Yes. A belt that is too loose will “slap” against the guards, while a belt that is too tight will put excessive load on the motor bearings, causing a high-pitched whine and premature wear. You should be able to depress the belt about 1/2 inch with moderate finger pressure.
Are link-belts worth the extra money for a beginner? If you have a tool with a significant “thump” from a set-in belt, yes. Link-belts are excellent because they don’t develop “memory” or flat spots. They are more expensive than standard V-belts, but they are a “one-and-done” fix for many vibration issues.
How often should I check the fasteners on my tools? In a new shop, I recommend doing a quick check every month for the first six months. Once the tools have “settled” into their mounts and you’ve gone through several heat cycles (tools warming up and cooling down), checking them once or twice a year is usually sufficient.
Is it safe to put a rubber mat under a welder? Welders themselves don’t vibrate much, but they do generate heat. If you use a mat, ensure it doesn’t block the air intake vents at the bottom of the welder. Most welders have feet that keep them elevated; as long as those feet are on the mat and the vents are clear, it is generally safe.
Can I use spray foam to quiet my machine guards? I don’t recommend it. Spray foam is messy, flammable, and makes it impossible to service the tool later. A small piece of adhesive-backed rubber or even a dab of silicone caulk at the contact points of the guard is a much cleaner and safer solution.
What should I do if my bench grinder still shakes after dressing the wheels? Check the mounting flanges (the big washers that hold the wheel). Sometimes these are stamped from thin metal and aren’t perfectly flat. Upgrading to machined steel flanges can ensure the wheel sits perfectly straight, which often solves the remaining vibration.
(This article was written by one of our staff writers, Michael Thompson. Visit our Meet the Team page to learn more about the author and their expertise.)