How to Repair Stripped Steel Threads With Helicoils (Fix)
I have spent 17 years in industrial maintenance, often standing over a piece of heavy machinery that has been sidelined by a single failed fastener. In my shop, I don’t look at brand names first; I look at the grain of the metal and the precision of the threads. One of the most common frustrations for any fabricator is finding a stripped-out hole in a critical steel component. It happens during a rebuild, a heavy repair, or simply from years of vibration and over-torquing.
Many buyers get caught up in the marketing hype of “miracle” fix-all kits found at big-box stores. They promise a permanent fix for pennies, but in a professional workshop, we know that the only way to restore the structural integrity of a steel part is through a mechanical rebuild of the thread path. This involves a specific process of oversized drilling, specialized tapping, and the installation of a coiled wire insert. Over the years, I have tested dozens of these kits on everything from structural steel frames to heavy-duty engine blocks. The difference between a tool that lasts a lifetime and one that snaps off in your workpiece usually comes down to the quality of the tap and the precision of the wire coil itself.
Evaluating the Structural Integrity of Steel Substrates
Understanding the metallurgical properties of the steel host material is the first step to ensure it can support a larger bored hole and the subsequent tension of a wire insert.
Steel is a resilient material, but it is not a monolith. When you are preparing to fix a damaged thread, you must first identify the grade of steel you are working with. Mild steel is forgiving, but high-carbon or alloy steels can work-harden if you use the wrong drill speed. If the surrounding metal is too thin, the process of expanding the hole to accommodate a coiled insert might compromise the part’s strength. I always look for a minimum wall thickness of at least one and a half times the diameter of the original bolt.
In my experience, the biggest mistake is rushing into a repair without checking for cracks around the hole. A wire insert provides a harder, more wear-resistant thread than the original steel, but it relies entirely on the host material’s ability to hold the tension. If the steel is fatigued or heat-damaged, the new threads will simply pull out under load. I use a simple magnifying glass and a bit of solvent to clean the area and inspect for hairline fractures before I ever pick up a drill.
Determining Steel Hardness and Drill Selection
Identifying if the steel is mild, hardened, or alloyed helps you choose the correct High-Speed Steel (HSS) or cobalt drill bit for the initial bore.
When you buy a thread restoration kit, the included drill bit is often the first point of failure. In cheap kits, these bits are frequently made of low-grade carbon steel that dulls after three seconds of contact with a hardened steel plate. For my shop, I prefer M35 or M42 cobalt bits. These bits can handle the heat generated when drilling through tough steel alloys without losing their tempered edge.
The drill size is not arbitrary. It must be the exact “STI” (Screw Thread Insert) size specified for the tap. If the hole is even 0.005 inches too large, the tap will not have enough material to bite into, and the resulting threads will be weak. Conversely, a hole that is too small will put excessive torque on the tap, leading to a snap that is nearly impossible to remove.
- Mild Steel (A36): Use standard HSS bits at moderate speeds.
- Alloy Steel (4140): Use Cobalt bits with plenty of cutting fluid.
- Stainless Steel (304/316): Use slow speeds and high pressure to prevent work-hardening.
Selecting High-Performance Thread Restoration Kits
Evaluating the build quality of the specialized taps and wire coils included in commercial sets helps you avoid tool breakage during the repair process.
When you are choosing between a $20 kit and a $100 kit, you aren’t just paying for a brand name. You are paying for the geometry of the tap and the material of the insert. A high-quality wire insert is typically made from 304 stainless steel, cold-rolled into a diamond shape. This shape allows the wire to lock into the host material while providing a smooth, 60-degree internal thread for the bolt.
The tap is the heart of the system. I look for “STI” taps that are ground with precision. Cheap taps often have “ragged” edges that tear the steel rather than cutting it. In a professional setting, I prefer a spiral point tap for through-holes, as it pushes the chips forward and out of the way. For blind holes, a spiral flute tap is better because it pulls the chips up and out of the hole, preventing them from bunching up at the bottom and breaking the tool.
Tap Geometry and Material Quality
Analyzing the flute design and heat treatment of the tap ensures clean thread cutting in tough steel without excessive torque build-up.
The “STI” tap is slightly larger than a standard tap of the same nominal size. This is because it must create a space for the wire coil to sit. If you look closely at a high-end tap, you will see that the relief angles are precisely ground to reduce friction. In steel, friction is your enemy. It creates heat, which expands the metal and can cause the tap to seize.
I always check the “H-limit” of the tap, which indicates its pitch diameter tolerance. For most shop work, an H3 limit is standard, providing a good balance between a tight fit and ease of assembly. If you are working on high-vibration machinery, you might want a tighter fit. I’ve found that many budget kits don’t even list their tolerances, which is a red flag for any precision-minded fabricator.
| Feature | Budget Kit (Carbon Steel) | Professional Kit (HSS-E/Cobalt) |
|---|---|---|
| Tap Material | Carbon Steel | HSS-G or Cobalt |
| Insert Material | Basic Stainless | 304 or 316 Stainless Steel |
| Drill Bit Quality | Rolled Forged (Soft) | Fully Ground (Hard) |
| Thread Tolerance | Unspecified | Class 2B or 3B |
| Longevity | 1-2 repairs in mild steel | Hundreds of repairs in alloy steel |
The Mechanics of Precision Drilling in Steel
The process of removing damaged thread material involves using a specific drill size that prepares the hole for the oversized “STI” tap.
Once you have verified your material and selected your tools, the execution begins with the drill. In my 17 years of maintenance, I have seen more repairs fail at this stage than any other. The hole must be perfectly perpendicular to the surface. If the drill tilts even a few degrees, the bolt will not sit flush against the mating surface, leading to uneven loading and eventual failure.
I recommend using a drill press whenever possible. If the part is too large to move, use a portable magnetic drill or a high-quality drill guide. When drilling steel, use a “pecking” motion—drill in about 1/8th of an inch, then pull back to clear the chips. This prevents the bit from overheating and ensures the hole remains true to size.
- Center Punch: Always mark the exact center of the old hole to prevent the drill from “walking.”
- Lubrication: Use a high-sulfur cutting oil. It clings to the bit and reduces the torque required to cut the steel.
- Speed Control: Run the drill at the recommended RPM for the bit diameter. For a 1/2-inch bit in steel, aim for about 600-900 RPM.
- Depth Stop: If drilling a blind hole, set a depth stop to avoid drilling through the other side of the part.
Mastering the Tapping Process for Wire Inserts
Cutting new, oversized threads into the steel base requires a specialized tap that matches the external geometry of the coiled wire insert.
Tapping steel is an exercise in patience. Unlike aluminum, steel offers significant resistance. I always use a T-handle tap wrench rather than a standard wrench to ensure I am applying even pressure on both sides. This prevents side-loading the tap, which is the primary cause of breakage.
Start the tap by hand, ensuring it is square to the hole. Turn it in about half a turn, then back it off a quarter turn. You will hear and feel a small “click”—that is the chip breaking. This “two steps forward, one step back” method is critical in steel. It prevents the flutes from clogging with long, stringy chips that can jam the tap and strip the very threads you are trying to create.
Installing the Stainless Steel Wire Coil
Winding the diamond-shaped wire insert into the newly tapped hole provides a permanent, wear-resistant internal thread.
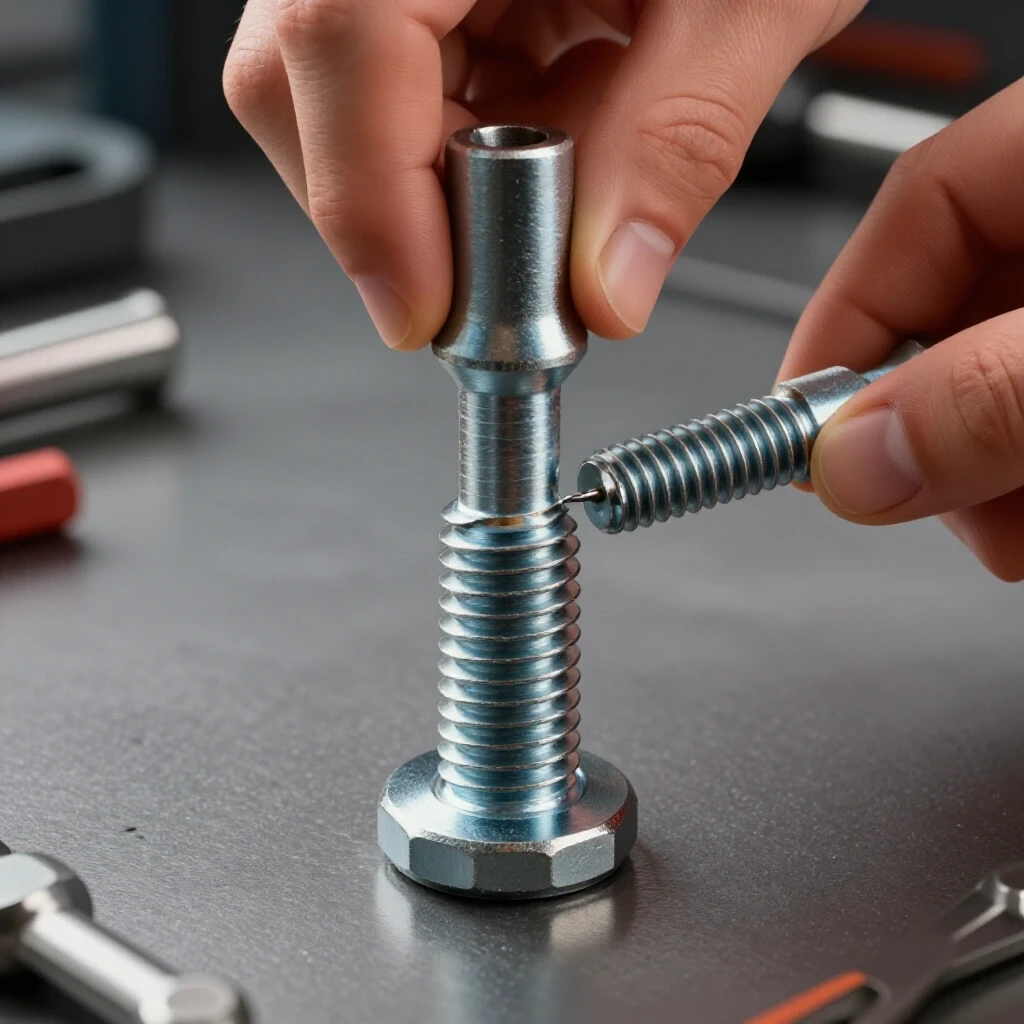
The insert itself looks like a simple spring, but it is engineered to be slightly larger than the hole it is going into. This “interference fit” is what keeps the insert from backing out once it is installed. The installation tool has a slot that engages a small cross-wire at the bottom of the coil, known as the tang.
As you wind the insert into the hole, the tool “pre-compresses” the coil, making it small enough to enter the threads. I always aim to seat the top of the insert about half a turn to a full turn below the surface of the steel. If it sits too high, it will interfere with the mating part. If it sits too low, you lose valuable thread engagement.
- Avoid Back-Winding: Once you start winding the insert in, do not turn it backward. This can cause the coil to jump threads or deform.
- Check the Lead: Ensure the first thread of the insert is properly seated in the first thread of the tapped hole.
- Surface Flushness: The insert should never protrude above the surface of the host material.
Final Verification and Tang Removal
Breaking off the driving tang and testing the newly formed threads with a fastener ensures proper fit and load-bearing capacity.
The final step is removing the tang. In a through-hole, this is simple—you just break it off and let it fall out. In a blind hole, you must be careful to retrieve the tang so it doesn’t interfere with the bolt. Most kits come with a “break-off tool,” which is essentially a flat-bottomed punch. A sharp tap with a hammer will snap the tang at the pre-notched point.
I never consider a job finished until I have run a bolt into the new threads by hand. It should spin in smoothly without binding. If there is resistance, there may be a burr at the break-off point or a bit of debris in the threads. I use compressed air to blow out the hole and a small pick to clear any remaining steel chips.
Why Heavy Steel Components Require This Specific Fix
In my shop, we deal with “torsional stiffness” and “clamping force” every day. When a steel thread strips, the structural integrity of the assembly is compromised. A coiled wire insert actually improves the connection. Because the stainless steel wire is harder than the original mild steel, it resists galling and wear much better than the factory threads ever did.
Furthermore, the insert acts as a load-distributor. In a standard tapped hole, the first two threads carry about 50% of the load. Because a coiled insert is slightly flexible, it allows the load to be distributed more evenly across all the engaged threads. This is why you see these inserts used in high-stress applications like cylinder heads and heavy machinery frames.
Case Study: Repairing a Milling Machine Footing
A few years ago, I was restoring a 1950s-era milling machine. The base was made of heavy structural steel, and one of the leveling bolt holes was completely stripped. The bolt was a 5/8-11, a significant size that carries a lot of weight.
Using a budget kit would have been a mistake. I invested in a professional-grade kit with a cobalt drill and a ground-flute tap. The steel was surprisingly hard, likely a high-manganese alloy. I used a magnetic drill to ensure the hole was perfectly vertical. The process took about 45 minutes from start to finish, but the result was a thread that felt smoother and more secure than the original. The machine has been level and vibration-free for three years of daily use.
Actionable Checklist for Successful Thread Restoration
- Measure the Fastener: Verify the diameter and pitch (e.g., 3/8-16 vs. 3/8-24) using a thread pitch gauge.
- Inspect the Host: Ensure the steel has enough “meat” around the hole to support the oversized tap.
- Select Tooling: Choose a kit with HSS or Cobalt tools if working with alloy steel.
- Clear the Area: Remove all oil, grease, and metal shavings before starting.
- Drill Square: Use a guide or press to keep the hole 90 degrees to the surface.
- Tap with Care: Use cutting oil and the “back-off” method to clear chips.
- Seat the Insert: Wind the coil to 0.5 – 1.0 turns below the surface.
- Remove Tang: Snap the tang cleanly and ensure it is removed from the hole.
- Test Fit: Hand-thread the bolt to verify the repair.
Understanding Tolerances and Runout in Threading
When we talk about “Total Indicated Runout” (TIR) in a lathe spindle, we are talking about precision. The same logic applies to thread repair. If your drill or tap has excessive runout—meaning it wobbles as it turns—the resulting hole will be “oversized” or “bell-mouthed.”
In steel, a bell-mouthed hole is a disaster. It means the insert will only be held by the threads at the bottom of the hole, while the top threads are loose. This leads to the insert pulling out under load. Always check your drill chuck for runout before starting a critical repair. If the bit wobbles more than 0.002 inches at the tip, find a better drill or a more precise chuck.
Common Mistakes to Avoid in Steel Repairs
- Using the Wrong Drill: Never “eyeball” the drill size. Use the specific bit included or recommended for the STI tap.
- Skipping the Oil: Steel-on-steel friction will weld the chips to your tap, ruining the threads and the tool.
- Over-Torquing the Insert: The installation tool is for winding, not for forcing. If the insert binds, stop and check the threads.
- Leaving the Tang: A loose tang at the bottom of a hole can prevent a bolt from seating or, worse, get caught in moving parts.
The Cost-Benefit Analysis of Premium Tooling
For a one-time fix on a non-critical part, a budget kit might get you through the day. However, for anyone building a workshop or maintaining machinery, the “cost per hole” is much lower with premium tools. A $15 carbon steel tap might break on the first hole in 4140 steel, costing you hours of extraction time and potentially ruining the part. A $40 cobalt tap will cut through that same steel like butter and be ready for the next fifty jobs.
When I evaluate machinery or tools, I look at the “replacement pipeline.” Can I buy just the inserts when I run out, or do I have to buy a whole new kit? Professional systems allow you to replenish individual components, which is the hallmark of a tool designed for a working shop.
Conclusion: Making the Right Investment
Restoring damaged threads in steel is a fundamental skill that separates the hobbyist from the professional fabricator. By looking past the marketing hype and focusing on tool material, tap geometry, and precise execution, you can make repairs that are often stronger than the original assembly.
If you are currently looking to invest in thread restoration equipment, prioritize kits that offer high-speed steel taps and 304 stainless steel inserts. Avoid the “all-in-one” sets that look like toys and instead build a collection of high-quality individual sizes that match the machinery in your shop. This approach ensures that when a critical fastener fails, you have the mechanical advantage to fix it right the first time.
FAQ
What is an STI tap and why do I need it? An STI (Screw Thread Insert) tap is a specialized tool that cuts a thread slightly larger than a standard tap. This extra space is required to accommodate the thickness of the wire coil while maintaining the correct internal diameter for the original bolt. You cannot use a standard oversized tap for this process.
Can I use these inserts in hardened steel? Yes, but you will need a high-quality cobalt or carbide-tipped drill bit and a premium HSS-E tap. Hardened steel is difficult to cut and generates significant heat, so use plenty of cutting fluid and a very slow tapping speed.
How do I know if the steel is too thin for a repair? A general rule of thumb is that you need a wall thickness of at least 1.5 times the diameter of the bolt. If the surrounding metal is thinner than this, the pressure of the tap or the tension of the bolt could cause the steel to crack or bulge.
Why does the wire insert stay in the hole without glue? The insert is designed with a slightly larger diameter than the tapped hole. When it is wound in, it acts like a compressed spring, exerting outward pressure against the host threads. This friction, combined with the way the wire locks into the thread profile, keeps it securely in place.
What happens if I break the tap inside the steel part? Breaking a tap in steel is a difficult situation. Because the tap is harder than the steel, you cannot simply drill it out. You will need a tap extractor, or in extreme cases, the tap must be removed using EDM (Electrical Discharge Machining) or shattered with a specialized punch. This is why using high-quality taps and plenty of oil is so important.
Is it possible to “stack” inserts for deeper holes? Yes, you can install one insert and then wind a second one in on top of it. However, you must ensure the coils are perfectly timed so the threads remain continuous. Most professionals prefer to buy extra-long inserts (2D or 3D length) rather than stacking them.
What is the difference between 1D, 1.5D, and 2D inserts? These numbers refer to the length of the insert relative to its diameter. A 1.5D insert for a 1/2-inch bolt is 3/4 of an inch long. For steel, 1.5D is the standard for most applications, providing a balance of strength and ease of installation.
Can I use a power drill to tap the holes? I strongly advise against it. Tapping requires a “feel” for the resistance of the metal. A power drill provides too much torque and speed, making it very easy to snap the tap or strip the new threads. Always tap by hand in a professional repair.
Do I need to use Loctite on the wire coil? Generally, no. The mechanical tension of the coil is sufficient to hold it in place. However, in high-vibration or high-heat environments, some technicians use a small amount of high-temperature thread locker on the outside of the coil before installation.
How do I measure the “pitch” of a stripped hole? Since the internal threads are gone, you should measure the bolt that came out of the hole using a thread pitch gauge. This gauge has several toothed blades that you match against the bolt threads to determine if it is, for example, 16 threads per inch (Coarse) or 24 threads per inch (Fine).
(This article was written by one of our staff writers, Steven Brooks. Visit our Meet the Team page to learn more about the author and their expertise.)