How to Build a Custom Hydraulic Pressure Testing Rig (Guide)
There is a specific scent that defines a machine rescue: a mixture of rancid lard oil, pulverized rust, and the damp, metallic tang of old cast iron. After 18 years of pulling pre-war lathes and abandoned drill presses out of barns, I have learned that the first hour with a new find is the most critical. You aren’t just looking at a tool; you are looking at a puzzle of mechanical history held together by oxidation and hope. Restoring these machines is a slow, deliberate process that requires more than just a toolbox. It requires a deep respect for the engineers who came before us and the patience to undo decades of neglect without causing further damage.
The biggest challenge isn’t the grease; it is the unknown. When you find a 1940s hydraulic shop press buried under a tarp, you cannot simply plug it in and flip a switch. Internal seals have likely turned to brittle plastic, and the cylinder walls may be pitted with corrosion. To bring such a machine back to factory tolerances, I had to develop a systematic way to verify component integrity before final assembly. This led me to develop my own methods for testing fluid power components, ensuring that every seal and weld can handle the stresses of operation.
Evaluating the Structural Viability of Vintage Iron
Assessment is the process of determining if a piece of machinery is a candidate for a full restoration or if it has reached the end of its functional life. I look for “fatal” flaws like large structural cracks in the main castings or evidence of extreme heat cycles that may have warped the bedways.
Before I turn a single wrench, I perform a “ring test” on large cast iron frames. By lightly tapping the casting with a small brass hammer, I listen for a clear, bell-like tone. A dull thud often indicates a hidden internal crack or a significant casting void. I also check for “bubba-fixes”—previous repairs where someone might have used a stick welder on grey iron without proper pre-heating, which almost always results in brittle, failing joints. If the bones are good, the rest is just a matter of time and technique.
Strategies for Managing Seized Hydraulic Components
Freeing stuck parts is an exercise in chemical warfare and thermal dynamics designed to break the bond of iron oxide without snapping obsolete fasteners. When a piston is frozen inside a bore, or a gland nut refuses to budge, aggressive force is usually the quickest way to turn a restoration into a scrap metal run.
I rely on a “heat and quench” cycle for the most stubborn parts. I use an oxy-acetylene torch to heat the outer casting rapidly while keeping the inner shaft as cool as possible. Once the outer part expands, I apply a high-quality penetrating oil. The cooling action “sucks” the oil into the threads through capillary action. Interestingly, a 50/50 mix of Automatic Transmission Fluid (ATF) and acetone often outperforms expensive commercial penetrants in these scenarios.
- Patience over Power: Give the penetrant at least 24 to 48 hours to work.
- Vibration: Light, repetitive tapping with a dead-blow hammer can help “walk” the oil into the microscopic gaps.
- Mechanical Advantage: Use long-handled wrenches, but avoid impact drivers on small, vintage fasteners which are often more brittle than modern Grade 8 bolts.
Constructing a Manual Hydraulic Verification Station
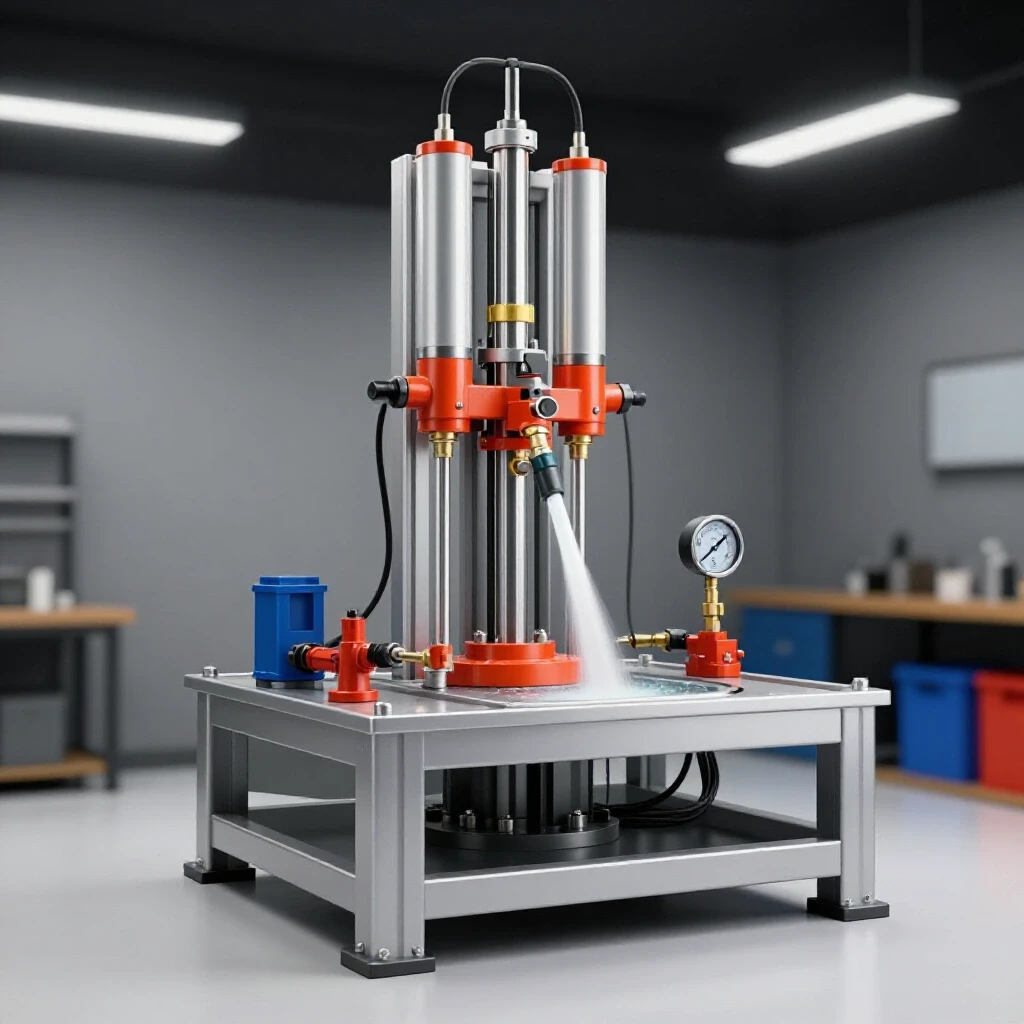
A workshop-scale pressure diagnostic tool is essential for checking the integrity of restored cylinders, hoses, and valves. This setup allows you to manually pressurize a component using a liquid (usually hydraulic oil or water with a rust inhibitor) to check for leaks or structural weaknesses.
Building this diagnostic tool involves creating a closed-loop system using a manual hand pump, a high-pressure gauge, and a series of isolation valves. By using a hand pump instead of a motorized one, you maintain total control over the pressure increase, allowing you to stop the moment a weep or a bulge is detected. This is a much safer approach for testing old castings that may have thinned over time due to internal corrosion.
Sourcing Reliable Fittings and Gauges
Selecting the right components is the foundation of a safe testing setup. For vintage machinery, you will often encounter a mix of NPT (National Pipe Thread) and older, less common thread patterns. When building your test station, use modern SAE 100R2 high-pressure hoses and JIC (Joint Service Council) fittings for the main manifold, as they are rated for much higher pressures than the 2,000 to 5,000 PSI we typically see in hobbyist restoration.
I always use a liquid-filled pressure gauge. The glycerin inside the gauge dampens vibrations and prevents the needle from fluttering, which gives a much more accurate reading when you are looking for tiny pressure drops that indicate a slow leak. Ensure your gauge’s maximum range is about 30% higher than your intended test pressure to prevent over-stretching the internal Bourdon tube.
Assembling the Pressure Circuit and Safety Relief
The heart of the validator is a steel manifold block. I prefer to machine mine from a solid block of 1018 steel, but you can also use high-pressure tee-fittings. The circuit must include a needle valve for fine pressure control and a safety relief valve. The relief valve is your “mechanical insurance policy”; it is set to a specific PSI and will vent fluid back to the reservoir if you accidentally over-pump the system.
| Component | Purpose | Recommended Specification |
|---|---|---|
| Hand Pump | Generates pressure manually | Two-stage manual (low/high volume) |
| Isolation Valve | Holds pressure in the test piece | High-pressure needle valve |
| Pressure Gauge | Monitors system PSI | 0–5,000 PSI, Glycerin-filled |
| Relief Valve | Prevents over-pressurization | Adjustable spring-loaded type |
| Reservoir | Holds the testing fluid | 1-gallon steel or heavy plastic tank |
Advanced Rust Stripping and Surface Preservation
Removing machinery rust requires a balance between being thorough and being gentle. While sandblasting is fast, it is incredibly messy and can embed grit into precision ways or bearing surfaces. For my restorations, I prefer chemical and electrochemical methods that preserve the underlying metal’s “skin.”
Electrolysis is my go-to for large, heavily encrusted castings. By submerged the part in a solution of water and washing soda (sodium carbonate) and applying a low-voltage DC current (usually from a 12V manual battery charger), the rust is converted and lifted away. The beauty of this method is that it is self-limiting; the current won’t “eat” the good steel, only the iron oxide.
- Setup: 12V DC, 2-10 Amps depending on part size.
- Anode: Use scrap steel or rebar (avoid stainless steel, as it produces toxic hexavalent chromium).
- Runtime: 12 to 24 hours for heavy scaling.
- Post-Process: Immediately dry the part and apply a “flash rust” inhibitor like WD-40 or a dedicated machine wax.
Restoring Bearing Surfaces and Precision Alignments
Once the rust is gone, we often find that the bearing surfaces are worn. In pre-war machinery, you will frequently encounter babbitt bearings—a soft white metal alloy poured directly into the casting. If these are scored or have too much “slop,” they must be repoured or shimmed.
For modern-style sleeve bearings or flat bedways, we use a process called hand scraping. This involves using a carbide-tipped tool to manually remove high spots on the metal surface. We use a “surface plate” and a marking medium like Prussian Blue to identify where the metal is touching. The goal is to achieve a specific number of “points per inch” (PPI). For a high-quality lathe bed, I aim for 15–20 PPI. This creates a surface that is not only flat but also has “pockets” to hold oil, preventing the two metal surfaces from seizing during operation.
Bearing Clearance Benchmarks
When reassembling a spindle or a hydraulic ram, the clearances must be exact. Too tight, and the machine will overheat and seize; too loose, and you will have “chatter” or leaks.
- Precision Spindles: 0.0005″ to 0.0015″ clearance.
- General Purpose Shafts: 0.002″ to 0.003″ clearance.
- Hydraulic Ram Bushings: 0.003″ to 0.005″ depending on diameter.
Sourcing and Fabricating Obsolete Fasteners
One of the most frustrating parts of vintage restoration is encountering obsolete thread patterns. Before the 1940s, standards like the Whitworth or various “shop standards” were common. If you lose a bolt or find a stripped hole, you can’t just go to the local hardware store.
I keep a comprehensive set of thread pitch gauges and a screw pitch diameter micrometer. If a thread is truly obsolete, I will often turn a new bolt on my lathe, cutting the threads manually using the lead screw. If the internal threads are damaged, I sometimes have to “over-drill” the hole, plug it with a threaded cast-iron bung, and then drill and tap the bung back to the original size to maintain the machine’s aesthetic integrity.
Final Assembly and Calibration Checklists
Reassembling a machine is more than just putting bolts back in holes. It is about stacking tolerances. I use a “bottom-up” approach, starting with the base and leveling it perfectly using a master precision level (accurate to 0.0005″ per foot). If the base isn’t level, the entire frame of the machine can twist, throwing off every subsequent measurement.
- Level the Base: Use steel shims, not wood, to achieve a dead-level foundation.
- Verify Spindle Runout: Use a dial indicator to ensure the spindle rotates true within 0.0005″.
- Check Squareness: Use a precision square to ensure the vertical columns are 90 degrees to the table.
- Lubrication Run: Before applying power, manually pump oil through every gallery to ensure no passages are blocked by old paint or cleaning grit.
Case Study: The 1952 H-Frame Press Recovery
Last year, I rescued a 50-ton H-frame press that had been sitting in a leaky shed since the 1980s. The main hydraulic ram was stuck fast, and the original copper lines were crushed. Using the manual pressure validator I built, I was able to isolate the cylinder and apply 1,500 PSI of pressure. This, combined with a gentle application of heat to the cylinder jacket, finally forced the ram to move.
After disassembling the cylinder, I found the bore was surprisingly clean, but the leather packings had disintegrated. I sourced modern U-cup seals and machined a custom adapter to fit them into the old piston head. By using my test station, I verified the new seals held at 5,000 PSI for two hours without a single drop of leakage. This gave me the confidence to put the press back into service, knowing it was safe for my shop.
Practical Maintenance for Restored Equipment
A restored machine is a living thing that requires ongoing care. Modern “Way Oil” (like Mobil Vactra No. 2) is specifically formulated with “tackifiers” that help the oil stick to vertical surfaces, which is vital for old cast iron. Never use automotive engine oil on machine ways; it contains detergents that can actually hold grit in suspension, acting like a lapping compound that wears down your precision surfaces.
I also recommend a yearly “precision audit.” Spend an hour with your dial indicators and levels to ensure that nothing has shifted. Cast iron is a stable material, but floor settling or heavy use can slowly knock a machine out of alignment. Keeping a logbook for each machine, detailing the oil used and the adjustments made, is a habit that separates the hobbyists from the true restorers.
Frequently Asked Questions
How do I know if a piece of cast iron is weldable? Most vintage machinery is made of “grey iron,” which has high carbon content. It is difficult to weld because it cracks easily when cooling. Brazing with nickel-bronze rod is usually a safer and more effective way to repair cracks in non-structural areas.
What is the best way to remove “varnished” old oil? Old oil turns into a hard, shellac-like substance. Acetone or specialized “purple” degreasers work well, but be careful as they will also strip paint. For a gentler approach, simple mineral spirits and a stiff nylon brush often do the trick.
Why shouldn’t I use a wire wheel on a bench grinder for rust? A wire wheel can be too aggressive, rounding off sharp corners and leaving “swirl” marks in the metal. It also tends to “burnish” the rust into the pores of the metal rather than removing it. Hand-scrubbing with Scotch-Brite pads and oil is much more controlled.
How do I find manuals for a company that went out of business in 1960? Online archives like “VintageMachinery.org” or “Archive.org” are gold mines. Often, other enthusiasts have scanned and uploaded original catalogs and service manuals.
Is it worth restoring a machine with pitted bedways? It depends on the depth. Light pitting can often be ignored or filled with a specialized epoxy if it doesn’t affect the travel of the carriage. If the pitting is deep and in a high-wear area, the ways may need to be professionally ground or hand-scraped.
What safety gear is mandatory for pressure testing? Always wear a full face shield and heavy gloves. Pressurized fluid can cause “injection injuries,” where fluid is forced under the skin. Always use a containment box or a heavy moving blanket draped over the test piece to catch any spray if a fitting fails.
Can I use a digital level instead of a machinist level? High-end digital levels are becoming very accurate, but for the final leveling of a lathe or mill, a traditional 12-inch master precision level is still the gold standard for most restorers due to its reliability and lack of “drift.”
How do I prevent flash rust after cleaning? The moment a part comes out of a chemical bath or electrolysis, it is extremely vulnerable. Rinse it with hot water (which evaporates faster), dry it with compressed air, and immediately coat it with a thin film of light machine oil or a dedicated rust preventative like Boeshield T-9.
What is the difference between NPT and NPTF threads? NPT (National Pipe Thread) requires a sealant like Teflon tape to be leak-proof. NPTF (National Pipe Thread Fuel) is designed to create a metal-to-metal seal without tape. When building high-pressure systems, knowing which one you have is crucial for preventing leaks.
How often should I change the oil in my restored machinery? In a home shop environment, an annual oil change is usually sufficient. However, if you are using the machine heavily or in a humid environment, check for “milky” oil, which indicates water contamination, and change it immediately.
(This article was written by one of our staff writers, Richard Beaumont. Visit our Meet the Team page to learn more about the author and their expertise.)