How to Build an Aluminum Dog Box for Pickup Trucks (Plan)
I have spent nearly two decades in the company of ghosts. These ghosts are the silent, heavy, and often rusted remains of the American industrial age. From 1940s South Bend lathes to massive cast-iron band saws that haven’t seen power since the Eisenhower administration, my life revolves around the patient revival of forgotten steel. There is a specific kind of satisfaction in taking a seized spindle and, through heat, chemistry, and mechanical empathy, making it spin with factory-level precision once again. However, a restorer’s skills are not limited to bringing old iron back to life; they are equally vital when we need to fabricate new, high-performance equipment from scratch.
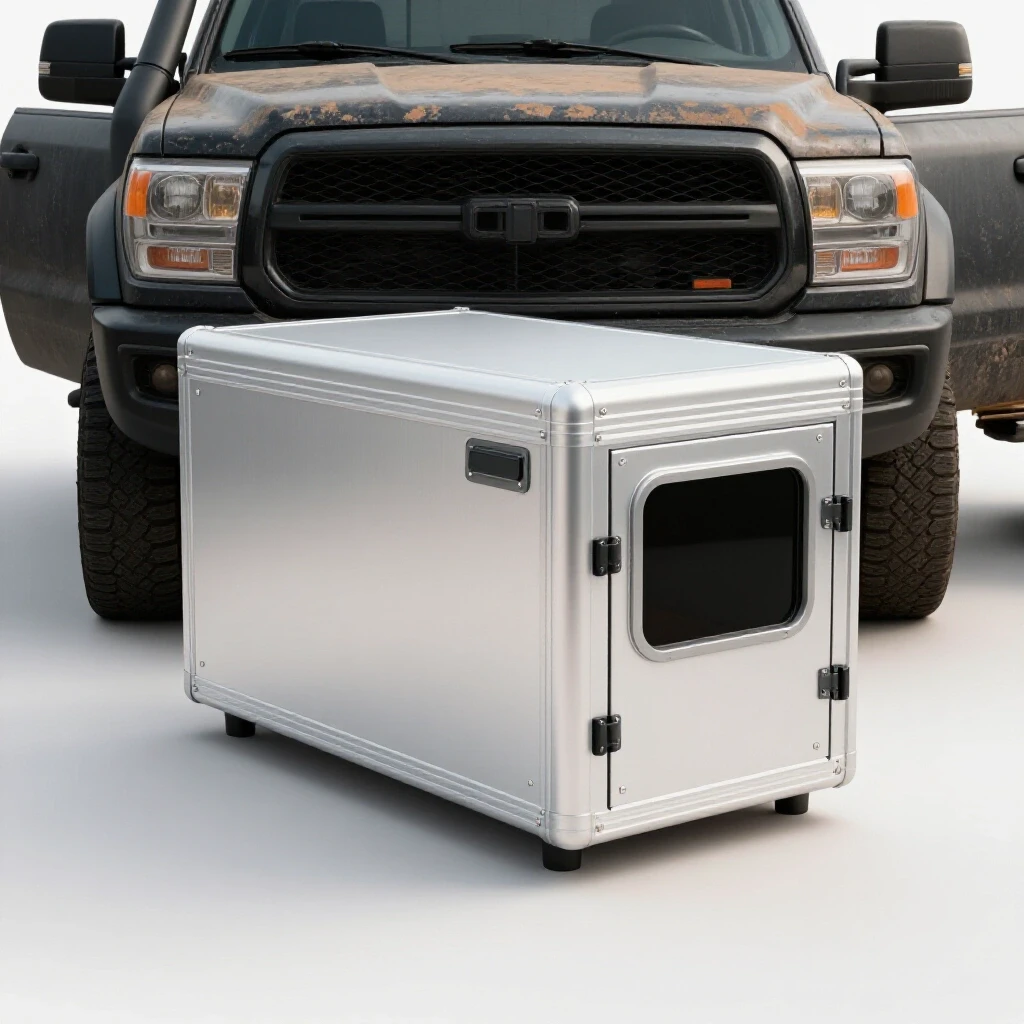
When the time came to create a custom aluminum utility enclosure for my pickup truck, I approached it with the same rigor I use when restoring a pre-war milling machine. We often think of vintage machinery restoration and modern aluminum fabrication as separate worlds. In reality, they share the same DNA: precision measurement, material compatibility, and structural integrity. Whether I am pouring babbitt bearings or TIG welding 5052 aluminum sheet, the goal is the same—building something that will outlast its creator. This guide details the systematic process of planning and fabricating a heavy-duty aluminum enclosure, treated with the technical depth of a machine rescue.
Evaluating Material Properties for Heavy-Duty Shop Projects
Selecting the correct alloy for a truck-bed enclosure requires an understanding of metallurgy similar to identifying different grades of vintage cast iron. This phase involves analyzing tensile strength, corrosion resistance, and workability to ensure the final structure can withstand years of vibration, weather exposure, and heavy physical use.
In my workshop, I treat material selection as the most critical step of any project. For this enclosure, I chose 5052-H32 aluminum for the main panels. Unlike the grey iron castings I usually work with, which are brittle and prone to cracking under tension, 5052 aluminum is prized for its excellent “workability” and marine-grade corrosion resistance. It takes a 90-degree bend without cracking at the radius, which is essential for a structural box. For the framework, I utilize 6061-T6 aluminum extrusions. This is a structural alloy that provides the rigidity needed to prevent the box from racking when the truck hits a pothole.
| Material Property | 5052-H32 Aluminum | 6061-T6 Aluminum | Class 30 Gray Cast Iron |
|---|---|---|---|
| Yield Strength | 28,000 psi | 40,000 psi | 30,000 psi (Tensile) |
| Corrosion Resistance | Excellent (Saltwater) | Good | Poor (Requires Coating) |
| Weldability | Excellent | Good (Requires Care) | Very Difficult |
| Primary Use | Sheet metal, Tanks | Structural frames | Machine bases, Beds |
When you are used to removing machinery rust from a 500-pound lathe bed, working with clean aluminum feels like a luxury. However, aluminum has its own “rust”—a thin layer of aluminum oxide that forms almost instantly. While it doesn’t flake away like iron oxide, it has a much higher melting point than the base metal. If you don’t strip this oxide layer using a dedicated stainless steel brush before welding, you will end up with inclusions that weaken the entire structure.
Precision Layout and Dimensional Fitment for Truck Beds
The layout phase is where my background in classic tool alignment pays dividends. This involves translating a conceptual design into a physical set of measurements that account for the specific geometry of a pickup truck bed, ensuring the enclosure fits securely without interfering with wheel wells or tailgates.
I start every fabrication project with a “master measurement sheet,” much like the ones I use for machine disassembly tips. You cannot trust the factory specs of a truck bed any more than you can trust the lead screw of a neglected lathe. I use a calibrated tape measure and a large machinist square to map the interior dimensions of the bed. I specifically look for “taper”—many truck beds are narrower at the tailgate than they are at the cab.
- Width Measurement: Measure at the floor, the mid-point, and the top of the rails.
- Length Measurement: Check both the driver and passenger sides to ensure the bed is square.
- Wheel Well Clearance: Note the height and depth of the wheel arches to allow for a “notched” design if the box is full-width.
- Tolerance Allowance: I always subtract 0.25 inches from my maximum width to allow for bed liners and thermal expansion.
When planning the cuts, I use a technique from my days of restoring vintage metalworking equipment: the “scribing method.” Instead of using a thick carpenter’s pencil, I use a carbide-tipped scriber and layout fluid (Dykem Blue). This allows for a line width of roughly 0.005 inches. When you are fitting doors and latches, that level of precision prevents the “rattle” often found in cheap, mass-produced utility boxes.
Systematic Cutting and Forming of Aluminum Sheet
Cutting and forming are the mechanical heart of the fabrication process, requiring specialized tools to manipulate sheet stock into a three-dimensional form. This stage focuses on maintaining clean edges and accurate bend radii to ensure that the individual components align perfectly during the final assembly.
For a restorer, cutting metal is second nature, but aluminum requires a different touch than the heavy steel plates found on old machinery guards. I use a circular saw with a dedicated non-ferrous blade for long, straight cuts. It sounds like a jet engine, but it leaves a factory-finish edge. For tighter corners or notches around the truck’s bed rails, a variable-speed jigsaw with a high-tooth-count blade is my go-to.
Bending the aluminum is where many hobbyists fail. If you try to bend 0.125-inch aluminum over a sharp edge, it will develop “stress risers” or micro-cracks. I use a shop-built finger brake, but if you don’t have one, you can “kerf-bend” the material. This involves cutting a shallow groove (about 30% of the material thickness) on the inside of the bend line. This mimics the relief cuts I often see in old cast-iron housings designed to prevent casting stress.
- Blade Speed: High speed, slow feed.
- Lubrication: Use a wax stick or WD-40 on the blade to prevent “loading” (where aluminum melts onto the teeth).
- Bend Radius: Aim for a minimum radius of 1x the material thickness for 5052 aluminum.
Welding Sequences for Structural Integrity and Warp Prevention
Welding aluminum is a high-precision task that involves managing heat input to join components without causing the warping or “oil-canning” common in thin-gauge fabrication. This section covers the technical nuances of TIG and MIG welding, focusing on the specific settings required for a durable, vibration-resistant bond.
In my 18 years of restoration, I’ve learned that heat is both a friend and an enemy. When I’m trying to achieve a thermal release of a seized shaft, I want localized heat. When I’m welding a large aluminum box, I want to distribute heat as evenly as possible. Aluminum conducts heat much faster than the cast iron found in vintage machinery, which means the whole box will expand and contract significantly during the welding process.
I prefer TIG (Tungsten Inert Gas) welding for the main structural seams. It allows for a “stack of dimes” aesthetic that matches the quality of a high-end machine restoration. I set my machine to AC (Alternating Current) with a frequency of about 100Hz to 120Hz. This provides a focused arc that “cleans” the oxide layer while penetrating the base metal.
| Material Thickness | Tungsten Diameter | Filler Rod (4043) | Amperage Range |
|---|---|---|---|
| 0.063″ (1/16) | 1/16″ | 1/16″ | 60 – 90A |
| 0.125″ (1/8) | 3/32″ | 3/32″ | 125 – 150A |
| 0.187″ (3/16) | 1/8″ | 1/8″ | 165 – 200A |
To prevent the box from warping out of square, I use a “stitch welding” technique. I place 1-inch welds every 6 inches, jumping from one side of the box to the other. This is similar to how I gradually tighten the bolts on a freshly poured babbitt bearing housing—even pressure and heat distribution are the only ways to maintain alignment.
Sourcing and Installing Legacy-Grade Hardware
The longevity of a custom enclosure depends heavily on the quality of its moving parts, such as hinges, latches, and seals. This phase involves selecting hardware that can withstand the rigors of a workshop environment, often requiring the same “parts sourcing” detective work used to find obsolete fasteners for antique tools.
When I restore a 100-year-old drill press, I often have to deal with obsolete thread patterns or custom-forged levers. Building this enclosure presents a similar challenge: finding hardware that won’t fail after two years of vibrating in a truck bed. I avoid plastic components entirely. Instead, I source stainless steel “piano hinges” or heavy-duty “bullet hinges” that can be welded directly to the frame.
One of the biggest risks in this project is galvanic corrosion. This happens when two dissimilar metals, like a steel bolt and an aluminum panel, are in contact in a moist environment. It’s the same process I use in an electrolysis bath to remove rust, but here, it’s destructive. To prevent this, I use stainless steel fasteners and always apply a barrier of “anti-seize” or a nylon washer between the different metals.
- Latches: Use stainless steel T-handle compression latches. They pull the door tight against the seal, preventing the rattle that drives every machinist crazy.
- Seals: Use automotive-grade EPDM rubber bulb seals. These are far superior to the foam tape found at big-box stores.
- Fasteners: If you aren’t welding the hardware, use 304 or 316 stainless steel bolts with Nyloc nuts.
Precision Alignment and Final Calibration
The final stage of the build involves aligning doors and lids to ensure smooth operation and a weather-tight fit. This process mirrors the “hand scraping” and “leveling” techniques used to restore machine tool ways, focusing on achieving tight tolerances and perfect geometry.
In the world of machinery restoration, we talk about “tenths”—ten-thousandths of an inch. While a truck-bed box doesn’t need that level of precision, a door that is 1/8th of an inch out of square will bind, leak, and eventually fail. I use a digital machinist level to ensure the box is sitting flat on the welding table before the final doors are hung.
If a door doesn’t sit flush, I don’t force it. I use the same diagnostic mindset I apply to a lathe carriage that won’t slide. Is the frame twisted? Is a weld pulling the corner? Sometimes, a slight “tweak” with a dead-blow hammer or a shim is necessary. This is the fabrication version of machinery hand scraping—removing the high spots until the fit is perfect.
Once the alignment is verified, I perform a “leak test.” I don’t use a garden hose; I use a high-powered work light inside the box at night. Any sliver of light escaping through the seals indicates a gap that will eventually let in dust or rain. It’s a simple, binary test that respects the precision of the build.
Maintenance and Long-Term Preservation Strategies
Just as a restored lathe requires regular oiling and cleaning, a custom aluminum enclosure needs a maintenance plan to preserve its function and appearance. This involves periodic inspections of welds, lubrication of moving parts, and monitoring for any signs of material fatigue or corrosion.
After 18 years of maintaining tools, I know that “set it and forget it” is a myth. Every six months, I inspect the welds for “stress cracks,” especially around the mounting points where the box meets the truck bed. Aluminum has a finite fatigue life, meaning it can only handle so many vibration cycles before it potentially fails.
- Hinge Lubrication: Use a dry PTFE spray. Wet oils will attract shop dust and grinding grit, turning into a lapping compound that wears out the hinge pins.
- Oxidation Control: If the aluminum starts to look dull, a light pass with a Scotch-Brite pad will restore the finish. This is much easier than removing machinery rust from a neglected cast-iron table.
- Fastener Check: Vibration is the enemy of tight bolts. I check the mounting hardware every time I rotate the truck’s tires.
Building a high-quality enclosure is more than just a weekend project; it’s an exercise in engineering. By applying the same patience and technical standards used in vintage machinery restoration, you create a tool that is not only functional but a testament to the skill of the maker.
Frequently Asked Questions
Why use 5052 aluminum instead of the more common 6061 for the panels? While 6061 is stronger, it is much more brittle. When you try to put a sharp bend in a 6061 sheet, it often cracks at the corner. 5052 is designed for forming and has superior corrosion resistance, making it the standard choice for sheet metal enclosures that will be exposed to the elements.
How do I prevent the aluminum from warping while I’m welding the long seams? The key is heat management. Use a “back-step” welding technique where you weld in short sections, moving in the opposite direction of the overall seam. Also, use large aluminum or copper “chill blocks” clamped near the weld zone to soak up excess heat, much like how we manage heat when doing a thermal release on a stuck part.
Can I use a standard MIG welder for this project? Yes, but you need a “spool gun.” Aluminum wire is too soft to be pushed through a standard 10-foot MIG torch liner; it will “bird-nest” or tangle. A spool gun puts the wire reel right at the handle, ensuring a smooth feed. You will also need 100% Argon gas.
What is the best way to clean the aluminum before welding? Use a dedicated stainless steel wire brush that has never been used on steel. If you use a brush contaminated with steel particles, you will embed those particles into the aluminum, causing “pitting” and corrosion later on. Wipe the area with acetone after brushing to remove any oils.
How do I handle the “galvanic corrosion” mentioned earlier? Always use a physical barrier. If you are bolting the box to a steel truck bed, use rubber mounting pads and plastic-coated washers. This breaks the electrical circuit between the two different metals, preventing the aluminum from acting as an anode and corroding away.
Why is “tack welding” so important in this specific project? Because aluminum expands so much when heated, a box that is perfectly square before you start welding can easily become a trapezoid by the time you finish. I place small tack welds every 3 to 4 inches around the entire perimeter before laying down any final beads.
Is it necessary to use a “K-factor” when calculating my bends? For 0.125-inch material, yes. The K-factor accounts for how the metal stretches during a bend. If you don’t account for this, your final box will be slightly larger than your plan, which might prevent it from fitting between the wheel wells of your truck.
How do I source “legacy-grade” hinges if I want them to last 50 years? Look for “industrial supply” catalogs rather than home improvement stores. Look for hinges rated for “heavy-duty cabinetry” or “marine hatches.” These are typically made from thicker gauge stainless steel and have grease fittings (zerks) for long-term maintenance.
What should I do if I find a crack in a weld later on? Stop-drill the crack by drilling a small 1/8-inch hole at the very tip of the crack to stop it from spreading. Then, grind out the old weld entirely, clean the area with a stainless brush and acetone, and re-weld it. This is the same “repair rather than replace” philosophy we use for cracked vintage castings.
Can I paint the aluminum box to match my truck? You can, but it requires a “self-etching primer.” Standard automotive paint won’t stick to the natural oxide layer of aluminum. Many restorers prefer a “powder coat” finish, which is much more durable against the scratches and dings common in a working shop truck.
(This article was written by one of our staff writers, Richard Beaumont. Visit our Meet the Team page to learn more about the author and their expertise.)