How to Grind TIG Welding Tungsten Points Correctly (Guide)
When I first started my metalworking journey over twelve years ago, I spent weeks frustrated by a weld puddle that seemed to have a mind of its own. I would set my machine to the recommended amperage, clean my material until it shone, and try to maintain a steady hand, yet my beads were often erratic and wide. It took me far too long to realize that the problem wasn’t my torch movement or my breathing—it was the physical shape of the small metal rod tucked inside my torch. Understanding how to shape TIG electrodes for precision changed everything for me, turning a chaotic arc into a focused tool.
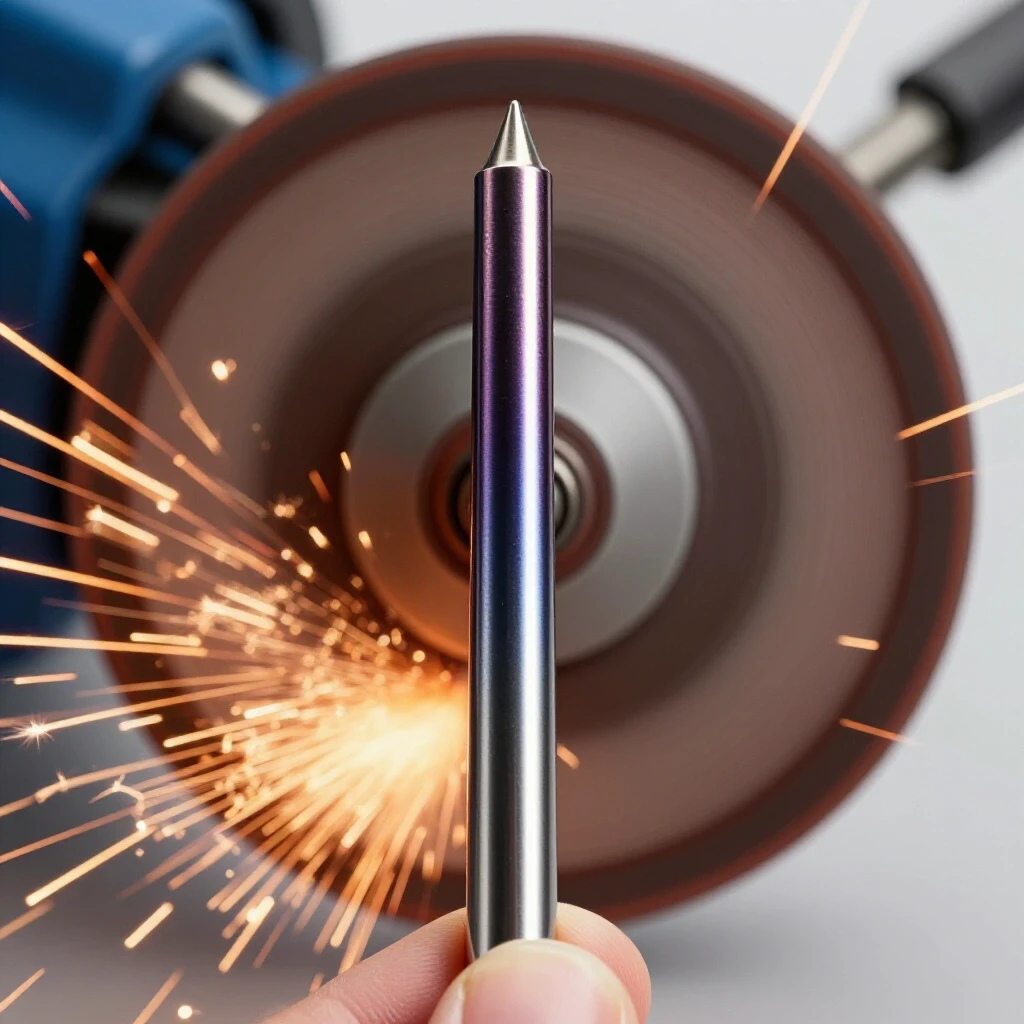
The anxiety of learning high-heat manual skills is real, especially when you are trying to coordinate your hands, feet, and eyes all at once. If your electrode isn’t prepared properly, you are fighting an uphill battle before you even strike an arc. This guide is designed to help you move past those technical plateaus by focusing on the foundational skill of electrode preparation. By mastering these physical cues and structured practice drills, you will build the muscle memory needed for professional-grade results.
Why Electrode Geometry Dictates Your Success in the Shop
Understanding how the physical shape of your tungsten affects the width and depth of your weld puddle is the first step toward consistent fabrication. This section explores the relationship between the physical taper of the electrode and the resulting arc shape, helping you choose the right profile for your specific project needs and skill level.
The geometry of your electrode tip acts as the nozzle for your welding arc. Just as a garden hose nozzle can create a wide mist or a sharp stream, the angle you grind onto your tungsten determines how the electrical energy is delivered to the workpiece. When I was teaching my first group of vocational students, I noticed they all struggled with “arc wander.” This is where the arc jumps from side to side rather than staying centered. In almost every case, the issue was a poorly shaped tip that forced the electrons to exit the metal at odd angles.
A sharp, needle-like point creates a wide, shallow arc. This is often counter-intuitive for beginners who think a sharp point means a sharp arc. In reality, a very sharp point can actually lead to tip melt-off at higher amperages. Conversely, a blunter taper produces a narrower, deeper-penetrating arc. For most of my practice sessions, I recommend a taper length that is roughly 2 to 2.5 times the diameter of the electrode. This provides a balance between arc stability and tip longevity.
The Connection Between Tip Shape and Heat Input
The angle at which you grind your electrode determines how concentrated or spread out your arc becomes during the welding process. Narrower angles produce wider beads with less penetration, while blunter points create a focused, deep-penetrating arc that is essential for thicker materials or tight joints.
When you are calculating your heat input—using the formula (Amps x Volts x 60) / Travel Speed—the shape of your tip plays a hidden role. A blunt tip requires slightly more voltage to start the arc but concentrates that heat into a smaller area. This allows you to maintain a travel speed of 8 to 12 inches per minute (IPM) while still achieving full penetration. If your tip is too sharp, the heat spreads out, and you may find yourself slowing down to compensate, which can lead to warping the base metal.
Building on this, I often tell my students to visualize the arc as a cone. A 20-degree included angle creates a wide cone, while a 60-degree angle creates a narrow, columnar arc. Interestingly, the narrow arc is much easier to control when you are practicing your first fillet welds. It gives you a clear “point of aim,” which is vital for building the hand-eye coordination required to keep the puddle exactly where it needs to be.
Setting Up Your Grinding Station for Consistent Results
A dedicated grinding area allows you to maintain the integrity of your electrode geometry without cross-contamination. Establishing a repeatable physical setup for your bench grinder ensures that every electrode you prepare has the same surface finish and taper angle, which is vital for building muscle memory and objective progress tracking.
Consistency is the enemy of the beginner, mostly because it is so hard to achieve. In my early years, I would just walk over to whatever grinder was available and sharpen my tungsten. The results were always different because every wheel had a different grit or wear pattern. To overcome this plateau, you need a standardized approach. I recommend using a fine-grit wheel, typically 120 grit or higher, dedicated solely to tungsten.
When you use a wheel that has been used for aluminum or carbon steel, you risk embedding tiny particles of those metals into your tungsten. When you start welding, those contaminants will pop and spit, ruining your arc stability. By keeping your grinding station clean, you eliminate one more variable from your practice. This allows you to focus entirely on your torch travel angles (10 to 15 degrees drag) and maintaining a consistent arc gap of 3/32″ to 1/8″.
Positioning Your Body for Precision Grinding
Proper ergonomics while shaping your tungsten prevents shaky hands and uneven tapers. By bracing your elbows and using a steady, rotating motion, you can achieve a symmetrical point that prevents the arc from wandering or blowing out to one side of the weld joint.
I like to treat the grinding process as a mini-drill for welding itself. Just as you would brace your hand on the welding table, you should brace your forearms against the tool rest of the grinder. This stability is what allows you to produce a perfectly centered point. If the point is off-center, the arc will exit at an angle, making it nearly impossible to maintain a straight bead.
- Stand with your feet shoulder-width apart for a stable base.
- Tuck your elbows into your ribs to minimize arm sway.
- Hold the tungsten lightly between your thumb and forefinger.
- Use your other hand to slowly and steadily rotate the rod as it touches the wheel.
By focusing on these body mechanics, you are training your nervous system to handle small, precise movements. This directly translates to better torch control once you get to the welding bench.
| Taper Angle (Included) | Arc Characteristics | Common Application | Penetration Level |
|---|---|---|---|
| 15–25 Degrees | Wide, soft arc | Thin gauge sheet metal | Shallow |
| 30–45 Degrees | Balanced arc | General purpose fabrication | Medium |
| 50–60 Degrees | Narrow, intense arc | Heavy plate, pipe welding | Deep |
Mastering the Physical Motion of Shaping the Taper
The way you move the tungsten against the abrasive wheel dictates the final quality of your arc. This section covers the longitudinal grinding technique, where the grind marks run parallel to the length of the electrode, ensuring the electrons flow smoothly toward the tip for a stable arc.
The most common mistake I see in trade schools is “radial grinding.” This is when a student holds the tungsten perpendicular to the wheel, creating rings around the taper. Think of these rings as hurdles for electricity. Electrons prefer to travel along the surface of the metal. If they hit those radial ridges, they jump and scatter, creating an unstable, flickering arc.
To do this correctly, you must hold the tungsten so that it is parallel to the direction of the wheel’s rotation. The grind marks should look like straight lines running from the shaft down to the very tip. This “longitudinal” finish acts like a highway for the electrons, channeling them into a single, focused point. When you achieve this, you’ll notice that your puddle heat input becomes much more predictable, allowing you to focus on your travel speed.
Achieving a Smooth Surface Finish
A rough or spiraled surface on your electrode can cause the arc to dance uncontrollably. Learning to rotate the tungsten steadily while maintaining consistent pressure against the wheel results in a polished finish that minimizes arc flutter and improves your overall control of the weld puddle.
As you rotate the tungsten, avoid applying heavy pressure. Let the abrasive do the work. If you push too hard, you’ll generate excessive heat, which can cause the tungsten to become brittle or even crack. I once had a student who was so frustrated with his progress that he was jamming the tungsten into the wheel. Not only did his points look terrible, but his arc was so erratic that he couldn’t complete a simple bead-on-plate exercise.
Once we slowed down and focused on a light, consistent rotation, his beads immediately improved. We tracked his progress by measuring the length of his tapers. A consistent taper length of 1/4″ to 5/16″ for a 1/8″ electrode became his benchmark. Once he could hit that measurement every time, his confidence soared.
Troubleshooting Common Mistakes in Electrode Preparation
Even experienced fabricators can fall into bad habits that lead to inconsistent welds. Identifying issues like radial grind marks, off-center points, or blunting the tip too aggressively will help you diagnose why your arc isn’t behaving as expected and how to correct it immediately.
One of the most frustrating plateaus is when you feel like your technique is perfect, but the weld still looks “dirty.” Often, this is because the tip of the tungsten has been ground to a “needle point” that is simply too thin to handle the current. The tip melts off into the puddle, causing contamination. To prevent this, I teach the “flat land” technique. After you have ground your taper, lightly touch the very tip of the tungsten to the wheel to create a tiny flat spot, about 0.010″ to 0.020″ in diameter.
This small flat area acts as a heat sink, preventing the tip from melting while still providing a focused exit point for the arc. If you find your arc jumping to the side of the joint, check your point. If it’s off-center by even a fraction of a millimeter, the arc will follow that path.
Identifying and Fixing Arc Wander
Arc wander occurs when the electrical current finds multiple paths off the electrode instead of a single, focused point. This usually stems from improper grinding direction or a contaminated wheel, and fixing it requires a return to basic longitudinal grinding principles and careful visual inspection.
If you are practicing on a T-joint and the arc keeps pulling toward the vertical member, your electrode geometry is likely the culprit. When I struggle with this, I stop immediately and re-grind. It’s a habit I’ve built over 12 years: never try to “weld through” a bad electrode.
- Check for radial scratches.
- Ensure the point is perfectly centered on the rod.
- Verify the taper is long enough (2x diameter).
- Look for any discoloration that might indicate overheating during the grind.
By systematically checking these factors, you turn a frustrating moment into a learning opportunity. This is how you move from a beginner who “gets lucky” to an intermediate fabricator who understands the “why” behind every move.
Establishing a Systematic Practice Routine for Tip Precision
Consistency in welding comes from consistency in preparation. By logging your results and comparing the performance of different taper angles, you can move away from guesswork and toward a data-driven approach that speeds up your learning curve and builds professional-level skills.
I am a firm believer in the “Practice Log.” When I was refining my own skills, I would prep ten electrodes at once, all with the exact same 30-degree taper. I would then weld a series of 6-inch beads on 1/8″ steel plate, maintaining a travel speed of 10 IPM. By keeping the electrode geometry constant, I could see if my hand movement was the cause of any inconsistencies.
If you change your grind angle every time you go to the wheel, you’ll never know if a bad weld was caused by your hand or your tool. Use the following template to track your sessions:
- Date and Material: (e.g., Oct 12, 1/8″ Mild Steel)
- Electrode Diameter and Type: (e.g., 3/32″ 2% Ceriated)
- Taper Angle: (e.g., 30 degrees)
- Amperage and Arc Gap: (e.g., 125A, 1/8″ gap)
- Observation: (e.g., Arc was stable, but puddle was wider than expected.)
Using Video Analysis to Refine Your Technique
Recording your grinding process and your subsequent weld beads allows you to see small errors you might miss in real-time. Slow-motion playback can reveal if you are wobbling during the grind or if the arc is struggling to stay centered due to a slight misalignment of the point.
Most modern smartphones can record in high frame rates. Set your phone up on a tripod and film yourself at the grinder. Are you rotating the tungsten at a constant speed? Is your hand drifting as you reach the end of the taper? When I first filmed myself, I was shocked to see that I was actually lifting the tungsten slightly at the very end of the rotation, which was rounding off my points.
Correcting that one small physical habit improved my arc starts by 50%. You can also film your weld puddle. A well-ground tungsten will produce a symmetrical, “teardrop” shaped puddle. If the puddle looks lopsided, go back to your grinder and check your symmetry.
Actionable Tracking Framework for Skill Progression
To move from a beginner to an intermediate level, you need objective benchmarks. Use this checklist to verify your preparation before every practice session. If you cannot check off every item, do not start welding.
- Visual Symmetry: Rotate the tungsten in your fingers. The point should stay in the exact center without “wobbling.”
- Grind Direction: All visible scratches must run parallel to the electrode length. No cross-hatching or spirals.
- Surface Texture: The taper should have a dull, satin finish or a mirror-like polish, not a rough, “toothed” appearance.
- Taper Length: For a 3/32″ electrode, the taper should be between 3/16″ and 1/4″ long.
- Tip Truncation: A visible but tiny flat spot (the “land”) is present at the very tip.
Once you can consistently produce electrodes that meet these standards, you will find that your metal welding practice guide becomes much more effective. You will no longer be guessing why your arc is behaving poorly, allowing you to focus on the much harder task of mastering torch manipulation and filler rod addition.
In the end, fabrication is about controlling variables. The shape of your electrode is one of the few things you have total control over before the arc even starts. Respect the process, take your time at the grinder, and you’ll find that the “frustrating plateaus” start to disappear, replaced by the steady, rhythmic progress of a craftsman who knows his tools.
Frequently Asked Questions
Why must I grind the electrode lengthwise instead of across the wheel?
Grinding lengthwise (longitudinally) creates micro-grooves that act as a path for electrons to flow toward the tip. If you grind across the wheel (radially), you create “hurdles” that cause the arc to wander, flicker, and become unstable. This is the most common cause of poor arc control for beginners.
What is the ideal taper angle for general-purpose steel welding?
For most applications on 1/8″ to 1/4″ steel, an included angle of 30 to 45 degrees is ideal. This provides a good balance between a focused arc for penetration and enough surface area to prevent the tip from melting.
How do I know if my tungsten point is too sharp?
If the very tip of your tungsten disappears or forms a small ball of molten metal as soon as you start welding, it was likely ground to a needle-point that was too thin for the amperage. Adding a small “flat land” to the tip helps prevent this.
Can I use the same grinding wheel for tungsten and other metals?
No. Using a wheel contaminated with aluminum, stainless, or carbon steel will transfer those particles to your tungsten. This leads to arc “spitting” and contamination of your weld puddle. Always use a dedicated wheel for your TIG electrodes.
How does the length of the taper affect the weld bead?
A longer taper (sharper angle) generally creates a wider, shallower bead. A shorter taper (blunter angle) creates a narrower, deeper-penetrating bead. Adjust your taper based on whether you need to spread heat out or drive it deep into a joint.
Why does my arc keep jumping to one side of the joint?
This is usually caused by an off-center point. If the tip of the electrode is not perfectly centered on the rod, the arc will exit at an angle. Check your symmetry by spinning the tungsten in your fingers; the point should not “wobble.”
Is a mirror-like finish on the taper necessary?
While a mirror finish isn’t strictly required, a smoother surface finish (120 grit or higher) leads to a more stable arc. Rough grind marks can cause the arc to “dance” or flicker, making it harder to maintain a consistent puddle.
How often should I re-grind my electrode?
You should re-grind immediately if you touch the tungsten to the weld puddle or the filler rod. Even a tiny amount of contamination will destabilize the arc. Additionally, re-grind if you notice the arc becoming erratic or the tip becoming misshapen.
What is the “flat land” on the tip, and why is it used?
The “flat land” is a tiny flat spot ground onto the very end of the sharp point. It helps the tip handle higher current without melting off into the weld, which increases the longevity of your electrode and keeps the weld clean.
Does the grit of the grinding wheel really matter?
Yes. A coarse grit (60 or 80) can leave deep gouges that cause arc instability. A finer grit (120-180) provides a smoother surface for electrons to flow, resulting in a much more predictable and controllable arc.
(This article was written by one of our staff writers, Thomas Langley. Visit our Meet the Team page to learn more about the author and their expertise.)