How to Weld a Mobile Steel Pipe and Bar Storage Cart (Plan)
I have spent nearly two decades in drafty garages and cramped workshops, pulling the history of American manufacturing out of the rust. Restoring a 1940s South Bend lathe or a pre-war Buffalo drill press requires more than just a set of wrenches; it requires a level of patience that most modern tool users simply don’t possess. One of the greatest challenges I’ve faced while bringing these cast-iron giants back to life isn’t just the seized pulleys or the obsolete thread patterns. It is the management of the raw materials needed for the job—the replacement shafts, the lengths of angle iron for custom stands, and the various diameters of round bar stock used to fabricate missing pins and bushings.
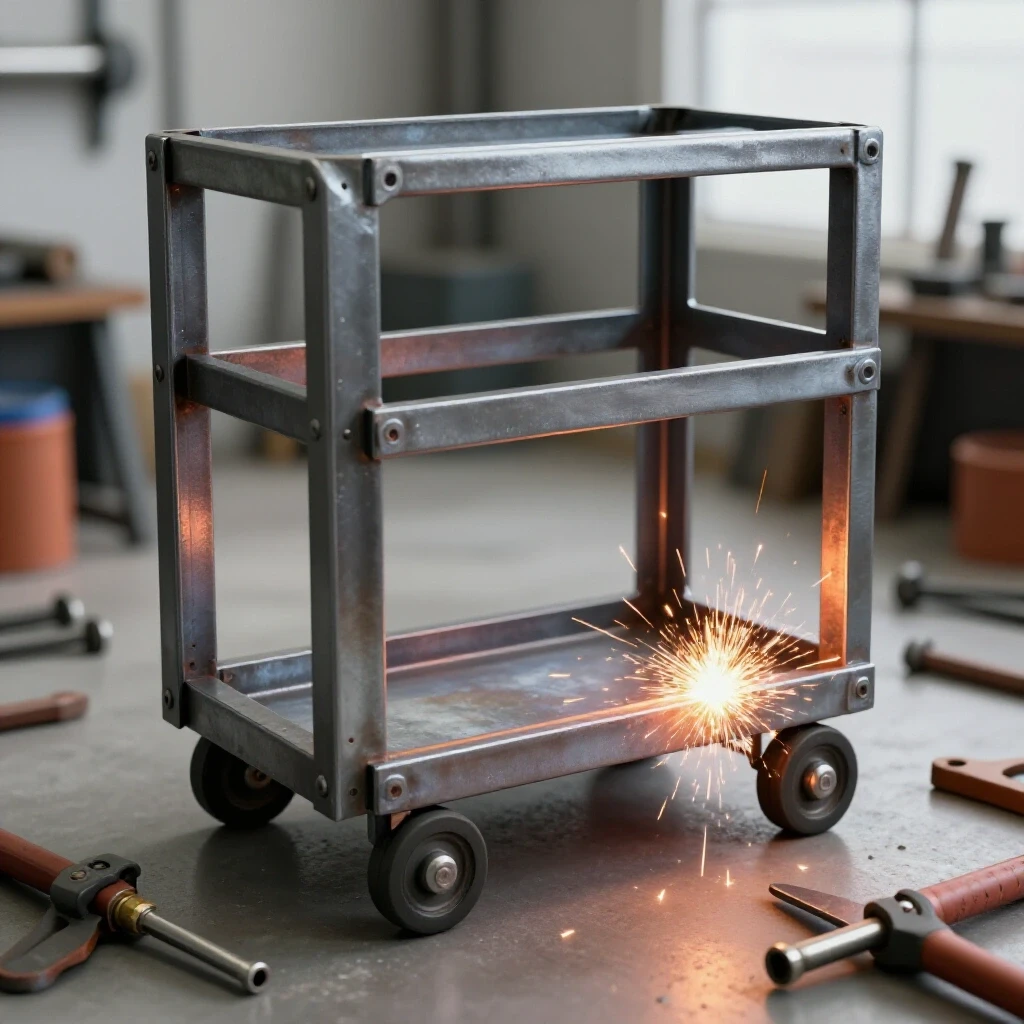
When you are deep into a machine rescue, your floor space becomes a premium. Tripping over a six-foot length of cold-rolled steel while carrying a heavy headstock casting is a safety hazard I’ve learned to avoid. To maintain a functional and safe workspace, I realized early on that I needed a dedicated system for my inventory. Fabricating a rolling material organizer became a necessity. This guide focuses on the methodical assembly of a heavy-duty steel frame designed to hold the very materials we use to restore our vintage machines. We will approach this build with the same precision and care we use when scraping a lathe bed or pouring a babbitt bearing.
Establishing the Foundation for a Rolling Material Organizer
A rolling material organizer is a welded steel structure designed to consolidate various lengths of metal stock into a single, mobile footprint. It utilizes vertical and horizontal supports to keep heavy bars and pipes off the floor, allowing for better shop organization and easier access during fabrication tasks.
In my 18 years of restoration, I have found that a project is only as good as its foundation. For a rack that will hold several hundred pounds of steel, the base must be perfectly square. I start by selecting 2-inch square steel tubing with a 1/8-inch wall thickness. This provides the rigidity needed to prevent the frame from racking under an uneven load. When you are restoring classic cast iron, you learn that stability is everything. The same principle applies here. I use a precision machinist square to check every cut. Even a half-degree error at the base will translate into a significant lean at the top of the rack, much like a misaligned drill press column.
Material Selection and Preparation for Rigidity
Material selection involves choosing the correct gauge and shape of steel to ensure the finished rack can support the weight of solid bar stock and heavy-walled pipe. Preparation includes removing mill scale and surface oxidation to ensure a clean, high-strength weld joint.
Before I even strike an arc, I treat the new steel with the same respect I give a 1930s casting. New steel tubing comes with mill scale—a flaky, dark grey coating formed during the manufacturing process. If you weld over this, you risk porosity and a weak bond. I use a flap disc on a 4.5-inch angle grinder to strip the steel back to shiny metal at every joint location. This is similar to removing machinery rust from a vintage bandsaw table; you want a clean surface for the best results. For the horizontal arms that will hold the stock, I prefer 1.5-inch angle iron. It provides a natural “V” shape that prevents round bars from rolling off the rack.
| Material Type | Recommended Size | Purpose in the Build |
|---|---|---|
| Square Tubing | 2″ x 2″ (1/8″ Wall) | Main vertical uprights and base frame |
| Angle Iron | 1.5″ x 1.5″ (3/16″ Thick) | Horizontal support arms for bar stock |
| Flat Bar | 2″ x 1/4″ | Gussets and caster mounting plates |
| Locking Casters | 4″ Diameter (Heavy Duty) | Providing mobility for the completed unit |
Precision Layout and Squaring the Main Frame
Layout and squaring is the process of measuring, marking, and clamping components to ensure the assembly is perfectly rectangular and level. This step prevents the finished structure from wobbling or leaning, which is critical for maintaining balance when loaded with heavy materials.
When I am aligning a lathe, I work in thousandths of an inch. While a welded rack doesn’t require that level of precision, “close enough” is never good enough in my shop. I lay out the two main vertical uprights on a flat section of the floor. I use a series of heavy-duty magnets and C-clamps to hold the pieces in place. Interestingly, the heat from welding can actually pull the metal out of alignment. To counter this, I use a technique called tack welding. I place small, temporary welds at each corner first. This allows me to check the squareness of the frame one last time before committing to the final beads.
Welding Techniques for Structural Integrity
Welding techniques refer to the specific methods used to fuse steel components, such as MIG (Metal Inert Gas) or Stick welding. Proper technique ensures deep penetration into the base metal, creating a joint that can withstand the stresses of a heavy, moving load.
For this type of project, I typically reach for my MIG welder. It provides a clean, fast weld that is easy to control. However, if you are working in a drafty shop or on slightly thicker material, a stick welder with a 7018 electrode is a fantastic choice for its deep penetration. As a restorer, I often compare a good weld to a well-fitted sleeve bearing; both require the right “clearance” or gap to function correctly. I leave a tiny 1/16-inch gap between my tubing joints. This “root gap” allows the weld puddle to sink deep into the metal, ensuring the arms don’t snap off when you load them with heavy 2-inch solid bar stock.
- Maintain a consistent travel speed to ensure the weld bead is uniform in width and height.
- Watch the “puddle” to ensure it is melting both pieces of steel equally.
- Position the work so you are welding in a flat or horizontal position whenever possible.
- Use a chipping hammer or wire brush to clean the weld between passes if using a stick welder.
Fabricating the Horizontal Support Arms
Horizontal support arms are the protruding members of the rack that directly hold the pipes and bars. They must be welded at a slight upward angle or equipped with “stops” to ensure the stored material remains securely on the rack during movement.
I like to space my support arms about 12 inches apart vertically. This gives me enough room to reach in and grab a specific piece of stock without Barking my knuckles. To ensure every arm is at the exact same height, I cut a “spacer block” from a scrap piece of wood or steel. I rest the arm on this block while tacking it to the upright. This is a trick I learned while recalibrating the table stops on an old milling machine; consistency in measurement saves hours of frustration later. I also weld the arms at a very slight upward angle—about 2 to 3 degrees. This ensures that gravity works in your favor, keeping the bars tucked against the vertical frame.
Ensuring Mobility with Heavy-Duty Casters
Ensuring mobility involves selecting and installing high-capacity wheels that can handle the total weight of the rack and its contents. This allows the restorer to move the material inventory around the shop to clear space for large machine teardowns.
A common mistake I see in shop builds is underestimating the weight of steel. A single 10-foot length of 2-inch steel pipe is heavy, but a dozen of them can weigh hundreds of pounds. I use 4-inch diameter casters with a polyurethane tread. These roll over shop debris and small metal chips much better than hard plastic wheels. I weld 1/4-inch thick flat bar plates to the bottom corners of the base frame to provide a solid mounting surface for the casters. I always use at least two locking casters. There is nothing more frustrating than a rack that tries to “walk” away while you are trying to cut a piece of stock with a hacksaw.
Final Alignment and Precision Checks
Final alignment is the last step where the completed assembly is checked for level and squareness after all welding is finished. This ensures the rack sits firmly on all four wheels and that the arms are parallel to the ground.
Once the welding is complete and the metal has cooled, I perform a final check. I use a 48-inch level to ensure the uprights are plumb. If the heat of the welding has pulled the frame slightly, I can often correct it with a few strategic taps from a heavy dead-blow hammer. This reminds me of the process of hand-scraping a machine way; you are looking for high spots and irregularities and slowly bringing the entire piece into a single, cohesive plane. A rack that sits level will stay stable, even when you are moving it across a floor that might have its own “character” and dips.
- Check for Square: Measure diagonally from corner to corner on the base; the measurements should be identical.
- Test the Casters: Ensure all wheels touch the floor simultaneously and swivel freely.
- Inspect Every Weld: Look for cracks or “cold laps” where the weld didn’t fuse properly.
- Load Test: Add a few pieces of stock and check for any visible flexing in the arms.
Integrating the Rack into the Restoration Workflow
Integrating the rack means placing it in a strategic location within the workshop to optimize the restoration process. It allows for a cleaner work area, which is essential when disassembling complex mechanical assemblies with many small parts.
In my shop, this rolling organizer lives near my horizontal bandsaw. When I am working on a 1920s lathe restoration and I find a bent feed rod, I don’t have to go digging through a pile in the corner. I can roll my rack right over to the saw, select a fresh length of 1018 cold-rolled steel, and make my cut. This systematic approach to material management mirrors the systematic approach I take to machine disassembly. By keeping your “raw” inventory organized, you free up mental energy to focus on the technical challenges of the restoration itself, such as calculating gear tooth profiles or sourcing obsolete 12-24 pitch screws.
Why Precision Matters in Shop Fixtures
Precision in shop fixtures ensures that the tools and supports you build are as reliable as the vintage machinery you are restoring. A well-built rack prevents accidents and protects your expensive material inventory from damage or corrosion.
Many hobbyists think that shop furniture doesn’t require the same accuracy as the machines themselves. I disagree. If your material rack is crooked, your stock will be harder to organize, and the unit will be more prone to tipping. When you spend months restoring a machine to factory tolerances—sometimes as tight as 0.0005 inches—you develop a respect for “right.” Building your own equipment is a great way to practice the skills needed for machinery repair. The layout, the metal prep, and the structural welding are all foundational skills that make you a better restorer.
Maintaining Your Steel Storage Unit
Maintenance involves periodic inspections of the welds, wheels, and surfaces to prevent rust and ensure continued safety. For a restorer, this also includes keeping the stored metal clean and identifiable for future projects.
Just like a vintage drill press needs a drop of oil on the quill, your material rack needs a little care. I occasionally wipe down the support arms with a light coat of machine oil to prevent them from rusting, especially if the shop gets humid. I also check the caster bolts to make sure they haven’t vibrated loose. If I notice any surface rust starting on the frame, I hit it with a wire brush and a quick dab of primer. Keeping your shop equipment in top shape is a reflection of how you treat your machines. A clean, well-maintained rack is the mark of a craftsman who values his tools and his time.
Frequently Asked Questions
What is the best way to ensure the rack doesn’t tip over? The key to stability is a wide base. I ensure the base of the rack is at least 24 inches wide, even if the uprights are only 12 inches wide. This creates a “footprint” that resists tipping. Always store your heaviest solid bars on the bottom rungs and save the lighter tubing or pipe for the top. This keeps the center of gravity low, which is essential for any mobile shop fixture.
Can I use a small 110V welder for this project? Yes, a 110V MIG welder can handle this build if you are using 1/8-inch wall tubing. However, you must be careful with your technique to ensure proper penetration. I recommend pre-heating the thicker 1/4-inch caster plates with a propane torch before welding to help the small welder “bite” into the metal. If you find the welds are sitting on top of the metal like a bead of glue, you need more heat or a slower travel speed.
How do I stop the round bars from sliding off the ends of the arms? I weld a small 1-inch “tab” of flat bar to the end of each angle iron support arm. This acts as a physical stop. It is a simple addition that prevents a heavy pipe from sliding off and landing on your toes while you are moving the rack across the shop.
What should I do if the frame warps during welding? Heat management is critical. If the frame warps, it’s usually because too much heat was applied to one side of a joint. You can sometimes “pull” it back by welding on the opposite side, as the cooling weld will shrink and tug the metal. In the future, use shorter weld beads and jump around the project to different joints to let the metal cool in between.
Is it better to use square tubing or round pipe for the frame? For a restorer, square tubing is almost always better for shop fixtures. It is much easier to measure, square up, and weld. Round pipe requires “notching” or “fish-mouthing” the ends to get a good fit, which takes more time and specialized tools. Square tubing provides flat surfaces that make mounting casters and support arms much simpler.
How much weight can a rack like this actually hold? While I avoid specific load ratings, I can tell you that a frame made of 2-inch, 1/8-inch wall square tubing is incredibly strong. In my experience, the limiting factor is usually the casters. If you buy casters rated for 250 pounds each, a four-wheel rack can theoretically handle 1,000 pounds. However, always aim for a significant safety margin and observe how the metal reacts as you load it.
How do I prevent the stored steel from rusting while on the rack? Raw steel will rust quickly in a damp environment. I keep a rag dampened with a mixture of mineral spirits and a little bit of engine oil near the rack. When I put a new piece of stock away, I give it a quick wipe. This leaves a microscopic film that protects the metal without making it too greasy to handle later.
What is the best way to cut the steel tubing for this project? A horizontal bandsaw is the gold standard for this, as it provides a square, clean cut. If you don’t have one, a cold saw or even a high-quality abrasive chop saw will work. If you use a chop saw, be prepared to spend more time with a grinder cleaning up the burrs and checking for squareness, as those blades tend to wander slightly during the cut.
Should I paint the rack once it is finished? While I don’t focus on aesthetics, a basic coat of primer or “shop grey” enamel can prevent the rack itself from becoming a source of rust in your shop. Just make sure the paint is fully cured before you start sliding heavy steel bars across the arms, or you will end up with a sticky mess.
How do I handle obsolete or odd-sized pipe on this rack? The beauty of using angle iron for the arms is that it creates a cradle. Whether the pipe is a standard 1-inch diameter or a strange vintage size you pulled off an old machine, the “V” shape will hold it securely. I often dedicate one side of the rack to “shorts”—pieces under three feet long—by adding an extra upright in the middle to support them.
(This article was written by one of our staff writers, Richard Beaumont. Visit our Meet the Team page to learn more about the author and their expertise.)